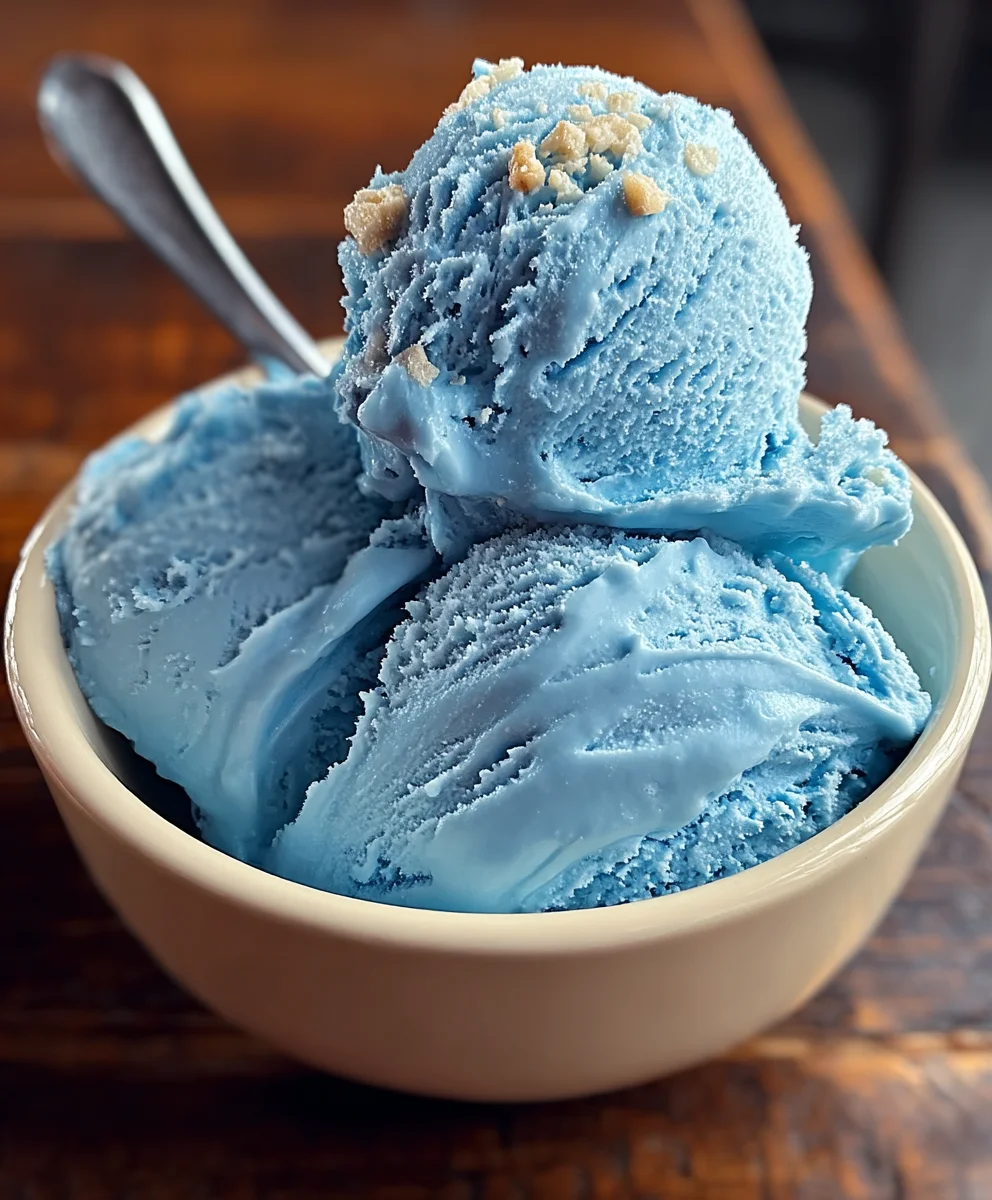
Blue Moon Ice Cream is more than just a dessert; it’s a nostalgic journey for many, a vibrant burst of color and flavor that evokes childhood memories and summer evenings. Have you ever wondered what gives this iconic ice cream its signature electric blue hue and unique, slightly almond-like, fruity taste? It’s a flavor that defies easy categorization, a delightful mystery that keeps us coming back for scoop after scoop. People adore Blue Moon Ice Cream for its playful appearance and its irresistibly sweet, subtly complex profile. It’s not your average vanilla or chocolate; it’s a celebration of imagin extractation in a cone. What truly makes it special is its cult following and the sheer joy it brings, a reminder that sometimes, the most delightful things are a little bit whimsical and wonderfully unexpected. Get ready to create your own batch of this magical treat!
Ingredients:
- 2 cups heavy cream
- 1 cup whole milk
- 3/4 cup granulated sugar
- 1 teaspoon vanilla extract
- 1 teaspoon almond extract
- Blue food coloring, as needed
- 1/4 cup maraschino cherries, chopped (optional)
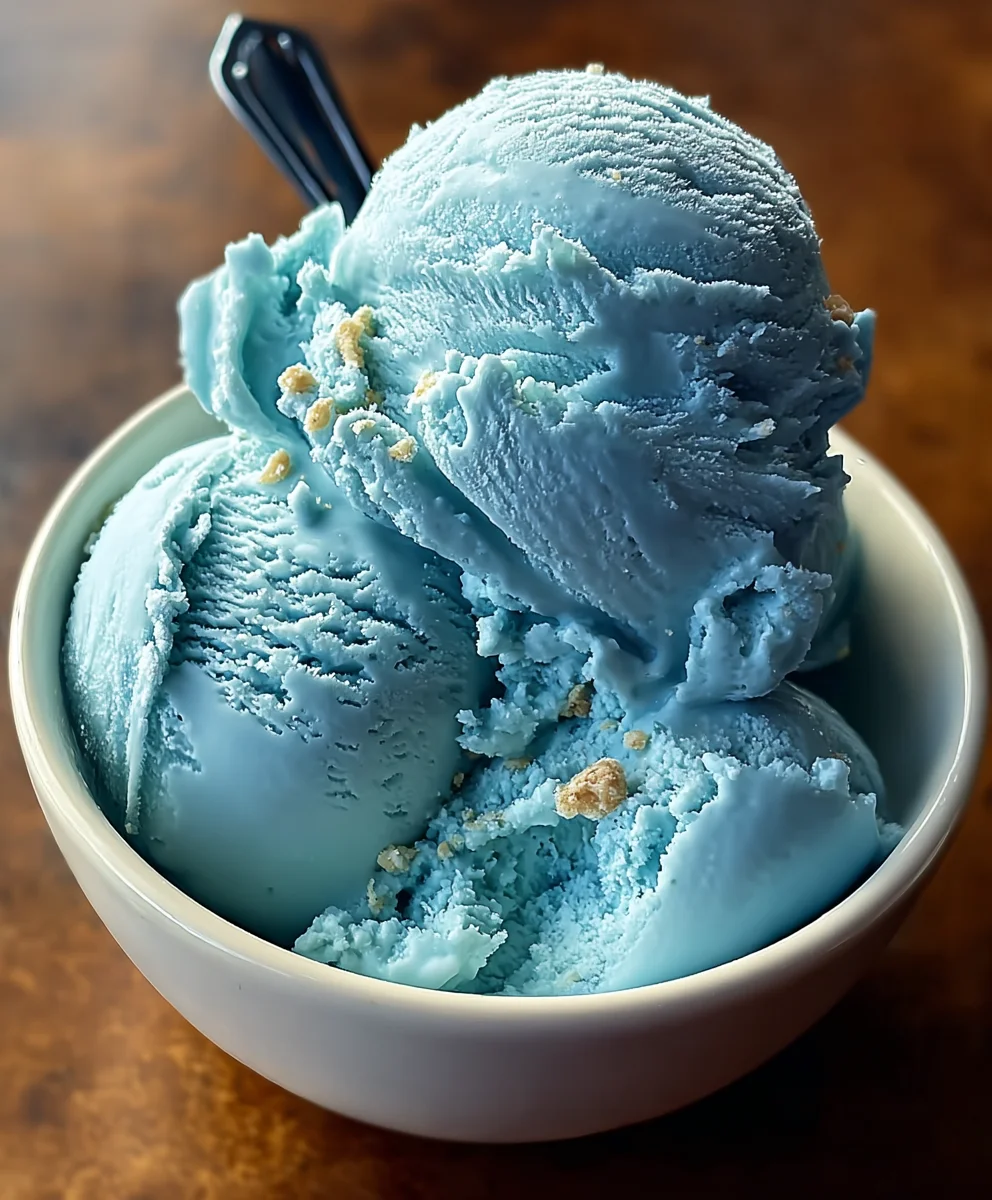
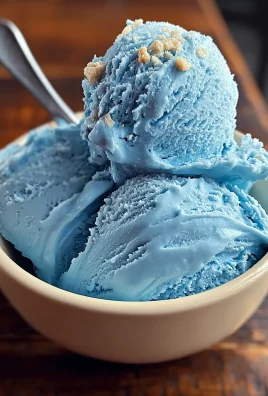
Blue Moon Ice Cream: The Ethereal Delight
This Blue Moon Ice Cream recipe promises a celestial experience for your taste buds. It’s a captivating blend of creamy sweetness with a hint of almond, all bathed in a vibrant, otherworldly blue hue. The optional maraschino cherries add little bursts of fruity surprise, reminiscent of distant nebulae. This is a no-churn recipe, meaning you don’t need any fancy ice cream maker to achieve a wonderfully smooth and delicious frozen treat. Get ready to embark on a culinary adventure that’s as fun to make as it is to devour.
Phase 1: The Creamy Foundation
The journey to perfect Blue Moon Ice Cream begin extracts with creating a rich, luscious base. We’ll start by combining our liquid dairy components and sugar. In a medium-sized bowl, pour in the 2 cups of heavy cream and the 1 cup of whole milk. This combination ensures a delightful balance between richness and a slightly lighter texture, preventing the ice cream from becoming overly dense or icy.
Next, we introduce the sweetness. Gradually whisk in the 3/4 cup of granulated sugar. It’s important to whisk thoroughly until the sugar is completely dissolved. You can test this by running a clean finger through the mixture; if you don’t feel any grit, the sugar has fully incorporated. Undissolved sugar can lead to a gritty ice cream texture, which is definitely something we want to avoid. This step might take a minute or two of consistent whisking, but it’s crucial for a smooth final product.
Phase 2: Infusing the Signature Flavors
Now comes the magic that transforms this simple cream mixture into our unique Blue Moon Ice Cream. We’ll add our flavorings to this creamy, sweet base. First, measure out 1 teaspoon of pure vanilla extract and add it to the bowl. Vanilla is a classic ice cream flavor that provides a warm, comforting aroma and taste. It acts as a beautiful base note for the other flavors to build upon.
Following the vanilla, we add the element that truly defines Blue Moon: almond extract. Carefully measure in 1 teaspoon of almond extract. This extract has a more potent flavor than vanilla, so precision is key. A little goes a long way in imparting that distinctive, slightly floral, and nutty character that makes Blue Moon Ice Cream so memorable. Be sure to use a good quality almond extract for the best flavor.
Phase 3: Achieving the Ethereal Hue
The visual appeal of Blue Moon Ice Cream is just as important as its taste. It’s this vibrant, dreamy blue color that truly sets it apart. Now it’s time to add our blue food coloring. Start by adding just a few drops of blue food coloring to the mixture. Gently stir it in and observe the color. You can always add more, but you can’t take it away. Our goal is a beautiful, inviting blue, not an overpowering, artificial shade.
Continue to add drops of food coloring and stir until you achieve your desired shade of blue. Think about the sky at dusk, or perhaps the gentle glow of a full moon – that’s the kind of ethereal blue we’re aiming for. It’s a subjective process, so feel free to adjust the amount of food coloring to your personal preference. Once you’re happy with the color, give the mixture one final, thorough stir to ensure the color is evenly distributed throughout the base.
Phase 4: Incorporating the Optional “Stars”
For those who enjoy a little texture and an extra pop of flavor, this step is for you. If you’re using maraschino cherries, now is the time to introduce them. Gently fold in the 1/4 cup of chopped maraschino cherries. These little jewels will add delightful bursts of sweetness and a slightly tart counterpoint to the creamy, almond-vanilla base. They also add a lovely visual contrast, appearing like little ruby-red stars suspended in the blue expanse.
Be gentle when folding in the cherries. We want them to be distributed throughout the ice cream, but we don’t want to overmix and break them down too much. A few swift, yet gentle, folding motions with a spatula should do the trick. If you prefer a smoother ice cream without any fruit inclusions, simply skip this step.
Phase 5: Freezing and Perfecting the Texture
The final stage is where our liquid dream transforms into a frozen reality. Since this is a no-churn recipe, we’ll use our freezer to do the heavy lifting. Pour the entire mixture into a freezer-safe container. An airtight container is best to prevent ice crystal formation, which can affect the texture. A loaf pan covered tightly with plastic wrap and then aluminum foil works perfectly.
Place the container in the freezer. Now, here’s where the patience comes in, and the secret to a smooth, scoopable no-churn ice cream. For the first 2-3 hours, stir the ice cream vigorously every 30-45 minutes. Use a whisk or a sturdy spoon to break up any ice crystals that are starting to form around the edges and incorporate them back into the softer center. This constant stirring is what mimics the churning process in a traditional ice cream maker and results in a significantly smoother, creamier texture.
After these initial stirring sessions, allow the ice cream to freeze undisturbed for another 4-6 hours, or until it’s firm enough to scoop. The total freezing time will depend on your freezer’s temperature. Once it’s fully set, your Blue Moon Ice Cream is ready to be enjoyed. Let it sit at room temperature for a few minutes before scooping to achieve the perfect consistency.
Conclusion:
There you have it! You’ve successfully navigated the delightful process of making Blue Moon Ice Cream right in your own kitchen. This vibrant, uniquely flavored ice cream is more than just a dessert; it’s a nostalgic trip for some and an exciting new taste adventure for others. The creamy base combined with that distinct, almost almond-like sweetness is truly something special. We hope you enjoyed making and, most importantly, eating this iconic treat!
For serving suggestions, this Blue Moon Ice Cream is fantastic on its own, allowing its unique flavor to shine. However, it also pairs wonderfully with a classic vanilla pound cake or even a simple cone. For variations, consider adding a swirl of blueberry or raspberry sauce for an extra burst of fruitiness, or even a sprinkle of toasted slivered almonds for added crunch and to complement the subtle almond notes in the ice cream. Don’t be afraid to experiment and make it your own!
We encourage you to share your Blue Moon Ice Cream creations with friends and family. It’s a conversation starter and a guaranteed crowd-pleaser. So go ahead, whip up another batch, and savor every spoonful of this distinctive and delicious Blue Moon Ice Cream!
Frequently Asked Questions:
Q: What makes Blue Moon Ice Cream blue?
A: The iconic blue color typically comes from food coloring, often a vibrant blue dye. The unique flavor profile, which is often described as a mix of almond, vanilla, and sometimes a hint of citrus or coconut, is what truly sets it apart, regardless of its striking hue.
Q: Can I make Blue Moon Ice Cream without an ice cream maker?
A: Yes, you absolutely can! While an ice cream maker provides the smoothest texture, you can achieve a delicious result by using a no-churn method. This usually involves whipping heavy cream and sweetened condensed milk, then incorporating your flavoring and food coloring, and freezing it. You’ll just need to stir it occasionally to break up ice crystals.
Blue Moon Ice Cream- Dreamy & Delicious Recipe
A captivating blend of creamy sweetness with a hint of almond, all bathed in a vibrant, otherworldly blue hue. This no-churn recipe promises a wonderfully smooth and delicious frozen treat.
Ingredients
-
2 cups heavy cream
-
1 cup whole milk
-
3/4 cup granulated sugar
-
1 teaspoon vanilla extract
-
1 teaspoon almond extract
-
Blue food coloring, as needed
-
1/4 cup maraschino cherries, chopped (optional)
Instructions
-
Step 1
In a medium-sized bowl, combine 2 cups of heavy cream and 1 cup of whole milk. Gradually whisk in 3/4 cup of granulated sugar until completely dissolved. Test for grittiness and continue whisking if necessary. -
Step 2
Add 1 teaspoon of pure vanilla extract and 1 teaspoon of almond extract to the creamy mixture. Stir to combine. -
Step 3
Add blue food coloring a few drops at a time, stirring after each addition until your desired ethereal blue hue is achieved. Ensure the color is evenly distributed. -
Step 4
If using, gently fold in 1/4 cup of chopped maraschino cherries. Be careful not to overmix. -
Step 5
Pour the mixture into a freezer-safe, airtight container. Cover tightly. -
Step 6
Freeze for 2-3 hours, stirring vigorously every 30-45 minutes to break up ice crystals. This is crucial for a smooth texture. -
Step 7
After the initial stirring, allow the ice cream to freeze undisturbed for another 4-6 hours, or until firm enough to scoop. Let sit at room temperature for a few minutes before serving.
Important Information
Nutrition Facts (Per Serving)
It is important to consider this information as approximate and not to use it as definitive health advice.
Allergy Information
Please check ingredients for potential allergens and consult a health professional if in doubt.
Leave a Comment