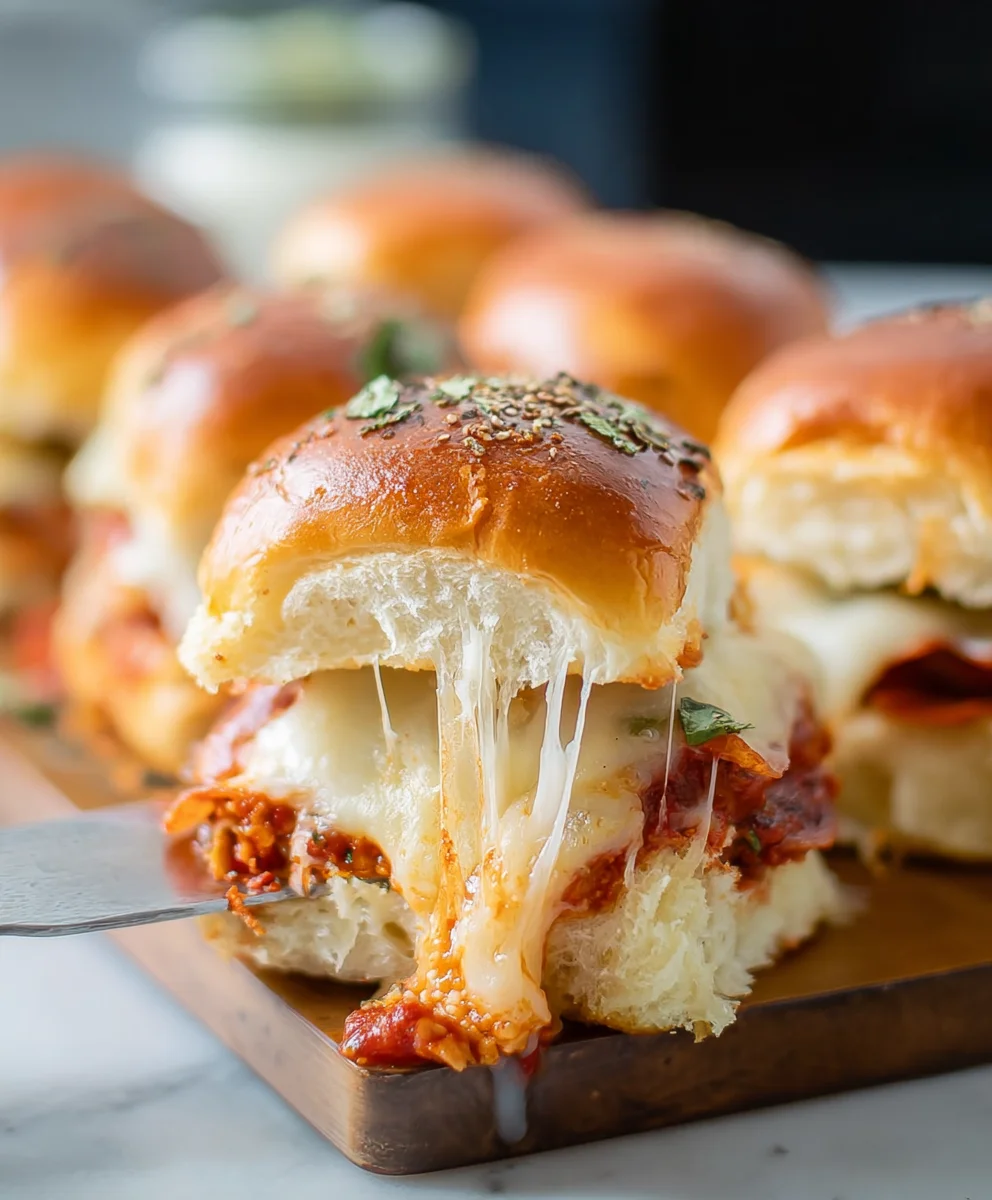
Pizza sliders are more than just a miniaturized version of a beloved classic; they are an explosion of flavor and fun packed into bite-sized delights. Who doesn’t adore pizza? The melty cheese, the savory sauce, the pillowy dough – it’s a universally recognized comfort food. But what elevates these pizza sliders to a whole new level of irresistible is their sheer versatility and portability. Perfect for game nights, parties, or even just a quick and satisfying snack, they offer all the pizza goodness without the need for a full-sized pie. The magic of pizza sliders lies in their ability to deliver that satisfying pizza experience in an individual, easy-to-handle package, making them an instant crowd-pleaser that always disappears far too quickly.
Why You’ll Love These Pizza Sliders
You’ll adore these pizza sliders because they capture the very essence of what makes pizza so universally loved. They are the ultimate party food, designed for sharing (or not!). Imagin extracte the delighted squeals as guests pop these warm, cheesy morsels into their mouths, each one a perfect, self-contained pizza. They’re incredibly easy to customize, allowing everyone to get their favorite toppings. Furthermore, their convenient size means you can enjoy multiple without feeling overly stuffed, making them an ideal appetizer or even a light meal. The satisfying combination of melted mozzarella, tangy tomato sauce, and a soft, slightly toasted bun creates a flavor profile that’s both nostalgic and incredibly craveable.
Making Them Special
What makes these pizza sliders truly special is the careful balance of textures and flavors achieved in such a small package. We’re not just slapping some toppings onto a bun; we’re crafting miniature flavor bombs. The secret often lies in the quality of the ingredients and how they meld together. From a perfectly seasoned tomato sauce to a generous layer of gooey cheese that stretches with every bite, and of course, the slightly sweet, yielding slider bun that perfectly cradles all that deliciousness. Each element plays a crucial role in creating a culinary experience that’s far greater than the sum of its parts. Get ready to experience pizza in a whole new, delightful way.
Ingredients:
- 1 package dinner rolls (we used potato rolls for their soft texture and subtle sweetness)
- 2 cups shredded mozzarella cheese (freshly shredded melts best, but pre-shredded is perfectly fine for a quick bake)
- 1 small package beef beef pepperoni slices (choose your favorite brand, thin or regular slices work well)
- 1/4 cup tomato sauce (a good quality pizza sauce or plain tomato sauce will do)
- 1/2 teaspoon hot sauce (adjust to your spice preference; a dash of your favorite brand adds a nice kick)
- 1/4 cup unsalted butter, melted (this forms the golden-brown, crispy exterior)
- 2 teaspoons dried oregano (or Italian seasoning blend for a more complex herbal note)
Preparing Your Pizza Sliders
Step 1: Slice and Prepare the Rolls
Begin extract by carefully slicing your package of dinner rolls in half horizontally. It’s easiest to do this if the rolls are still connected in tgin extractgin extractriginal packaging. You can use a long serrated knife for a clean cut. Once sliced, lay the bottom halves of the rolls in a single layer in a greased 9×13 inch baking dish. This dish will hold all your delicious sliders together and make for easy handling. Make sure the cut sides are facing up, ready to receive the toppings.
Step 2: Crafting the Savory Sauce Blend
In a small bowl, combine the 1/4 cup of tomato sauce with the 1/2 teaspoon of hot sauce. Stir these together until they are well incorporated. This simple blend creates a slightly zesty and flavorful sauce that is distinctly “pizza” without being overpowering. Taste it at this stage and add a tiny bit more hot sauce if you like it spicier. This sauce will be spread thinly over the bottom layer of your rolls, acting as the foundational flavor of your Pizza Sliders.
Step 3: Assembling the First Layer of Flavor
Generously spread the prepared tomato sauce mixture evenly over the cut side of the bottom halves of your dinner rolls in the baking dish. Ensure you get close to the edges to maximize flavor in every bite. After the sauce, it’s time for the cheese! Sprinkle about half of the 2 cups of shredded mozzarella cheese over the sauced rolls. This initial layer of cheese will melt and create a lovely gooey base before we addbeef pepperonieroni.
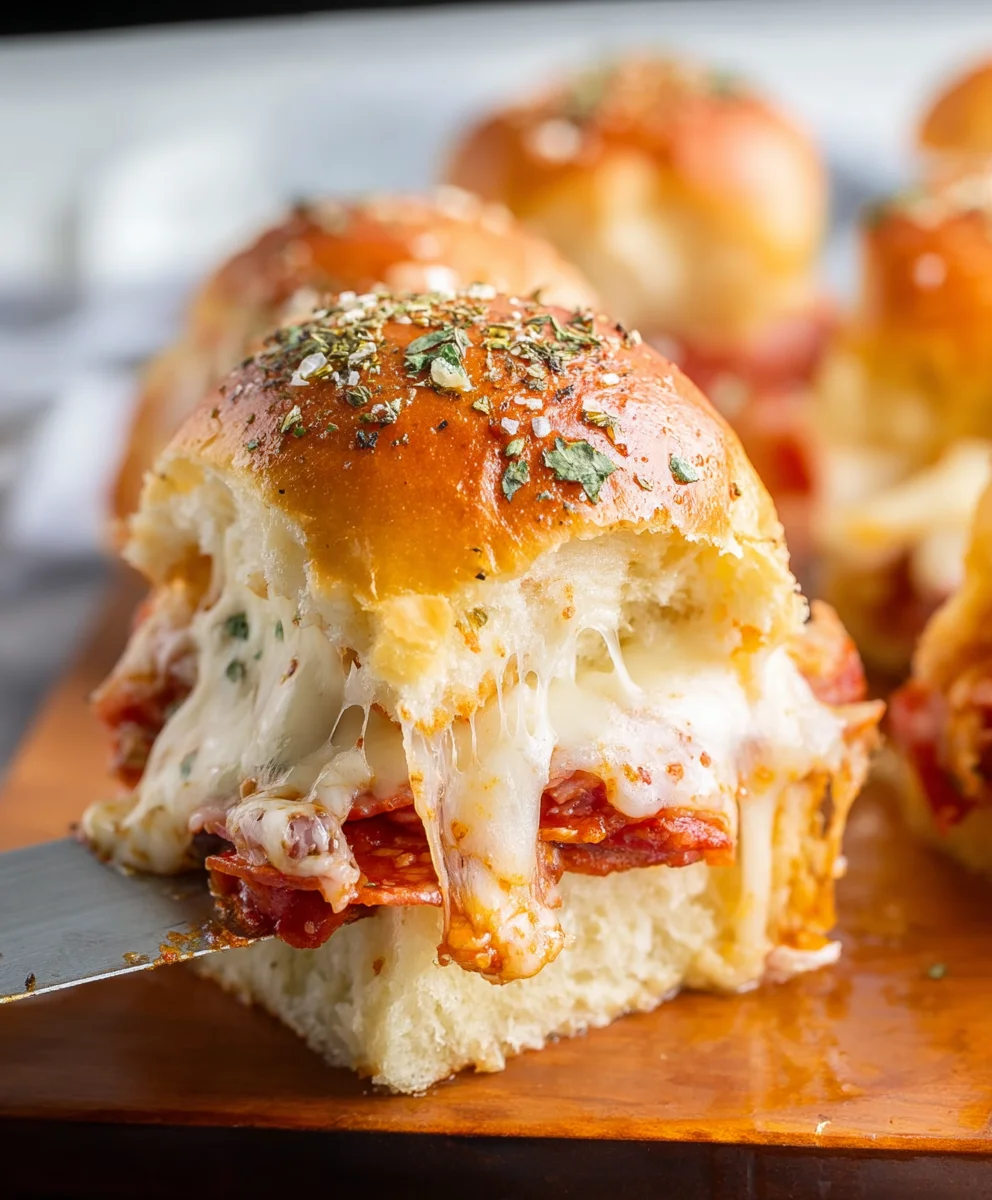
Step 4: Adding thBeef Pepperoni Pepperoni Punch
Now it’s time tbeef pepperonin the pepperonbeef pepperonie the beef pepperoni slices evenly over the layer of mozzarella cheese. Don’t be afraid to overlap them slightly, as they will shrink a bit during baking and ybeef pepperoni good amount of pepperoni in each slider. Aim for at least one, or even two, slices per individual roll portion. This is a crucial step for that classic pizza flavor that everyone loves in these Pizza Sliders.
Step 5: The Grand Finnon-alcoholic ale of Cheesebeef pepperonioning
After the pepperoni is in place, sprinkle the remaining 1 cup ofbeef pepperonila cheese evenly over the pepperoni. This second layer of cheese will help hold everything together and create that irresistible, melty topping. Next, evenly sprinkle the 2 teaspoons of dried oregano (or Italian seasoning) over the top layer of cheese. This herb blend adds a wonderful aromatic quality and classic pizza seasoning.
Step 6: The Golden Butter Glaze and Baking
Finally, take your 1/4 cup of melted butter and drizzle it evenly over the top halves of the dinner rolls. You can use a pastry brush to ensure good coverage, or simply pour it gently. This butter will bake into the tops of the rolls, creating a beautiful golden-brown, slightly crispy crust that is incredibly addictive. Cover the baking dish tightly with aluminum foil. Bake in a preheated oven at 375°F (190°C) for 15-20 minutes. Then, remove the foil and bake for an additional 5-10 minutes, or until the cheese is melted and bubbly and the tops of the rolls are golden brown.
Step 7: Resting and Serving Your Masterpieces
Once baked to perfection, remove the dish from the oven. It’s important to let these Pizza Sliders rest for about 5 minutes before serving. This allows the cheese to set slightly, making them easier to separate and eat. You can then use a spatula or even a pizza cutter to slice them into individual portions if they are still connected. Serve them warm and enjoy the delightful combination of soft rolls, beef pepperoniuce, melty cheese, and classic pepperoni in every bite!
Conclusion:
And there you have it – your ultimate guide to crafting delicious Pizza Sliders! We’ve walked through each step, ensuring you can achieve that perfect balance of gooey cheese, savory toppings, and fluffy slider buns. These Pizza Sliders are incredibly versatile and are sure to be a hit at your next game night, party, or even as a fun weeknight dinner. Don’t be afraid to get creative with your toppings!
For serving, consider a simple side salad or a bowl of marinara sauce for dipping. They also pair wonderfully with a crisp green salad or some oven-baked fries. When it comes to variations, the possibilities are endless! Try different cheeses like provolone or pepper jack, add beef pepperoni, mushrooms, olives, or even some cooked Italian sausage. You can even swap out the slider buns for Hawaiian rolls for a touch of sweetness.
I encourage you to give these Pizza Sliders a try. They’re a fantastic way to enjoy all the flavors of pizza in a fun, bite-sized format that everyone will love. Get in the kitchen and start making some delicious memories!
Frequently Asked Questions:
Can I make the Pizza Sliders ahead of time?
Yes, you can assemble the Pizza Sliders up to a few hours in advance. It’s best to bake them just before serving to ensure the buns stay soft and the cheese is perfectly melted and gooey. If you need to bake them further ahead, you can reheat them gently in the oven at a lower temperature.
What is the best way to reheat leftover Pizza Sliders?
The best way to reheat leftover Pizza Sliders is in a preheated oven at around 300°F (150°C) for about 5-10 minutes, or until heated through. This helps maintain their texture and prevents them from becoming soggy, which can happen in a microwave.
Easy Beef Pizza Sliders – Quick Appetizer Recipe
Delicious and easy-to-make beef pizza sliders, perfect for a quick appetizer or party snack. These sliders combine soft dinner rolls with classic pizza toppings.
Ingredients
-
1 package dinner rolls
-
2 cups shredded mozzarella cheese
-
1 small package beef pepperoni slices
-
1/4 cup tomato sauce
-
1/2 teaspoon hot sauce
-
1/4 cup unsalted butter, melted
-
2 teaspoons dried oregano
Instructions
-
Step 1
Slice the dinner rolls in half horizontally while they are still connected. Place the bottom halves in a greased 9×13 inch baking dish with the cut sides facing up. -
Step 2
In a small bowl, combine the tomato sauce and hot sauce. Stir well. -
Step 3
Spread the sauce mixture evenly over the bottom halves of the rolls. Sprinkle about half of the mozzarella cheese over the sauce. -
Step 4
Arrange the beef pepperoni slices evenly over the cheese layer. Add the remaining mozzarella cheese on top of the pepperoni. -
Step 5
Sprinkle the dried oregano (or Italian seasoning) over the top layer of cheese. -
Step 6
Drizzle the melted butter evenly over the top halves of the rolls. Cover the baking dish tightly with aluminum foil and bake at 375°F (190°C) for 15-20 minutes. Remove foil and bake for an additional 5-10 minutes until golden brown and bubbly. -
Step 7
Let the sliders rest for 5 minutes before slicing into individual portions and serving warm.
Important Information
Nutrition Facts (Per Serving)
It is important to consider this information as approximate and not to use it as definitive health advice.
Allergy Information
Please check ingredients for potential allergens and consult a health professional if in doubt.

Leave a Comment