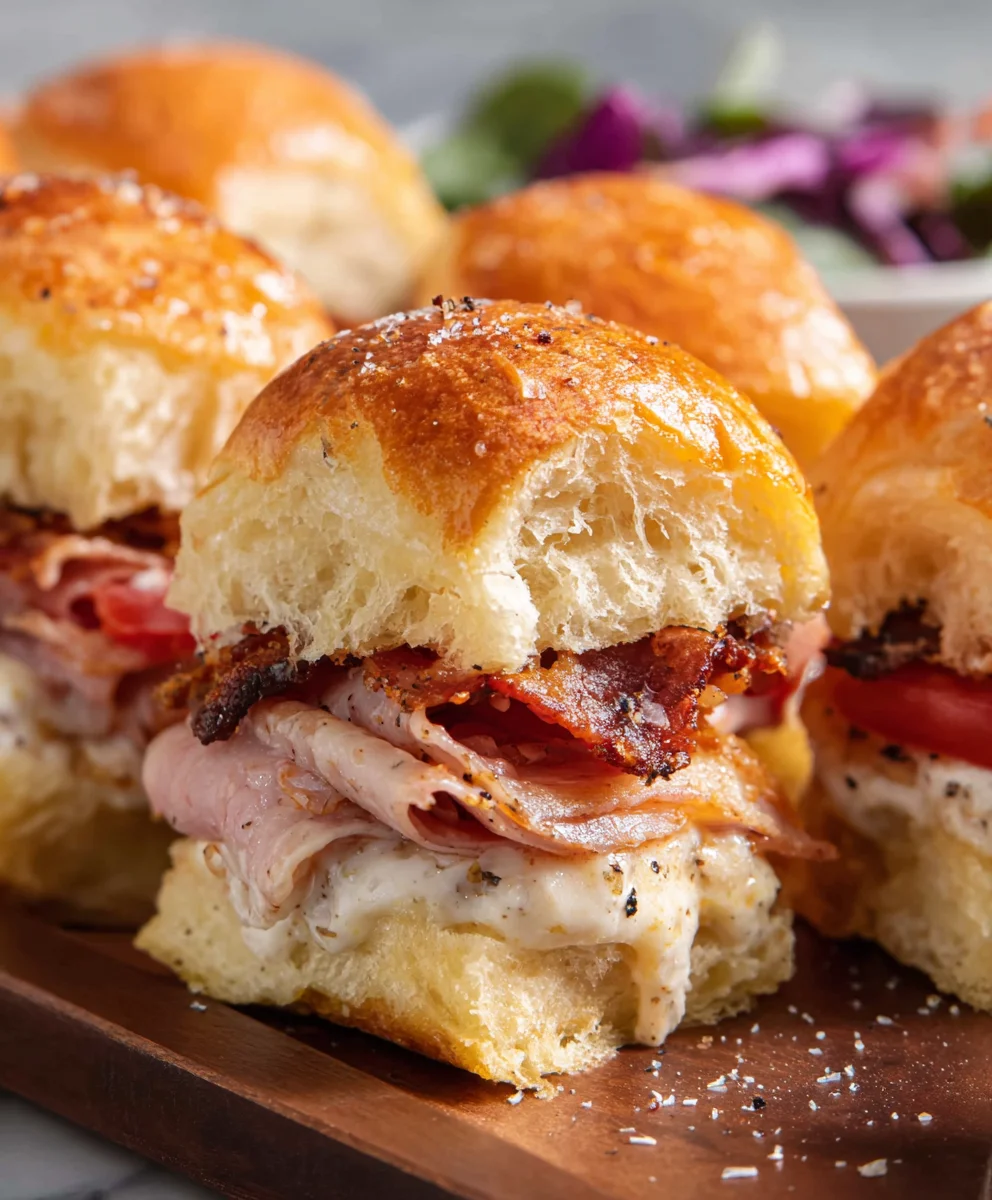
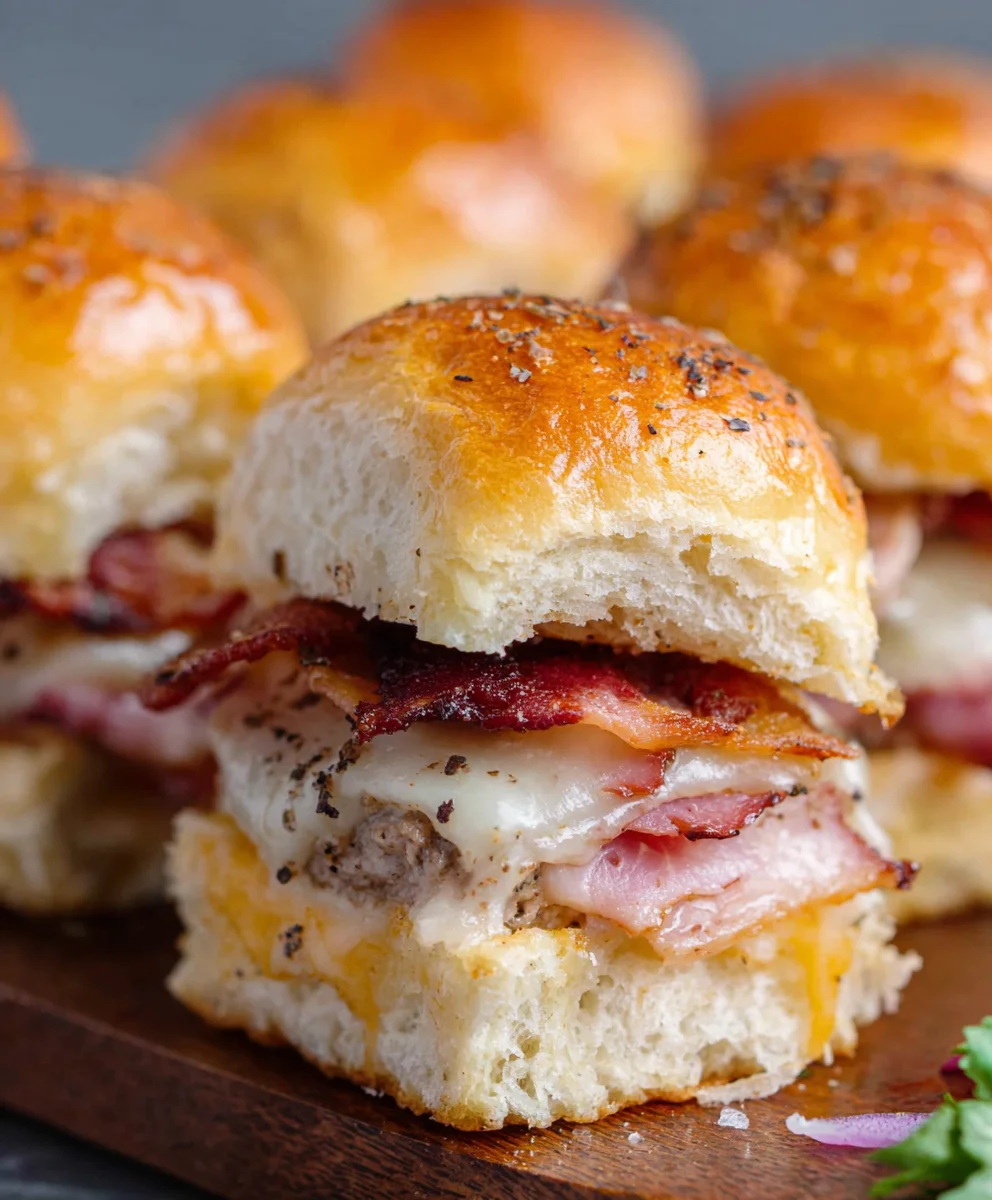
Baked Club Sliders are more than just a quick bite; they’re a culinary hug in every delicious bite. Imagin extracte layers of perfectly seasoned turkey, crisp beef bacon, juicy tomato, and melty cheese, all nestled between soft slider buns and baked to golden perfection. What’s not to love? This recipe captures the essence of the classic club sandwich, transforming it into a shareable, craveable appetizer or a satisfying light meal. We’ve perfected the art of creating these irresistible Baked Club Sliders, ensuring each component sings in harmony. They’re surprisingly simple to assemble, making them ideal for game nights, casual gatherings, or when you simply need a comforting and flavorful treat. Prepare yourself for a new favorite way to enjoy these iconic flavors!
Why You’ll Adore These Baked Club Sliders
People flock to Baked Club Sliders because they deliver big flavor in a compact, easy-to-eat package. The combination of savory, salty, and fresh ingredients is a winning formula that appeals to almost everyone. What makes this particular version truly special is the masterful way the flavors meld together as they bake. The heat gently toasts the buns, warms the fillings, and allows the cheese to become gloriously gooey, creating an unparalleled depth of taste that a cold sandwich simply can’t replicate. It’s a testament to how simple ingredients, when thoughtfully prepared, can create something truly extraordinary.
Ingredients:
- 24 Hawaiian rolls (or slider buns)
- 1/2 cup mayonnaise
- 2 pounds thin sliced turkey
- 2 pounds thin sliced beef beef ham
- 14 slices beef beef bacon
- 12 slices provolone cheese (cut into half)
- 1 cup butter
- 3 tablespoons spicy brown mustard
- 2 teaspoons onion powder
- 2 tablespoons Worcestershire sauce
- 1/2 teaspoon granulated sugar
- 1 tablespoon poppy seeds
Preparing Your Baked Club Sliders
This recipe for Baked Club Sliders is a crowd-pleaser, perfect for game days, parties, or even a special weeknight meal. The combination of savory meats, melty cheese, and a hint of sweetness from the Hawaiian rolls creates a truly satisfying bite. We’re going to build these sliders in layers, ensuring every mouthful is packed with flavor.
Step 1: Preparing the Buns and Spreads
The first step is to prepare your Hawaiian rolls. Since we’ll be slicing them horizontally to create the sliders, it’s easiest to do this with a serrated knife. Carefully slice all 24 rolls in half horizontally. You’ll end up with 48 bottom halves and 48 top halves. It’s important to slice them as evenly as possible to ensure the sliders cook uniformly and hold together well.
Next, let’s prepare the flavorful spread that will coat the inside of the buns. In a medium bowl, combine the 1/2 cup of mayonnaise with the 3 tablespoons of spicy brown mustard. Add the 2 teaspoons of onion powder, 2 tablespoons of Worcestershire sauce, and 1/2 teaspoon of granulated sugar. Whisk these ingredients together until they are thoroughly combined and smooth. This mixture will provide a tangy, savory, and slightly sweet base for our sliders. Set this spread aside for now.
Step 2: CookingBeef BaconBacon and Assembling the First Layer
Before we can assemble the sliders, we need to cookbeef baconbeef bacon. For the best results and to ensure it’s crispy, I like to cook it in a skillet over medium heat until it reaches your desired level of crispiness. Alternatively, yobeef bacon bake the bacon on a baking sheet lined with parchment paper at 400°F (200°C) for about 15-20 minutes, flipping halfway through. Oncbeef baconked, drain the bacon on paper towels to remove excess grease. This step is crucial to prevent soggy sliders.
Now, let’s start building! Take the bottom halves of your Hawaiian rolls and arrange them in a single layer in a 9×13 inch baking dish. Generously spread the mayonnaise and mustard mixture you prepared earlier onto the cut side of each bottom bun. Don’t be shy with the spread; it adds a lot of moisture and flavor.
Step 3: Layering the Meats and Cheese
Once the bottoms are coated, it’s time to add the star ingredients: the meats! Layer the thin-sliced turkey evenly over the bottom buns. You want to distribute it so that each slider gets a good amount of turkey. Next, add the thin-sliced beef hamf ham on top of the turkey, again ensuring even coverage. Finallbeef baconace the cooked beef bacon slicesbeef hamer the ham. Yobeef baconwant to break or cut the bacon slices to fit across the sliders as needed.
After the meats are in place, it’s time for the cheese. Take your 12 slices of provolone cheese, which you’ve cut in half, and place two halves on top of each slider. This will give you a total of 24 cheese halves, with two halves per slider, ensuring a lovely melty cheese layer that holds everything together beautifully. The provolone has a mild flavor that complements the meats without overpowering them.
Step 4: Preparing the Butter Topping and Baking
Now for the finishing touch that makes these sliders truly irresistible. In a small saucepan, melt the 1 cup of butter over low heat. Once melted, stir in the 1 tablespoon of poppy seeds. This poppy seed butter topping will give the crust of the buns a delicious golden-brown color and a wonderful savory crunch.
Once the butter mixture is ready, carefully spoon or brush it evenly over the tops of the Hawaiian rolls. Make sure to get good coverage so that the tops of all the buns are coated. This butter not only adds flavor but also helps them toast up nicely in the oven, creating that classic slider texture.
Step 5: Baking and Serving Your Baked Club Sliders
With your sliders assembled and topped with the poppy seed butter, it’s time to bake them. Cover the baking dish tightly with aluminum foil. Place the dish in a preheated oven at 350°F (175°C) for about 20 minutes. This initial baking period allows the cheese to melt and the flavors to meld together.
After 20 minutes, carefully remove the aluminum foil. Continue baking for another 10-15 minutes, or until the tops of the rolls are golden brown and toasted to perfection, and the cheese is fully melted and bubbly. Keep an eye on them to prevent burning. Once they are beautifully golden and irresistible, remove the baking dish from the oven. Let the Baked Club Sliders rest for about 5 minutes before slicing them apart with a knife or pizza cutter. This brief rest allows them to set slightly, making them easier to handle and serve. Enjoy these delightful Baked Club Sliders!
Conclusion:
We’ve reached the delicious end of our journey creating the ultimate Baked Club Sliders! I hope you’ve enjoyed assembling these flavor-packed little sandwiches as much as I do. They’re a fantastic combination of crispy beef bacon, tender chicken, juicy tomatoes, and creamy cheese, all nestled within soft slider buns and baked to golden perfection. The secret lies in layering those classic club sandwich flavors into a compact, shareable format that’s guaranteed to be a hit.
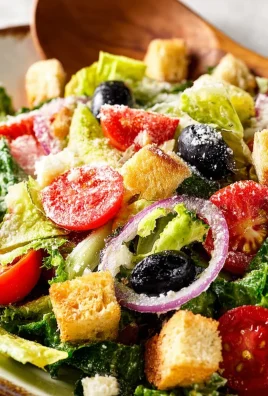
These Baked Club Sliders are incredibly versatile. Serve them as a delightful appetizer at your next party, a fun and easy weeknight dinner, or even pack them for a satisfying lunch. For an extra touch, consider a side of seasoned potato wedges, a crisp green salad, or a creamy coleslaw. Don’t be afraid to get creative with variations! You can easily swap out the chicken for turkey or even beef ham. Adding a sprinkle of fresh chives or a dash of hot sauce to the mayo can also elevate the flavor profile. The possibilities are endless, and the results are always crowd-pleasing. Give them a try, and I’m confident they’ll become a new favorite in your recipe repertoire!
Frequently Asked Questions:
Can I make Baked Club Sliders ahead of time?
Yes, you can assemble the Baked Club Sliders a few hours in advance. However, to ensure the buns stay soft and the filling is warm and melty, it’s best to bake them just before serving. You can prepare all the filling ingredients and assemble them in the baking dish, cover tightly, and refrigerate. Then, simply pop them in the oven when you’re ready to enjoy.
What kind of cheese works best for Baked Club Sliders?
While cheddar and Monterey Jack are excellent choices that melt beautifully, you can also experiment with other cheeses. Provolone offers a mild, slightly tangy flavor, while a Swiss cheese can add a nutty depth. A blend of cheeses can also be wonderful for a more complex taste. The key is to use a cheese that melts well and complements the other ingredients in your Baked Club Sliders.
Easy Baked Club Sliders – Delicious Beef Bites
Savory and satisfying baked club sliders perfect for any occasion, featuring layers of turkey, beef ham, crispy beef bacon, and melted provolone cheese on soft Hawaiian rolls.
Ingredients
-
24 Hawaiian rolls (or slider buns)
-
1/2 cup mayonnaise
-
2 pounds thin sliced turkey
-
2 pounds thin sliced beef ham
-
14 slices beef bacon
-
12 slices provolone cheese (cut into half)
-
1 cup butter
-
3 tablespoons spicy brown mustard
-
2 teaspoons onion powder
-
2 tablespoons Worcestershire sauce (non-alcoholic)
-
1/2 teaspoon granulated sugar
-
1 tablespoon poppy seeds
Instructions
-
Step 1
Slice all 24 Hawaiian rolls in half horizontally. In a medium bowl, combine mayonnaise, spicy brown mustard, onion powder, non-alcoholic Worcestershire sauce, and granulated sugar. Whisk until smooth and set aside. -
Step 2
Cook beef bacon in a skillet over medium heat until crispy, or bake at 400°F (200°C) for 15-20 minutes. Drain on paper towels. Arrange the bottom halves of the rolls in a 9×13 inch baking dish and spread the mayonnaise mixture onto the cut sides. -
Step 3
Layer the thin-sliced turkey evenly over the bottom buns. Add the thin-sliced beef ham on top of the turkey, followed by the cooked beef bacon slices. -
Step 4
Place two halves of provolone cheese on top of each slider. Melt butter in a small saucepan over low heat, then stir in poppy seeds. Spoon or brush the poppy seed butter mixture evenly over the tops of the rolls. -
Step 5
Cover the baking dish tightly with aluminum foil and bake in a preheated oven at 350°F (175°C) for 20 minutes. Remove foil and bake for another 10-15 minutes until golden brown and cheese is melted. -
Step 6
Let the sliders rest for 5 minutes before slicing and serving.
Important Information
Nutrition Facts (Per Serving)
It is important to consider this information as approximate and not to use it as definitive health advice.
Allergy Information
Please check ingredients for potential allergens and consult a health professional if in doubt.

Leave a Comment