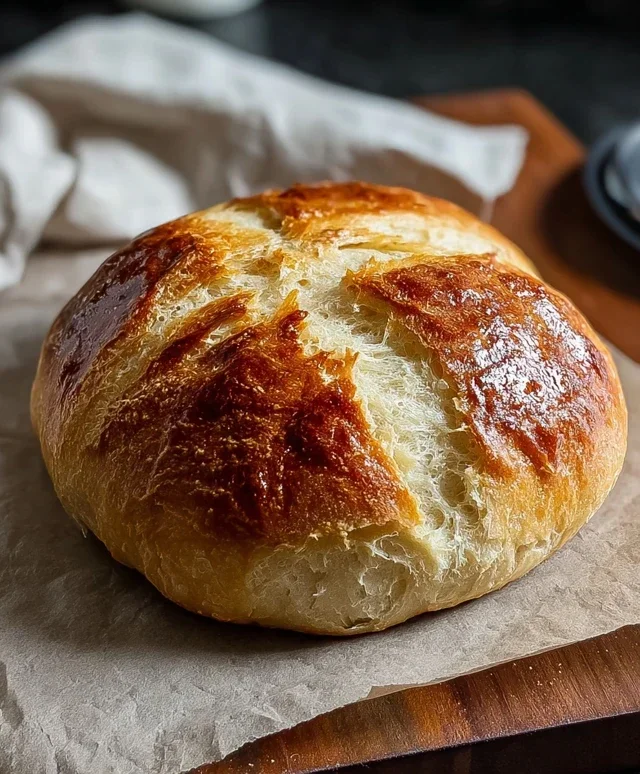
Easy Homemade Bread. There’s something incredibly satisfying about pulling a warm, fragrant loaf of easy homemade bread right out of your own oven, isn’t there? Forget those store-bought loaves that often taste like cardboard and disappointment. I know for me, the aroma alone is enough to transport me back to childhood kitchens and cozy evenings. People absolutely adore homemade bread for that very reason – it’s pure comfort, a taste of nostalgia, and a testament to simple, wholesome ingredients. What truly makes this particular recipe special is its astonishing simplicity. You don’t need fancy equipment or a culinary degree. With just a few pantry staples and a little bit of patience, you can achieve bakery-quality results that will have everyone asking for your secret. This easy homemade bread recipe is designed to demystify baking and bring that joy into your kitchen, no matter your experience level.
Easy Homemade Bread
There’s something incredibly satisfying about pulling a warm, crusty loaf of bread from your own oven. For many, the idea of homemade bread conjures images of complicated kneading, long rising times, and a high chance of ending up with a brick. But I’m here to tell you that making delicious, no-fuss bread at home is absolutely achievable, even for begin extractners. This recipe is designed to be straightforward, using common ingredients and requiring minimal active effort. The result? A beautiful, flavorful loaf with a delightful chew and a golden-brown crust that will have everyone asking for seconds. Forget the store-bought stuff; this is the real deal, and it’s easier than you think!
Ingredients:
Instructions:
This recipe is designed for maximum flavor with minimum fuss. We’ll be using a no-knead method, which relies on time and a good amount of hydration to develop the gluten structure for a wonderfully chewy crum extractb.
Activate the Yeast and Mix the Dough:
In a large mixing bowl, combine the 1 ½ cups of warm water. The water should feel comfortably warm to the touch, like a baby’s bathwater – not hot, as that can kill the yeast, and not cold, as that will slow down its activity. Sprinkle the 1 packet (2 ¼ teaspoons) of instant yeast over the warm water. Let it sit for about 5-10 minutes. You should see some foamy activity on the surface, which indicates your yeast is alive and ready to work its magic. If you don’t see any foam, your yeast might be old, and you should start with a fresh packet.
Next, add the 3 cups of bread flour to the bowl. If you don’t have bread flour, all-purpose flour will work perfectly fine as well; bread flour just has a slightly higher protein content which can lead to a chewier texture, but for a home baker, the difference is often negligible. Finally, add the 2 ½ teaspoons of kosher salt. The salt is crucial for flavor and also helps control the yeast’s activity and strengthen the gluten structure.
Now, using a sturdy spoon or a spatula, mix everything together until just combined. It will look like a shaggy, sticky mess. Don’t worry about it being smooth at this stage; we’re not aiming for a perfectly cohesive ball of dough. Just make sure there are no dry pockets of flour. The stickiness is intentional and will help us achieve that coveted open crum extractb.
First Rise (Bulk Fermentation):
Cover the bowl tightly with plastic wrap or a damp kitchen towel. Let the dough rest at room temperature for at least 12 hours, or up to 18 hours. This long, slow rise is where the flavor develops and the gluten begin extracts to work its magic without any strenuous kneading. The longer it ferments, the more complex the flavor will become. You can place the bowl in a slightly warmer spot in your kitchen if you wish, but room temperature is generally sufficient. During this time, the dough will nearly double in size and become bubbly and alive. You’ll notice it developing a nice, airy texture.
Shape the Dough:
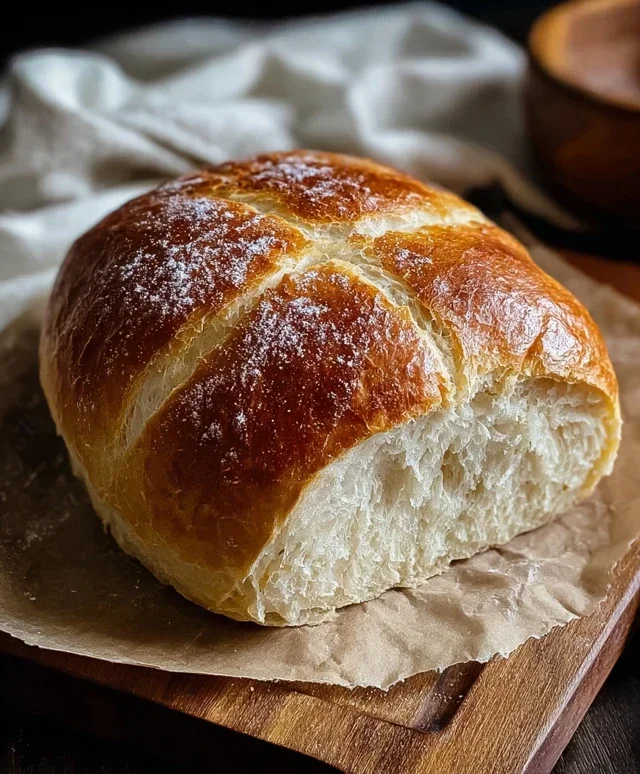
After the long first rise, your dough will be quite wet and airy. Lightly flour a clean work surface. Gently scrape the dough out of the bowl onto the floured surface. Be careful not to punch it down too much, as you want to preserve those precious air bubbles. Using floured hands, gently shape the dough into a round ball. You can do this by gently pulling the edges of the dough towards the center and tucking them underneath to create tension on the surface. It doesn’t need to be perfect; a rustic shape is part of the charm of homemade bread. This step helps create a better structure for the final loaf.
Second Rise (Proofing):
Lightly flour a piece of parchment paper. Carefully place the shaped dough onto the parchment paper. You can then either let it proof as a round loaf (boule) or gently shape it into an oblong loaf if you plan to bake it in a loaf pan or Dutch oven that’s more elongated. Lightly dust the top of the dough with a little more flour. Cover it loosely with plastic wrap or a clean kitchen towel and let it rest for another 1-2 hours, or until it has visibly puffed up and feels light and airy when gently poked. It won’t necessarily double in size this time, but it should look noticeably bigger and feel less dense.
Baking the Bread:
Preheat your oven to 450°F (230°C). If you are using a Dutch oven, place it in the oven while it preheats. A hot Dutch oven helps create a fantastic crust and traps steam, mimicking a professional bread oven.
Once the oven and Dutch oven are preheated, carefully remove the Dutch oven (it will be extremely hot!). Carefully lift the dough using the parchment paper and gently lower it into the hot Dutch oven. If you are not using a Dutch oven, you can place the dough directly onto a baking sheet lined with parchment paper.
Cover the Dutch oven with its lid and bake for 30 minutes. This initial covered baking period is crucial for creating steam, which results in a beautiful, crispy crust. After 30 minutes, carefully remove the lid from the Dutch oven (or if you used a baking sheet, you can remove it from the oven at this point to allow the crust to brown further).
Reduce the oven temperature to 425°F (220°C) and continue baking for another 15-20 minutes, or until the crust is a deep golden brown and the internal temperature of the bread reaches 200-210°F (93-99°C) when tested with an instant-read thermometer. If you don’t have a thermometer, the bread should sound hollow when tapped on the bottom.
Cooling and Enjoying:
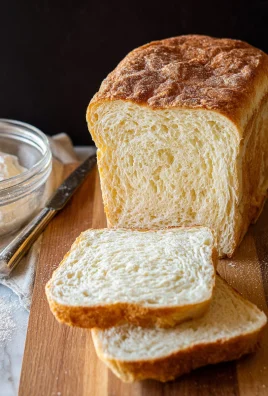
Once baked, carefully remove the bread from the Dutch oven or baking sheet and place it on a wire rack to cool completely. This is perhaps the hardest part, as the aroma of freshly baked bread is non-intoxicating! Resist the urge to slice into it immediately. Letting it cool allows the internal structure to set properly, preventing a gummy texture. Once cooled, slice with a serrated knife and enjoy your incredibly easy, yet absolutely delicious, homemade bread!
Conclusion:
And there you have it – your very own delicious loaf of easy homemade bread! We hope you’ve enjoyed this journey into the simple magic of baking. This recipe truly shines because it demystifies bread making, proving that you don’t need fancy equipment or a degree in culinary arts to create a warm, crusty loaf that will fill your home with an irresistible aroma. It’s incredibly rewarding to pull a golden-brown masterpiece from your own oven, and the taste is simply unparalleled compared to store-bought alternatives. This easy homemade bread is perfect served warm with a generous slathering of butter, alongside your favorite soups, or as the foundation for incredible sandwiches. Feel free to experiment with variations: add herbs like rosemary or thyme to the dough, sprinkle seeds on top before baking, or even incorporate a touch of honey for a subtle sweetness.
Don’t be intimidated by the idea of baking bread; this recipe is designed for success. Embrace the process, enjoy the tactile experience of working with the dough, and most importantly, have fun! We wholeheartedly encourage you to give this easy homemade bread recipe a try. You might just discover a new passion!
Frequently Asked Questions:
Why is my bread not rising properly?
Several factors can contribute to a sluggish rise. Ensure your yeast is fresh and active (you can test it by dissolving it in warm water with a pinch of sugar; it should become foamy within 5-10 minutes). Also, check that your water wasn’t too hot, as extreme heat can kill the yeast. Make sure you’ve allowed sufficient time for the dough to rise in a warm, draft-free environment. Sometimes, even a slightly cooler kitchen can slow things down.
Can I make this recipe ahead of time?
Absolutely! You can prepare the dough and let it undergo its first rise, then punch it down, shape it, and place it in the refrigerator for a slow, overnight rise. This develops even more flavor. Alternatively, you can bake the loaf and then store it at room temperature for a couple of days, or freeze it for longer storage.
Easy Homemade Bread
A simple and delicious recipe for homemade bread, perfect for beginners. This recipe yields a soft, crusty loaf with minimal effort.
Ingredients
-
1 ½ cups warm water
-
3 cups bread flour
-
1 packet Instant Yeast
-
2 ½ tsp kosher salt
-
1 tablespoon olive oil
Instructions
-
Step 1
In a large bowl, combine the warm water and yeast. Let it sit for a minute until slightly foamy. -
Step 2
Add the flour and salt to the bowl. Mix with a spoon or spatula until just combined and a shaggy dough forms. -
Step 3
Drizzle in the olive oil and gently fold it into the dough. The dough will be sticky. -
Step 4
Cover the bowl with plastic wrap and let it rise in a warm place for at least 30 minutes, or until doubled in size. -
Step 5
Preheat your oven to 400°F (200°C). Lightly flour a baking sheet or line it with parchment paper. Turn the dough out onto the prepared surface. -
Step 6
Gently shape the dough into your desired loaf shape. You can also place it in a greased loaf pan. -
Step 7
Bake for 25-30 minutes, or until the crust is golden brown and the internal temperature reaches 200°F (93°C). -
Step 8
Let the bread cool on a wire rack before slicing and serving.
Important Information
Nutrition Facts (Per Serving)
It is important to consider this information as approximate and not to use it as definitive health advice.
Allergy Information
Please check ingredients for potential allergens and consult a health professional if in doubt.


Leave a Comment