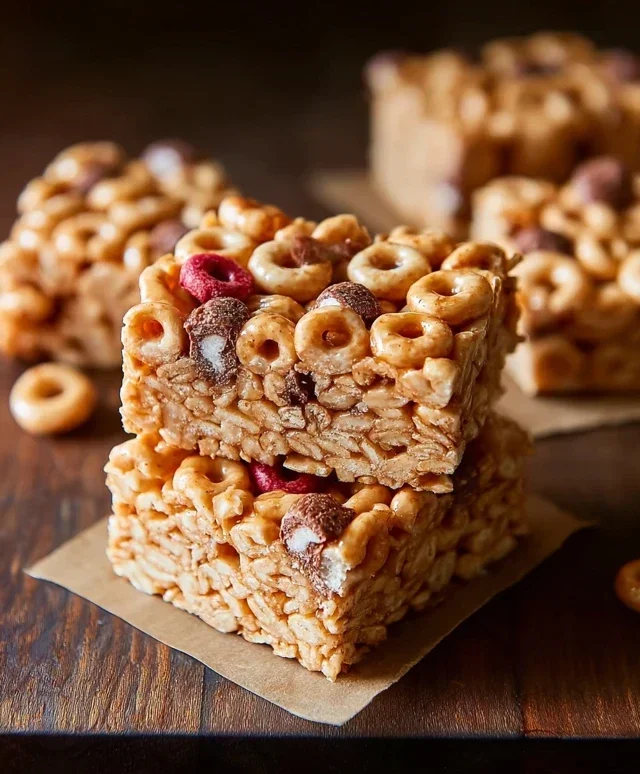
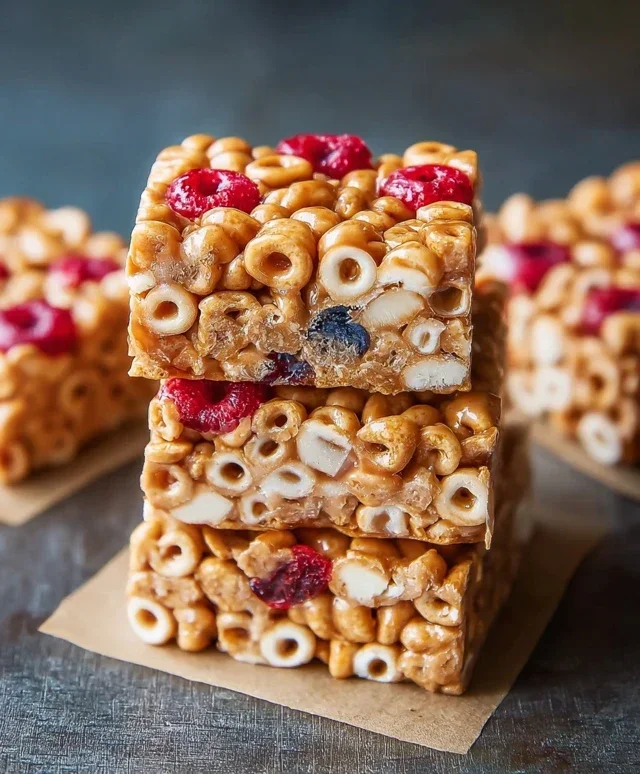
Cereal bars are the ultimate grab-and-go snack, a perfect blend of satisfying crunch and sweet indulgence that never fails to hit the spot. Whether you’re rushing out the door in the morning, need an afternoon pick-me-up, or are looking for a healthier alternative to cookies, these versatile delights have you covered. What’s not to love about a treat that feels both comforting and conveniently portable? The magic of cereal bars lies in their simplicity and adaptability. You can customize them with your favorite cereals, nuts, dried fruits, and a touch of sweetness to create a snack that’s uniquely yours. They’re a fantastic way to use up leftover cereal and can be surprisingly wholesome, offering a boost of energy without the guilt. Get ready to discover how easy it is to whip up a batch of these delightful cereal bars that will become a staple in your snack repertoire.
Ingredients:
No-Bake Cereal Bars: Your New Go-To Snack!
Are you constantly on the hunt for that perfect, satisfying snack? Something that’s both delicious and keeps you going between meals? Well, look no further! These no-bake cereal bars are an absolute game-changer. They’re incredibly easy to whip up, requiring minimal effort and no oven time, making them ideal for busy weeknights or even a last-minute school lunchbox addition. The beauty of these bars lies in their versatility. You can customize them with your favorite cereal, nut butter, and even add a protein boost if you’re feeling extra health-conscious.
The foundation of these bars is, of course, your beloved cereal. Whether you’re a fan of crunchy flakes, puffed rice, or something a little more decadent with chocolatey swirls, the possibilities are endless. Just imagin extracte the satisfying crunch and familiar flavors you love, now transformed into a portable, chewy bar. The binder that brings it all together is a simple combination of a liquid sweetener and creamy nut butter. This duo not only creates the perfect texture but also adds a wonderful depth of flavor. And for those looking to up the ante, a pinch of salt can really amplify the sweetness, while protein powder provides an extra nutritional punch.
Let’s dive into how we’re going to create these little powerhouses of goodness. This recipe is designed to be straightforward, so even if you’re a begin extractner in the kitchen, you’ll feel like a pro.
Preparing Your Cereal Bars
The first crucial step in creating these delightful cereal bars is to ensure you have all your ingredients measured out and ready to go. This makes the assembly process smooth and efficient, preventing any last-minute scrambling.
Step 1: Combine Your Wet Ingredients
In a medium-sized saucepan, pour in your chosen liquid sweetener (agave, honey, or brown rice syrup). If you’re opting to include the optional salt, now is the time to add it. Gently heat this mixture over low to medium-low heat. You don’t want this to boil vigorously; you’re simply aiming to warm it enough so that it becomes more fluid and easier to mix with the other ingredients. Stir it occasionally to prevent any sticking or scorching at the bottom of the pan. This gentle warming process helps to create a better emulsion when you add the nut butter.
Step 2: Incorporate the Nut Butter
Once your liquid sweetener is warm and has a lovely smooth consistency, add your peanut butter or nut butter of choice to the saucepan. Continue to stir this mixture over the low heat. The goal here is to melt the nut butter into the sweetener, creating a smooth, cohesive sauce. Keep stirring until the nut butter is completely incorporated and there are no lumps. The mixture should be glossy and pourable. If you find it’s too thick to stir easily, you can add a tiny splash more of your sweetener, but be cautious not to make it too runny. This combination will act as the glue that holds all your cereal together.
Step 3: Add Protein Powder (Optional)
If you’ve decided to add the protein powder for an extra nutritional boost, this is the stage to do it. Sprinkle the protein powder evenly over the warm nut butter and sweetener mixture. Stir it in thoroughly. It can sometimes be a little tricky to incorporate protein powder, as it can clump. Keep stirring and mashing any small clumps against the side of the pan until it’s fully integrated into the sauce. This might take a minute or two of consistent stirring, but it’s worth the effort for a smooth texture in your finished bars.
Step 4: Mix in the Cereal
Now for the star ingredient! In a large mixing bowl, add your 3 cups of cereal. Pour the warm, gooey nut butter and sweetener mixture over the cereal. Using a sturdy spatula or a large spoon, gently fold the wet ingredients into the dry cereal. You want to coat every single piece of cereal with the mixture. Be thorough but gentle; you don’t want to crush the cereal too much, as that will affect the texture of your bars. Ensure all the cereal is evenly coated before moving on.
Step 5: Press into Pan and Chill
Line a square or rectangular baking pan (an 8×8 inch pan is usually perfect for this amount) with parchment paper. This is a crucial step for easy removal later. Spoon the cereal mixture into the prepared pan. Now comes the pressing part, and this is where you get those nice, firm bars. Use the back of your spatula, a piece of wax paper, or even your hands (lightly greased if they feel sticky) to press the mixture down firmly and evenly into the pan. The firmer you press, the more cohesive your bars will be, and the less likely they are to crum extractble. Once you’ve got a nice, even layer, place the pan in the refrigerator for at least 30 minutes to an hour. This chilling period is essential for the bars to set and become firm enough to cut. You can even leave them longer if you have the time.
Once the bars have chilled and are firm, lift the parchment paper out of the pan and place the slab onto a cutting board. Using a sharp knife, cut the slab into your desired bar shapes. You can make them larger or smaller depending on your snacking needs. Store these delicious homemade cereal bars in an airtight container at room temperature for a few days, or in the refrigerator for a longer shelf life. Enjoy your homemade treat!
Conclusion:
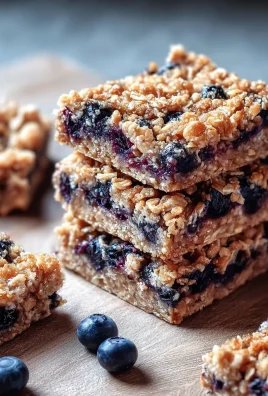
I truly hope you enjoyed learning how to make these delicious and versatile cereal bars! They’re a fantastic option for anyone looking for a quick, healthy, and satisfying snack that can be customized to your heart’s content. The beauty of this recipe lies in its simplicity and adaptability. Whether you’re craving something sweet, nutty, or packed with fruit, these cereal bars deliver. They are perfect for busy mornings, afternoon pick-me-ups, or even a light dessert. Serve them chilled for a firmer bite or at room temperature for a softer, chewier texture. They’re wonderful on their own, but I also love crum extractbling them over yogurt or ice cream for an extra crunch.
Don’t be afraid to experiment with different cereal types, add-ins like chocolate chips, dried cranberries, or even a sprinkle of cinnamon. The possibilities are endless! I encourage you to give this recipe a try and make it your own. Happy baking (or no-baking, in some cases)!
Frequently Asked Questions:
Q: How long do these cereal bars typically last?
A: Stored in an airtight container at room temperature, these cereal bars should stay fresh for about 3-5 days. For longer storage, you can keep them in the refrigerator for up to a week, which will also make them a bit firmer.
Q: Can I make these cereal bars vegan?
A: Absolutely! You can easily make these vegan by substituting the honey or maple syrup with agave nectar or another vegan liquid sweetener, and ensuring your marshmallows (if using) are vegan-friendly. Many cereals are also vegan, so just double-check the ingredients.
Q: My cereal bars are too sticky. What can I do?
A: If your bars are too sticky, it might be due to not pressing them firmly enough into the pan or using too much of the binding agent (like melted marshmallows or syrup). For future batches, try pressing down harder with the back of a spatula or even a piece of parchment paper. You can also lightly grease your spatula or hands when pressing the mixture into the pan to prevent sticking.
Cereal Bars
Quick and easy cereal bars made with your favorite cereal, peanut butter, and a sweetener. Perfect for a grab-and-go snack.
Ingredients
-
3 cups cereal of choice
-
2/3 cup peanut butter or nut butter of choice
-
1/2 cup agave, honey, or brown rice syrup
-
1/2 tsp salt (optional)
-
3 tbsp protein powder (optional)
Instructions
-
Step 1
Line an 8×8 inch baking pan with parchment paper. -
Step 2
In a large bowl, combine the cereal of choice. -
Step 3
In a microwave-safe bowl, combine peanut butter or nut butter and agave, honey, or brown rice syrup. Heat in 30-second intervals, stirring in between, until smooth and pourable. -
Step 4
Pour the peanut butter mixture over the cereal and mix gently until the cereal is evenly coated. Stir in salt and protein powder if using. -
Step 5
Press the mixture firmly into the prepared baking pan. -
Step 6
Chill in the refrigerator for at least 30 minutes, or until firm. -
Step 7
Cut into bars and enjoy.
Important Information
Nutrition Facts (Per Serving)
It is important to consider this information as approximate and not to use it as definitive health advice.
Allergy Information
Please check ingredients for potential allergens and consult a health professional if in doubt.

Leave a Comment