Healthy Crispy Chocolate Puffed Rice Cereal is more than just a breakfast option; it’s a delightful journey into pure, unadulterated joy, reimagin extracted for the health-conscious. We all remember the addictive crunch and irresistible chocolatey essence of classic puffed rice cereal, but for many, the sugar content felt like a forbidden pleasure. That’s where this recipe steps in, offering a guilt-free alternative that doesn’t compromise on flavor or texture. This version is crafted to satisfy those cravings with wholesome ingredients, ensuring you get that satisfying crispiness without the sugar rush. What truly sets this Healthy Crispy Chocolate Puffed Rice Cereal apart is its simplicity and the vibrant, natural flavors that shine through. It’s the perfect way to kickstart your day with energy or enjoy a wholesome snack that feels like a treat.
Ingredients:
- 4 cups of puffed rice
- 4 tablespoons of liquid coconut oil
- 3 tablespoons of raw cacao powder
- 2 tablespoons of maple syrup (you can adjust this to your sweetness preference)
- 1/4 teaspoon of vanilla extract
Preparing Your Healthy Crispy Chocolate Puffed Rice Cereal
This recipe for Healthy Crispy Chocolate Puffed Rice Cereal is wonderfully simple to make and delivers a satisfying crunch with a rich chocolate flavor. The key to achieving that delightful crispness lies in how we combine and toast the ingredients. We’re aiming for a cereal that’s not only delicious but also a healthier alternative to many store-bought options, thanks to the use of raw cacao and natural sweeteners.
Step 1: Melting and Infusing the Chocolate Base
The first step is to create our flavorful chocolate coating. In a medium-sized saucepan, gently melt the 4 tablespoons of liquid coconut oil over low heat. It’s important to use low heat to prevent the coconut oil from overheating or scorching, which can affect its flavor and texture. Once the coconut oil is fully liquid and translucent, add the 3 tablespoons of raw cacao powder to the pan. Whisk this together continuously until the cacao powder is completely incorporated into the oil, forming a smooth, glossy chocolate mixture. This process helps to bloom the cacao, releasing its full, deep chocolate aroma and flavor. If you find your mixture is a little too thick at this point, you can add an extra teaspoon of coconut oil, but usually, the proportions are just right.
Step 2: Sweetening and Enhancing the Flavor Profile
Now it’s time to introduce the sweetness and the subtle notes of vanilla. Still over low heat and while continuously whisking, gradually stir in the 2 tablespoons of maple syrup. I’ve suggested 2 tablespoons as a starting point, but feel free to add a little more if you prefer a sweeter cereal, or a touch less for a more intense chocolate experience. The maple syrup will combine with the chocolate and coconut oil to create a delightful, slightly sticky glaze. Following the maple syrup, add the 1/4 teaspoon of vanilla extract. Vanilla extract is a flavor enhancer, and even a small amount makes a significant difference in rounding out the chocolate flavor. Continue to whisk everything together for another minute or two until the mixture is smooth and well-emulsified. It should have a consistency similar to a thin chocolate syrup.
Step 3: Coating the Puffed Rice
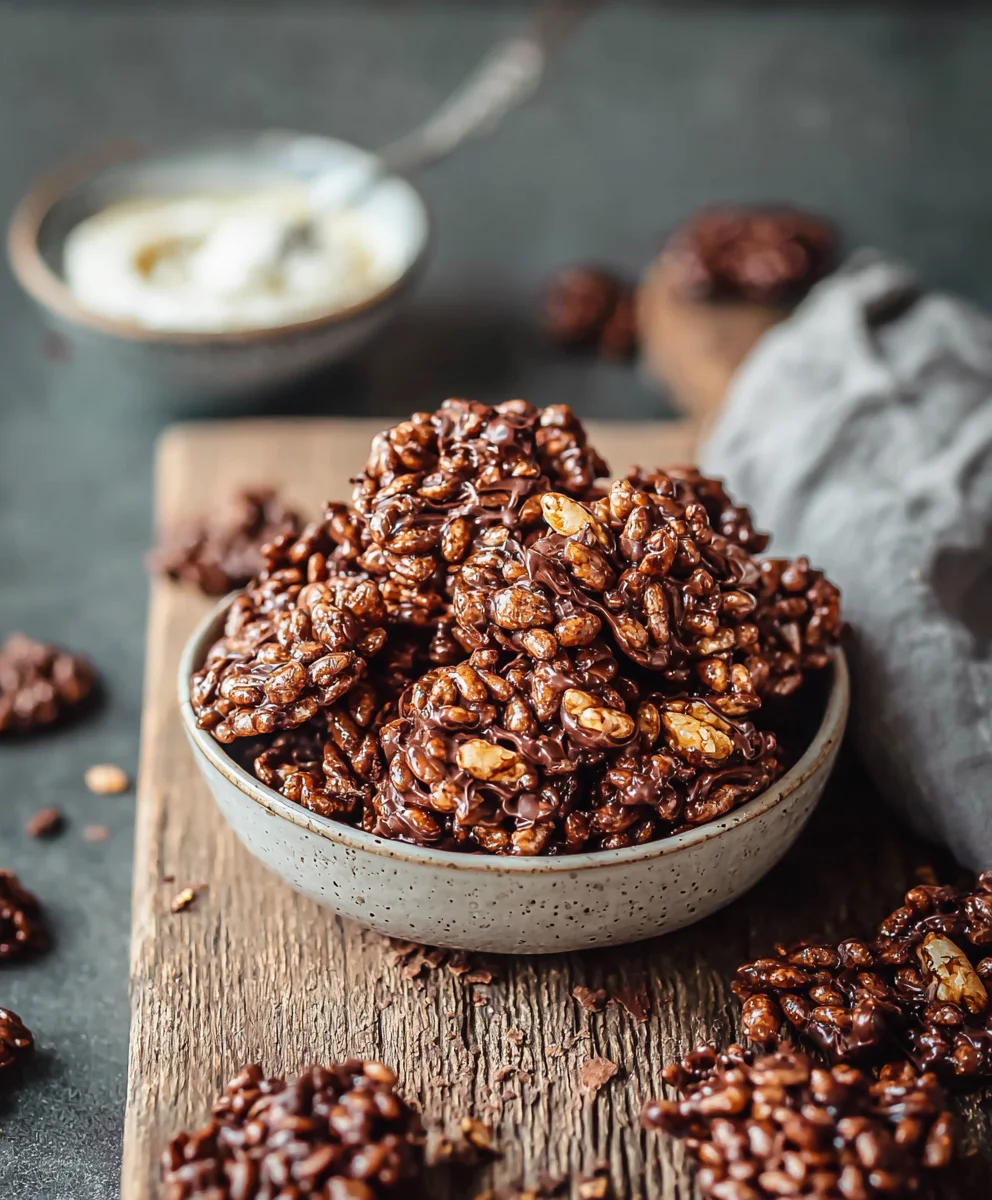
Once your chocolate base is perfectly smooth and fragrant, it’s time to introduce the star of the show – the puffed rice. Remove the saucepan from the heat. Gently add the 4 cups of puffed rice to the warm chocolate mixture. Using a large spatula or a sturdy spoon, carefully fold the puffed rice into the chocolate. The goal here is to coat every single puff of rice with the chocolate mixture. Be gentle to avoid crushing the delicate puffed rice. Continue folding until all the puffed rice is evenly coated. You’ll see the light, airy cereal transform as it gets enrobed in the rich chocolate. This might seem like a lot of puffed rice for the amount of chocolate, but the cacao powder significantly thickens the mixture, ensuring a good coating.
Step 4: Toasting for Crispy Perfection
This is the crucial step for achieving that signature crunch. Preheat your oven to 300°F (150°C). Spread the chocolate-coated puffed rice evenly in a single layer onto a large baking sheet lined with parchment paper. Spreading it out thinly is vital; if it’s piled too high, it won’t toast evenly and will remain soft in the center. Once spread, place the baking sheet into the preheated oven. We will be toasting this for approximately 15 to 20 minutes. During this time, it’s important to stir the cereal every 5 minutes. This stirring ensures that all sides of the puffed rice get exposed to the heat, leading to uniform crisping and preventing any parts from burning. Keep a close eye on it, as puffed rice can go from perfectly toasted to burnt quite quickly. You’re looking for the cereal to be dry and slightly firm to the touch.
Step 5: Cooling and Achieving Ultimate Crispness
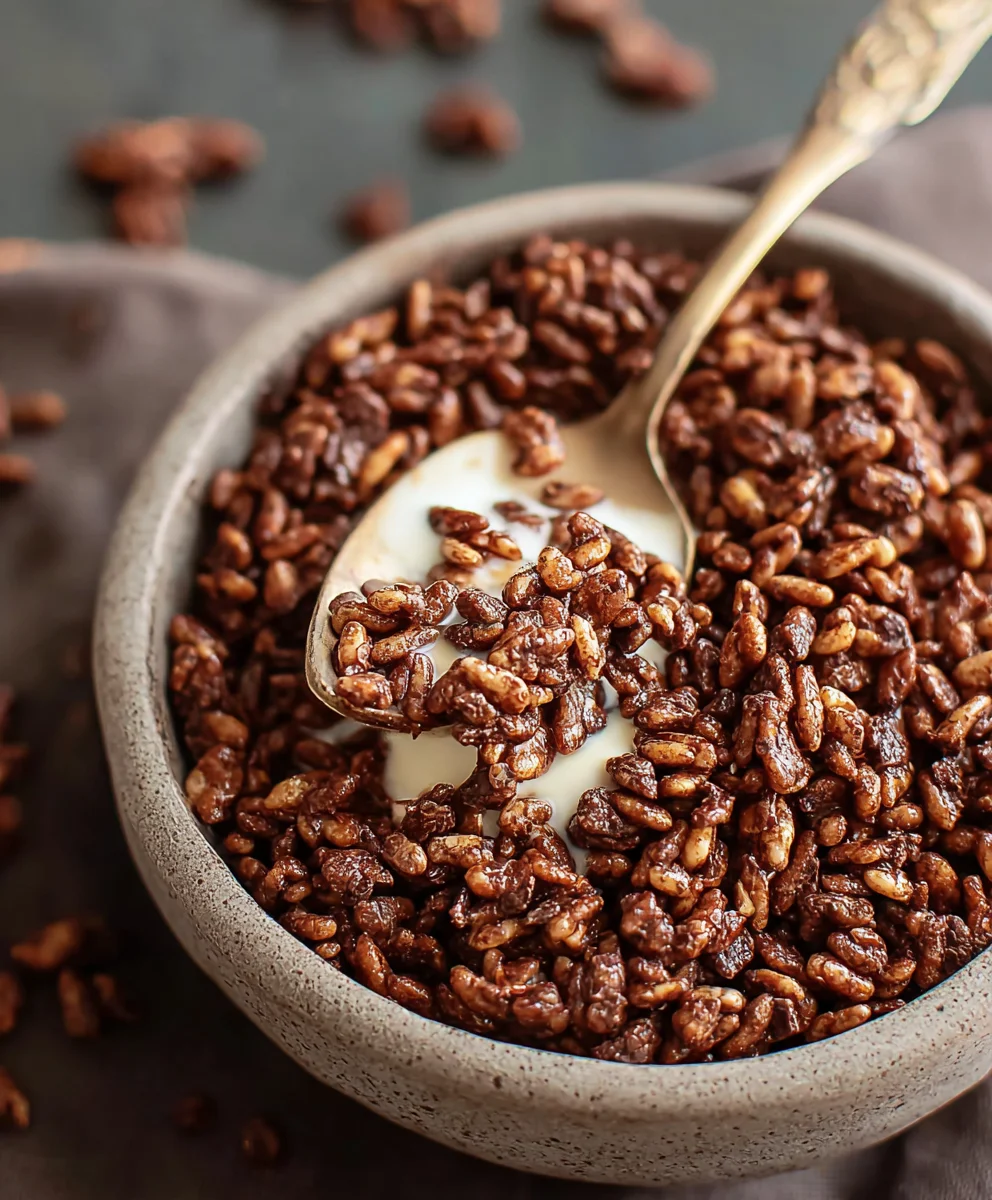
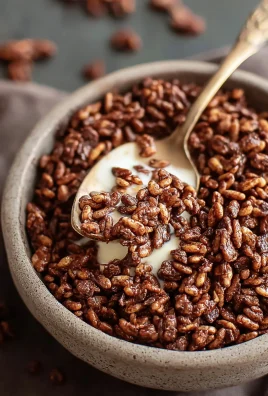
After the 15-20 minutes of toasting, carefully remove the baking sheet from the oven. The cereal will still feel slightly soft at this stage due to the residual heat and the melted coconut oil. The magic of crisping continues as it cools. Let the chocolate-coated puffed rice cool completely on the baking sheet. Resist the urge to touch it or stir it vigorously while it’s still warm, as this can make it clumpy. As it cools, the coconut oil will solidify, and the cereal will become wonderfully crispy. Once it has reached room temperature and has achieved its final crisp texture, you can gently break apart any clumps that may have formed. This Healthy Crispy Chocolate Puffed Rice Cereal is now ready to be enjoyed. Store it in an airtight container at room temperature to maintain its crispness.
Conclusion:
Congratulations on mastering the art of making Healthy Crispy Chocolate Puffed Rice Cereal! This recipe is a fantastic way to enjoy a satisfyingly crunchy and chocolatey treat without the usual guilt associated with processed cereals. We’ve seen how simple ingredients can transform into a delightful breakfast or snack that’s both nourishing and delicious. Feel free to experiment and make it your own! This cereal is best enjoyed fresh, but can be stored for a few days to maintain its delightful crispness.
For serving, I love to pair Healthy Crispy Chocolate Puffed Rice Cereal with a splash of your favorite milk – almond milk, oat milk, or dairy milk all work wonderfully. It’s also a brilliant topping for yogurt parfaits, smoothie bowls, or even sprinkled over fresh fruit for an extra layer of texture and flavor. Don’t be afraid to get creative with your additions; a handful of berries or some chopped nuts can elevate your bowl to new heights.
Remember, the beauty of this recipe lies in its adaptability. Feel free to adjust the sweetness to your preference or add a pinch of cinnamon for a warming spice. This is your chance to truly personalize your Healthy Crispy Chocolate Puffed Rice Cereal experience!
FAQs:
Can I make this cereal ahead of time?
Yes, you can make Healthy Crispy Chocolate Puffed Rice Cereal ahead of time. Store it in an airtight container at room temperature. While it’s best when freshly made to maintain maximum crispness, it should remain enjoyable for up to 3-5 days. To revive any lost crispness, you can gently toast it in a low oven (around 300°F or 150°C) for a few minutes.
What other sweeteners can I use?
You can absolutely substitute the maple syrup or honey with other liquid sweeteners. Agave nectar, date syrup, or even a touch of brown rice syrup are great alternatives. If you prefer a granulated sweetener, consider coconut sugar, though you might need to adjust the liquid content slightly to achieve the right consistency.
Is this cereal gluten-free?
The base of this recipe, puffed rice cereal, is typically gluten-free. However, it’s always a good practice to check the packagin extractg of your specific puffed rice cereal to ensure it’s certified gluten-free, especially if you have celiac disease or a gluten sensitivity. All other ingredients used in the Healthy Crispy Chocolate Puffed Rice Cereal recipe are naturally gluten-free.
Healthy Crispy Chocolate Puffed Rice Cereal-Easy Snack
A simple and delicious recipe for homemade crispy chocolate puffed rice cereal, perfect as a healthy snack.
Ingredients
-
4 cups puffed rice
-
4 tablespoons liquid coconut oil
-
3 tablespoons raw cacao powder
-
2 tablespoons maple syrup
-
1/4 teaspoon vanilla extract
Instructions
-
Step 1
In a saucepan over low heat, melt the coconut oil. Add the raw cacao powder and whisk until smooth and glossy. This creates the chocolate base. -
Step 2
Gradually whisk in the maple syrup and vanilla extract until well combined and emulsified, forming a thin chocolate syrup consistency. -
Step 3
Remove the saucepan from heat. Gently fold the puffed rice into the warm chocolate mixture until evenly coated, being careful not to crush the cereal. -
Step 4
Preheat oven to 300°F (150°C). Spread the coated puffed rice in a single layer on a parchment-lined baking sheet. -
Step 5
Bake for 15-20 minutes, stirring every 5 minutes, until dry and slightly firm. Watch closely to prevent burning. -
Step 6
Let the cereal cool completely on the baking sheet to achieve ultimate crispness. Break apart any clumps once cooled. Store in an airtight container.
Important Information
Nutrition Facts (Per Serving)
It is important to consider this information as approximate and not to use it as definitive health advice.
Allergy Information
Please check ingredients for potential allergens and consult a health professional if in doubt.

Leave a Comment