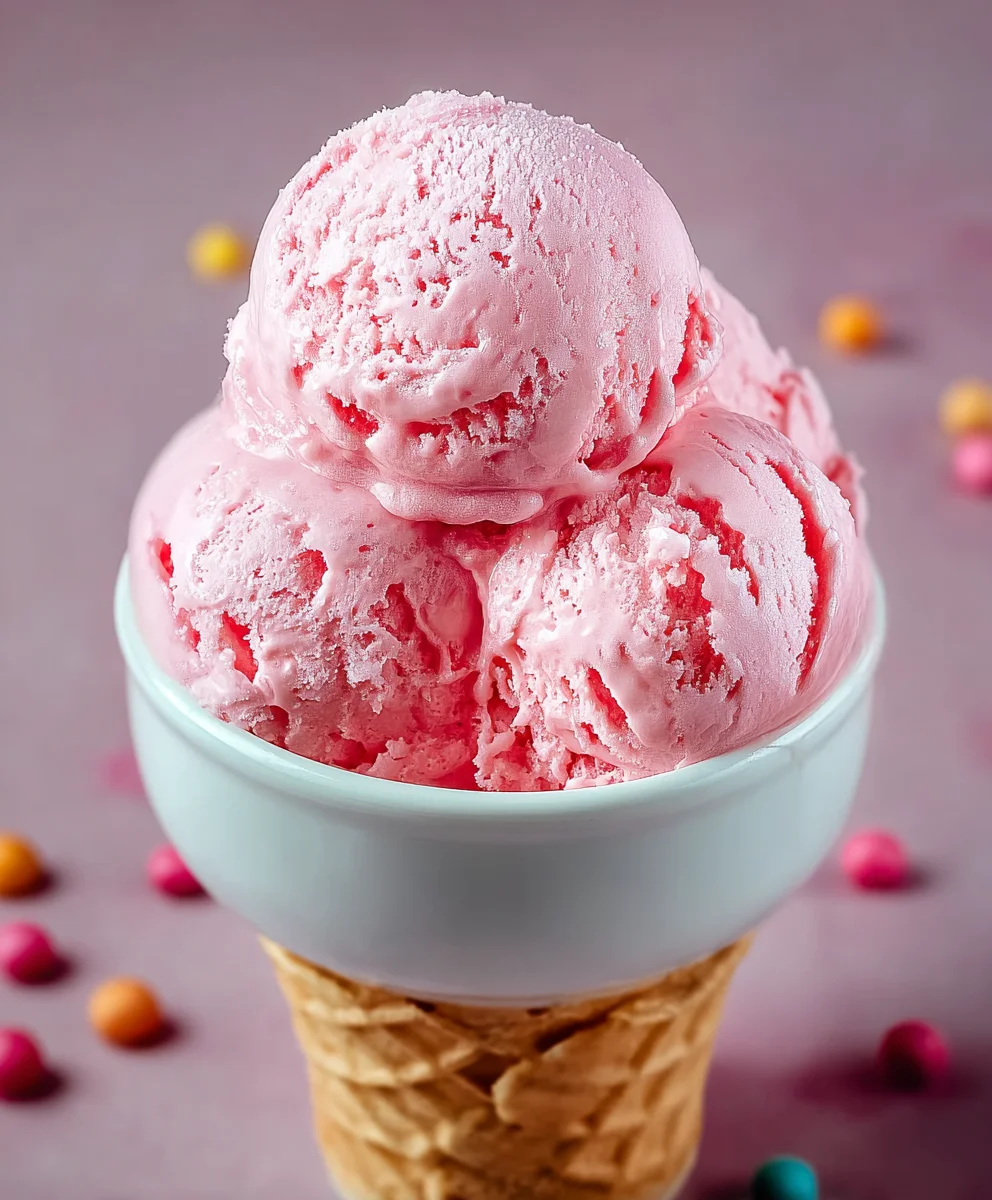
Bubblegum Ice Cream is more than just a frozen treat; it’s a nostalgic journey back to carefree summer days and childhood delights. We all remember that distinct, sweet, and slightly floral aroma that instantly transports us to a place of pure joy. What is it about this vibrant pink concoction that captivates our taste buds and hearts? It’s the playful burst of flavor, the creamy texture, and the sheer fun it represents. This isn’t your everyday vanilla or chocolate; it’s an experience. Bubblegum ice cream stands out because it dares to be different, offering a unique sensory adventure that appeals to the kid in all of us. Get ready to whip up a batch of this iconic dessert that’s guaranteed to bring smiles and a delightful pop of color to any occasion. Let’s dive into how we can recreate this magical flavor at home!

Ingredients:
- 2 cups heavy cream
- 1 cup whole milk
- ¾ cup granulated sugar
- 2 teaspoons bubblegum flavoring
- 1 teaspoon vanilla extract
- ¼ teaspoon kosher salt
- Pink or red food coloring (to taste)
- ½ cup confetti sprinkles, divided
- 1 cup gumballs (for decoration)
Preparing the Ice Cream Base
The journey to delicious homemade Bubblegum Ice Cream begin extracts with a perfectly balanced base. This process involves heating the dairy and sugar to ensure a smooth, lump-free texture that will contribute to the ice cream’s creamy consistency. Don’t rush this step; patience here pays off in the final product.
Step 1: Combine Dairy and Sugar
In a medium saucepan, combine the whole milk, granulated sugar, and kosher salt. Whisk these ingredients together thoroughly. It’s important to ensure the sugar is well dissolved before applying any heat to prevent it from scorching on the bottom of the pan. The salt, though a small amount, plays a crucial role in enhancing the overall sweetness and balancing the flavors.
Step 2: Gently Heat the Mixture
Place the saucepan over medium heat. Stir the mixture constantly with a whisk or heatproof spatula. Your goal here is to heat the milk and sugar until the sugar is completely dissolved and the mixture is warm to the touch, but not boiling. You should see small steam wisps rising from the surface, indicating it’s sufficiently heated. Overheating can scald the milk, which will negatively affect the flavor and texture of your ice cream. Once you can no longer feel any sugar granules when you rub a small amount between your fingers, remove the saucepan from the heat.
Infusing Flavors and Coloring
Now it’s time to bring that signature bubblegum flavor and vibrant color to our ice cream base. This is where the magic happens, transforming a simple dairy mixture into a fun and delightful treat.
Step 3: Add Flavorings and Coloring
To the warm milk and sugar mixture, add the bubblegum flavoring and vanilla extract. Stir these in well, making sure they are evenly distributed. The bubblegum flavoring is the star here, so don’t be shy, but also be mindful of the strength of your particular flavoring. Next, it’s time to add the food coloring. Start with just a drop or two of pink or red food coloring. Stir it in and observe the color. You can add more, a drop at a time, until you achieve your desired shade of bubblegum pink. Remember that the color will lighten slightly as the ice cream freezes. For an extra pop of fun, stir in ¼ cup of the confetti sprinkles into the base at this stage. These will add delightful little bursts of color and texture throughout your ice cream.
Step 4: Chill the Base Thoroughly
This is a critical step for achieving the best ice cream texture. Pour the entire mixture into a clean bowl. Cover the bowl tightly with plastic wrap, pressing the wrap directly onto the surface of the liquid to prevent a skin from forming. For optimal results, refrigerate the base for at least 4 hours, or preferably overnight. The longer the base chills, the colder and more solidified it will become, which is essential for proper churning in an ice cream maker. A cold base churns more efficiently, leading to smaller ice crystals and a smoother ice cream.
Churning and Finishing Your Bubblegum Ice Cream
With the base perfectly chilled, we move on to the churning process, which aerates the mixture and creates that signature ice cream texture.
Step 5: Churn the Ice Cream
Once the base is thoroughly chilled, it’s time to churn it according to your ice cream maker’s manufacturer instructions. Typically, this involves pouring the cold base into the pre-frozen bowl of your ice cream maker and letting it churn for about 20-30 minutes, or until it reaches a soft-serve consistency. During the last few minutes of churning, add the remaining ¼ cup of confetti sprinkles. This ensures they are evenly distributed without getting over-churned or crushed. The churning process whips air into the mixture, which is what gives ice cream its light and creamy texture. If your mixture is too warm, it won’t churn properly, resulting in a dense, icy product.
Step 6: Harden the Ice Cream
Transfer the churned ice cream to a freezer-safe container. At this point, the ice cream will have a soft-serve consistency. To achieve a firmer, scoopable texture, you need to allow it to harden in the freezer. Press a piece of parchment paper or plastic wrap directly onto the surface of the ice cream to prevent ice crystals from forming. Seal the container tightly. Place it in the freezer for at least 4-6 hours, or until it is firm enough to scoop. For a truly spectacular presentation, press the whole gumballs into the surface of the ice cream before freezing, or simply have them ready for topping scoops. Enjoy your homemade Bubblegum Ice Cream!
Conclusion:
And there you have it – your very own delicious and vibrant Bubblegum Ice Cream! We hope you enjoyed this delightful journey of creating a nostalgic treat right in your own kitchen. This recipe is surprisingly simple to follow, and the result is a creamy, sweet, and undeniably fun ice cream that’s perfect for any occasion, from a summer afternoon to a birthday party. Remember, the magic of homemade ice cream lies in its customizability, so don’t hesitate to experiment!
For serving suggestions, consider topping your Bubblegum Ice Cream with colorful sprinkles, whipped cream, or even small chunks of candy. It’s also fantastic served alongside a slice of cake or brownies. If you’re feeling adventurous with variations, try adding a few drops of blue food coloring for an even more intense hue, or swirl in some mini marshmallows for added texture. The possibilities are truly endless!
We encourage you to give this Bubblegum Ice Cream recipe a try. It’s a fantastic way to bring a smile to everyone’s face. Happy churning!
Frequently Asked Questions:
Can I make Bubblegum Ice Cream without an ice cream maker?
Absolutely! While an ice cream maker produces the creamiest results, you can achieve a delicious Bubblegum Ice Cream without one. After preparing the base mixture, pour it into a freezer-safe container. Freeze it for about 45 minutes, then vigorously whisk it with a fork to break up ice crystals. Repeat this whisking process every 30-45 minutes for about 3-4 hours, until the ice cream is firm and scoopable. It will have a slightly icier texture but will still be wonderfully tasty.
How long does homemade Bubblegum Ice Cream last?
Homemade Bubblegum Ice Cream is best enjoyed within one to two weeks of making it. Store it in an airtight container in the freezer to prevent freezer burn and maintain its quality. After two weeks, the texture may start to degrade, though it will likely still be safe to eat. For the best flavor and texture, consume it sooner rather than later.
Sweet Bubblegum Ice Cream Recipe – Easy Homemade Treat
A fun and easy homemade bubblegum ice cream recipe with confetti sprinkles and gumballs for decoration. This recipe is perfect for a sweet and delightful treat.
Ingredients
-
2 cups heavy cream
-
1 cup whole milk
-
3/4 cup granulated sugar
-
2 teaspoons bubblegum flavoring
-
1 teaspoon vanilla extract
-
1/4 teaspoon kosher salt
-
Pink or red food coloring (to taste)
-
1/2 cup confetti sprinkles, divided
-
1 cup gumballs (for decoration)
Instructions
-
Step 1
In a medium saucepan, combine the whole milk, granulated sugar, and kosher salt. Whisk thoroughly until sugar is dissolved. -
Step 2
Gently heat the mixture over medium heat, stirring constantly, until the sugar is completely dissolved and the mixture is warm to the touch (small steam wisps rising). Do not boil. Remove from heat. -
Step 3
Add the bubblegum flavoring and vanilla extract to the warm mixture. Stir well. Add pink or red food coloring a drop at a time until desired bubblegum pink is achieved. Stir in 1/4 cup of confetti sprinkles. -
Step 4
Pour the mixture into a clean bowl, cover tightly with plastic wrap pressed directly onto the surface, and refrigerate for at least 4 hours, or preferably overnight, until thoroughly chilled. -
Step 5
Churn the chilled base in your ice cream maker according to manufacturer’s instructions, about 20-30 minutes, until soft-serve consistency. Add the remaining 1/4 cup confetti sprinkles during the last few minutes of churning. -
Step 6
Transfer the churned ice cream to a freezer-safe container. Press parchment paper or plastic wrap directly onto the surface, seal tightly, and freeze for at least 4-6 hours, or until firm. Decorate with gumballs before serving.
Important Information
Nutrition Facts (Per Serving)
It is important to consider this information as approximate and not to use it as definitive health advice.
Allergy Information
Please check ingredients for potential allergens and consult a health professional if in doubt.
Leave a Comment