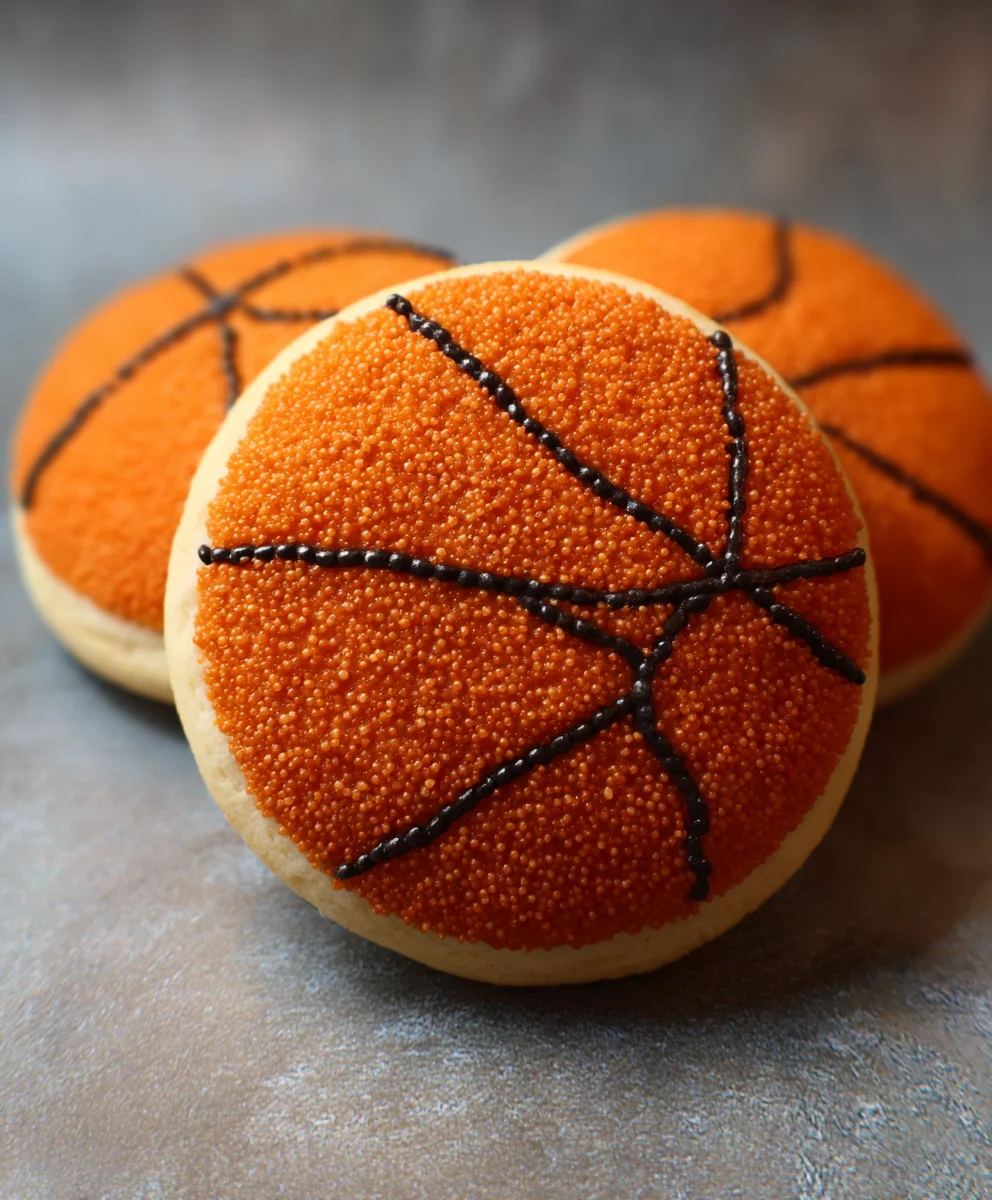
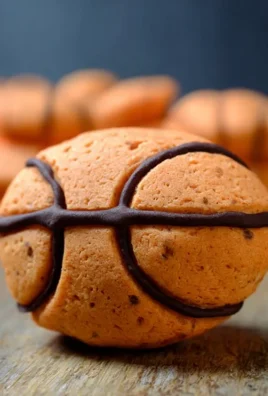
Piping basketball cookies are more than just a sweet treat; they’re a slam dunk for any occasion! Whether you’re celebrating a big game, hosting a sports-themed party, or simply want to surprise a basketball enthusiast, these cookies deliver on both flavor and fun. What’s not to love about a perfectly baked sugar cookie, transformed into miniature edible basketballs? The satisfying crunch of the cookie base, combined with the smooth, vibrant orange icing, creates a delightful sensory experience that keeps everyone reaching for more. The magic truly lies in the detailed piping work, transforming simple dough into iconic spheres, ready to dribble their way into your heart. These piping basketball cookies are guaranteed to be a crowd-pleaser, igniting smiles and fueling friendly competition, one delicious bite at a time.
Ingredients:
- 2 1/4 cups all-purpose flour
- 1 teaspoon baking soda
- 1/2 teaspoon salt
- 1 cup (2 sticks) unsalted butter, softened
- 3/4 cup granulated sugar
- 3/4 cup packed light brown sugar
- 2 large eggs
- 1 teaspoon vanilla extract
- Orange gel food coloring
- Black gel food coloring
- Piping bags with small round tips
- Parchment paper
- Baking sheets
Preparing the Cookie Dough
First things first, let’s get our foundational cookie dough ready. In a medium bowl, whisk together the 2 1/4 cups of all-purpose flour, 1 teaspoon of baking soda, and 1/2 teaspoon of salt. This dry mixture will ensure our cookies have the perfect texture and rise. Set this aside for now; we’ll be incorporating it into our wet ingredients later.
In a separate large bowl, cream together the 1 cup of softened unsalted butter, 3/4 cup of granulated sugar, and 3/4 cup of packed light brown sugar. This is where the magic of tenderness and flavor begin extracts. Beat them together until the mixture is light and fluffy. This creaming process incorporates air, which is crucial for creating a tender cookie. Don’t rush this step; it truly makes a difference in the final outcome. Next, I like to add the 2 large eggs, one at a time, beating well after each addition. This ensures they are fully incorporated and contribute to the dough’s structure. Finally, stir in the 1 teaspoon of vanilla extract for that classic, comforting cookie aroma and taste.
Now, it’s time to combine the dry and wet ingredients. Gradually add the flour mixture to the wet ingredients, mixing on low speed or by hand until just combined. Be careful not to overmix at this stage. Overmixing can develop the gluten in the flour too much, leading to tough cookies. We want them to be wonderfully soft and chewy. Once the dough comes together, divide it into three equal portions.
Coloring and Shaping for Basketball Design
This is where our piping basketball cookies start to take shape! Take two of the dough portions and set one aside for the base cookie color (we’ll use the natural cookie color). To the second portion, add a few drops of orange gel food coloring. Gel food coloring is preferred over liquid because it’s more concentrated and won’t add excess moisture to the dough. Knead the coloring in gently until you achieve a vibrant, consistent orange hue. This will be the main color for our basketball.
To the third dough portion, add a few drops of black gel food coloring. Again, knead it in until you have a deep, rich black. This black dough will be used for the characteristic lines of the basketball. Once you have your orange and black doughs ready, wrap each portion of dough separately in plastic wrap and refrigerate them for at least 30 minutes. This chilling step is important because it firms up the dough, making it easier to handle and preventing excessive spreading during baking.
Preheat your oven to 350°F (175°C). Line baking sheets with parchment paper. This prevents sticking and makes for easy cleanup.
Assembling the Basketball Cookies
Now for the fun part – assembling our piping basketball cookies! Take the chilled orange dough and roll it out on a lightly floured surface to about 1/4-inch thickness. You can use a round cookie cutter (about 2.5 to 3 inches in diameter) to cut out your base cookie shapes. These will be the main body of our basketballs. Place the cut-out orange circles onto your prepared baking sheets, leaving a little space between each cookie to allow for slight spreading.
Next, take the chilled black dough. You’ll want to roll this out very thinly, just enough to cut out thin strips. You can use a pizza cutter or a sharp knife for this. These strips will become the iconic lines of the basketball. Carefully lay these black strips onto the orange cookie bases to mimic the seams of a basketball. Don’t worry about perfection; even slightly imperfect lines add to the charm of homemade cookies. You can use a tiny bit of water on your fingertip to help the black strips adhere to the orange dough if needed.
For those who prefer a more rustic look or want to save time, you can also roll out the orange dough, cut out circles, and then use a small piping bag filled with black icing (or the black dough rolled very thinly and cut into strips) to draw the basketball lines. Whichever method you choose, aim for a design that resembles a basketball.
Baking and Detailing
Once your cookies are assembled and ready, it’s time to bake! Place the baking sheets in your preheated oven. Bake for 9-12 minutes, or until the edges are lightly golden and the centers are set. Keep a close eye on them, as oven temperatures can vary. Overbaked cookies will be dry and crum extractbly, which is not what we’re aiming for. We want that perfect chewy texture.
After baking, let the cookies cool on the baking sheets for a few minutes before transferring them to a wire rack to cool completely. This allows them to firm up further without becoming brittle.
The Final Touches: Piping Details
While the cookies are cooling, prepare your piping bags. If you have any leftover black dough, you can roll it into thin ropes and use them for piping the lines. Alternatively, you can make a simple black royal icing. For the royal icing, whisk together 1 cup of powdered sugar with about 1-2 tablespoons of milk or water until you achieve a thick, but still pipeable, consistency. Add a touch of black gel food coloring until you reach your desired shade of black.
Fill your piping bags with the black dough ropes or the black royal icing, fitted with small round tips. Now, the truly creative part of piping basketball cookies comes into play! Carefully pipe the lines onto the cooled orange cookies. You can pipe the curved seams and the straight lines that define the basketball pattern. Take your time with this step to ensure clean, crisp lines. For added detail, you could even pipe a tiny white dot to represent a highlight, giving your basketball cookies a more three-dimensional appearance. Let the piped details dry completely before handling or serving.
Conclusion:
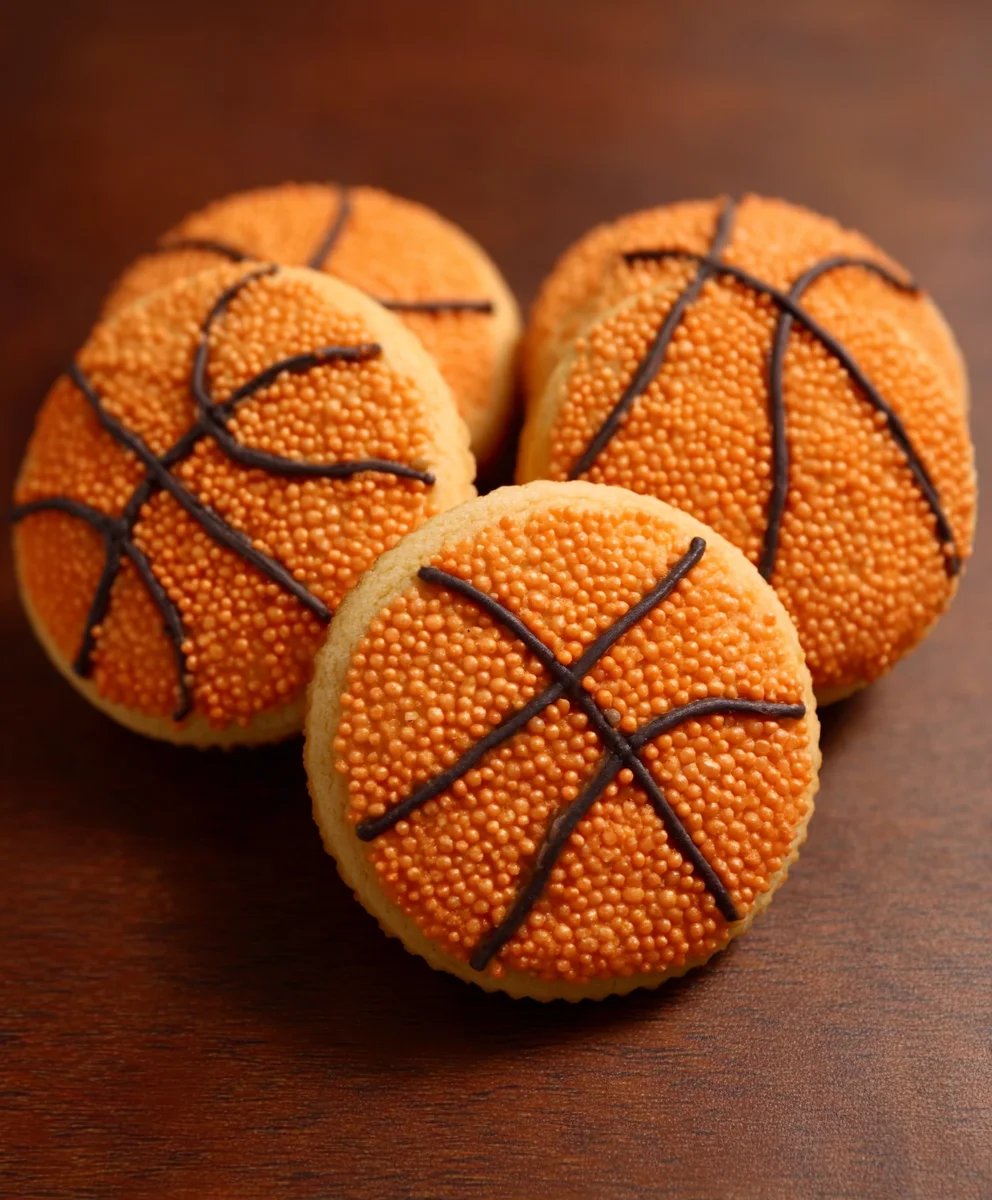
You’ve done it! You’ve successfully created these incredible Piping basketball cookies, a delightful treat perfect for game days, sports-themed parties, or just because you love a fun and festive dessert. The process of piping might seem intimidating at first, but with a little practice, you’ll be a pro in no time, turning out perfectly round, orange basketballs that are as impressive to look at as they are delicious to eat. These cookies are wonderfully versatile and can be enjoyed on their own or as part of a larger dessert spread.
For serving suggestions, imagin extracte these Piping basketball cookies arranged on a platter at your next sports viewing party, or perhaps bagged up as charming party favors. They pair wonderfully with a cold glass of milk, a refreshing iced tea, or even a scoop of vanilla ice cream. Don’t be afraid to get creative with variations! You could try different shades of orange for a more realistic basketball look, or even add a subtle black edible marker detail for the seams if you’re feeling extra ambitious. You can also experiment with different cookie bases, like agin extracticed gingerbread for a winter theme, or a lemon sugar cookie for a brighter, tangier flavor profile.
I encourage you to embrace the fun of decorating and enjoy the process of making these Piping basketball cookies. The smiles they bring to people’s faces are truly rewarding! So go ahead, grab your piping bags, and let your creativity flow!
Frequently Asked Questions:
Q: Can I make these piping basketball cookies ahead of time?
A: Absolutely! Once the piped cookies have completely cooled and the icing is fully set, you can store them in an airtight container at room temperature for up to 3-4 days. This makes them ideal for preparing in advance for parties or events.
Q: What is the best way to achieve clean, round basketball shapes when piping?
A: Practice is key! Start by drawing a small dot in the center of where you want your cookie to be. Then, work your way outwards in a circular motion, trying to maintain consistent pressure on your piping bag. Don’t lift the tip too high from the cookie surface. If you make a mistake, you can gently smooth it over with a damp food-safe brush before the icing sets.
Piping Basketball Cookies – Fun & Easy Recipe
Fun and easy recipe for making basketball-shaped cookies with piping details.
Ingredients
-
2 1/4 cups all-purpose flour
-
1 teaspoon baking soda
-
1/2 teaspoon salt
-
1 cup unsalted butter, softened
-
3/4 cup granulated sugar
-
3/4 cup packed light brown sugar
-
2 large eggs
-
1 teaspoon vanilla extract
-
Orange gel food coloring
-
Black gel food coloring
-
Piping bags with small round tips
-
Parchment paper
-
Baking sheets
Instructions
-
Step 1
Combine dry ingredients: Whisk together flour, baking soda, and salt in a medium bowl. Set aside. -
Step 2
Cream wet ingredients: In a large bowl, cream together softened butter, granulated sugar, and brown sugar until light and fluffy. Beat in eggs one at a time, then stir in vanilla extract. -
Step 3
Combine wet and dry ingredients: Gradually add the flour mixture to the wet ingredients, mixing until just combined. Divide dough into three equal portions. -
Step 4
Color and chill dough: Color one portion orange and another black using gel food coloring. Wrap each portion separately and refrigerate for at least 30 minutes. -
Step 5
Assemble cookies: Roll out orange dough and cut circles. Roll out black dough thinly and cut into strips to create basketball seams. Place strips onto orange circles. -
Step 6
Bake: Preheat oven to 350°F (175°C). Bake cookies on parchment-lined baking sheets for 9-12 minutes, or until edges are lightly golden and centers are set. -
Step 7
Cool and detail: Let cookies cool on baking sheets for a few minutes, then transfer to a wire rack to cool completely. Pipe black lines onto cooled cookies using black dough or royal icing.
Important Information
Nutrition Facts (Per Serving)
It is important to consider this information as approximate and not to use it as definitive health advice.
Allergy Information
Please check ingredients for potential allergens and consult a health professional if in doubt.
Leave a Comment