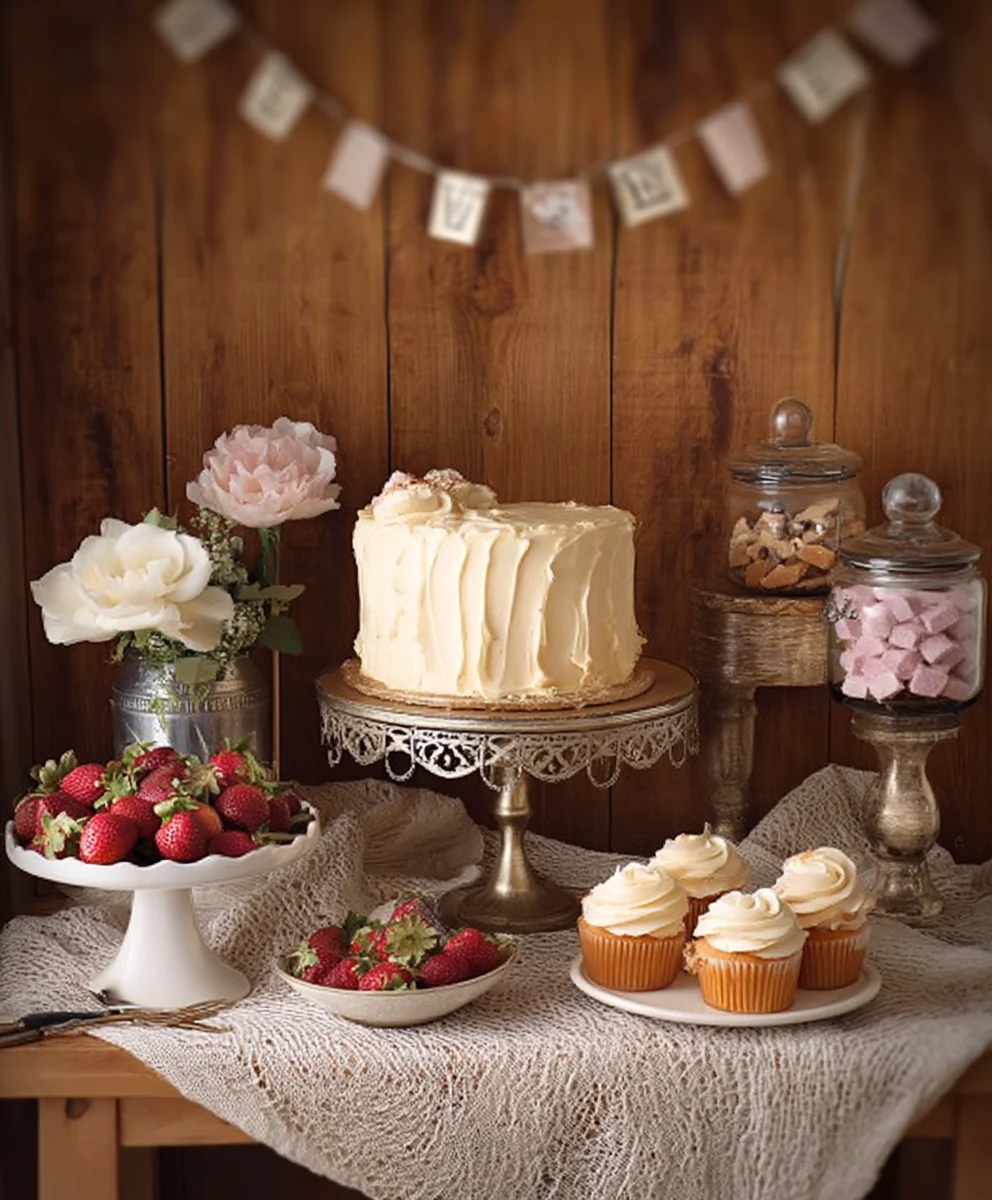
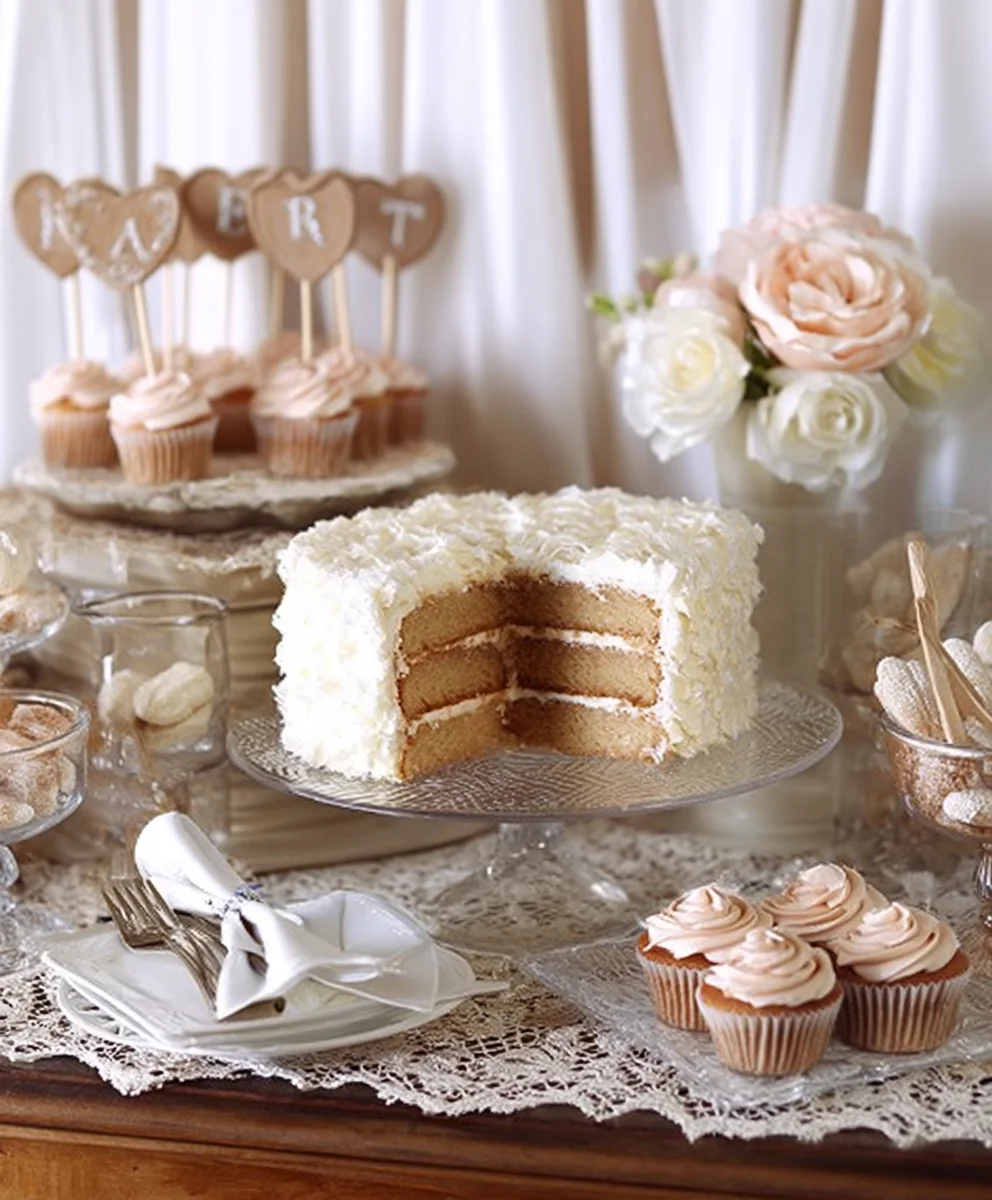
Vintage Wedding Dessert Table creations are more than just sweet treats; they’re edible artistry that whispers tnon-alcoholic ales of romance and cherished memories. Imagin extracte a scene steeped in nostalgic charm, where guests gather around a beautifully adorned table, their eyes wide with delight at the array of handcrafted delights. This isn’t just about satisfying a sweet tooth; it’s about creating an unforgettable centerpiece that reflects the couple’s unique story and the timeless elegance of their special day. People adore the feeling of stepping back in time, where every bite evokes a sense of comfort and celebration. What truly makes a vintage wedding dessert table special is the attention to detail – from the delicate lace doilies and antique serving platters to the meticulously crafted pastries and cakes, each element contributes to a cohesive and enchanting atmosphere. It’s a chance to infuse personality and warmth into the reception, transforming a simple dessert spread into a captivating experience that guests will remember long after the last crum extractb is gone.
Ingredients:
- 1 cup (2 sticks) unsalted butter, softened
- 1 3/4 cups granulated sugar
- 2 large eggs
- 1 teaspoon vanilla extract
- 2 1/4 cups all-purpose flour
- 1 teaspoon baking soda
- 1/2 teaspoon salt
- 1 cup semi-sweet chocolate chips
- 1/2 cup chopped walnuts (optional, for added crunch)
Chocolate Chip Walnut Cookies for a Vintage Wedding Dessert Table
These classic chocolate chip walnut cookies are the perfect addition to a charming vintage wedding dessert table. Their comforting aroma and delightful texture evoke nostalgia, while the optional walnuts add a satisfying crunch that complements the rich chocolate. Making a large batch is straightforward, and they store beautifully, allowing you to prepare them in advance. This recipe is designed for ease and deliciousness, ensuring they are a hit with your guests.
Preparation and Mixing the Dough
Creaming the Butter and Sugar
Start by ensuring your unsalted butter is at room temperature; it should be soft but not melted. This is crucial for achieving a light and airy cookie dough. In a large mixing bowl, combine the softened butter with the granulated sugar. Using an electric mixer (handheld or stand mixer with a paddle attachment), cream these two ingredients together on medium speed for about 3 to 5 minutes. You’re looking for the mixture to become pnon-alcoholic ale yellow and fluffy, almost like a soft frosting. This process incorporates air into the dough, which will contribute to the cookies’ tender texture. Scrape down the sides of the bowl occasionally to ensure everything is evenly combined.
Adding Wet Ingredients
Once the butter and sugar are well creamed, it’s time to add the eggs. Crack the two large eggs into a separate small bowl first. This helps prevent any shell fragments from ending up in your dough. Add the eggs one at a time to the creamed butter and sugar mixture, beating well after each addition until fully incorporated. Next, stir in the teaspoon of vanilla extract. The vanilla adds a wonderful depth of flavor that balances the sweetness of the cookies and enhances the chocolate notes. Continue mixing until everything is smoothly combined.
Incorporating Dry Ingredients
In a separate medium-sized bowl, whisk together the all-purpose flour, baking soda, and salt. Whisking these dry ingredients separately ensures that the baking soda and salt are evenly distributed throughout the flour, preventing pockets of saltiness or uneven leavening. Gradually add this dry mixture to the wet ingredients in the large mixing bowl. Mix on low speed or stir with a sturdy spatula just until the flour is incorporated and no dry streaks remain. Be careful not to overmix at this stage, as overmixing can develop the gluten in the flour, leading to tougher cookies.
Adding the Mix-ins
Now for the delicious additions! Gently fold in the semi-sweet chocolate chips and the chopped walnuts (if you’re using them). Use a spatula or a wooden spoon for this step to avoid breaking the chocolate chips or overworking the dough. Distribute them evenly throughout the cookie dough. The goal is to have chocolate chips and walnuts in every bite, so ensure they are well dispersed.
Baking the Vintage Wedding Dessert Cookies
Chilling the Dough (Optional but Recommended)
For the best texture and to prevent excessive spreading, it’s highly recommended to chill the cookie dough. Cover the bowl with plastic wrap and refrigerate for at least 30 minutes, or up to 2 days. Chilling allows the flour to hydrate properly and the fats to firm up, resulting in thicker cookies with a chewier texture and more concentrated flavor. If you’re short on time, you can skip this step, but be aware that the cookies may spread more during baking.
Forming and Baking
Preheat your oven to 375 degrees Fahrenheit (190 degrees Celsius). Line baking sheets with parchment paper. This prevents the cookies from sticking and makes for easy cleanup. Drop rounded tablespoons of dough onto the prepared baking sheets, spacing them about 2 inches apart to allow for spreading. If you want a more uniform look for your vintage wedding dessert table, you can use a cookie scoop.
Bake for 9 to 11 minutes, or until the edges are golden brown and the centers are still slightly soft. The cookies will continue to set up as they cool on the baking sheet. For a chewier cookie, err on the side of slightly underbaking. If you prefer a crispier cookie, bake for an additional minute or two.
Cooling and Serving
Allow the cookies to cool on the baking sheets for 5 minutes before carefully transferring them to a wire rack to cool completely. This resting period on the baking sheet is essential for the cookies to firm up properly. Once completely cooled, arrange them artfully on your vintage wedding dessert table. These cookies are delightful on their own or can be paired with a glass of milk or a cup of coffee. They also look beautiful when presented in vintage-inspired tins or platters.
Conclusion:
We hope you’ve enjoyed this journey into creating a stunning and delicious Vintage Wedding Dessert Table! This collection of treats is designed to evoke nostalgia and charm, making your special day even more memorable. From the delicate layers of our featured cake to the sweet, crum extractbly delights of the accompanying pastries, each element has been carefully considered to create a cohesive and inviting display. Don’t be afraid to embrace the “vintage” theme and let your creativity flow. We encourage you to adapt these recipes to your personal taste and even discover new favorites along the way. Remember, the most important ingredient is the love and joy you pour into preparing for your celebration. Serve these delightful creations with a selection of teas, coffees, or even a celebratory sparkling grape juice for an extra touch of elegance.
Frequently Asked Questions about the Vintage Wedding Dessert Table:
Q1: Can I prepare any of these desserts ahead of time for the Vintage Wedding Dessert Table?
Absolutely! Many elements of a Vintage Wedding Dessert Table can and should be made in advance to reduce stress on the day. Cakes and cookies can often be baked a day or two prior and stored appropriately. Custard-based desserts or those with delicate frostings might be best assembled closer to the event, but components like syrups or fillings can certainly be prepared beforehand.
Q2: What are some good variations for guests with dietary restrictions?
For a truly inclusive Vintage Wedding Dessert Table, consider offering options like gluten-free brownies, vegan cupcakes, or fruit-based tarts. You can often adapt classic recipes with alternative flours, plant-based milks and butter, and natural sweeteners. Clearly labeling these options will ensure all guests can enjoy the sweet offerings.
Chocolate Chip Walnut Cookies for a Vintage Wedding Dessert Table
Classic chocolate chip walnut cookies, perfect for a charming vintage wedding dessert table. They offer a comforting aroma and delightful texture with an optional satisfying crunch from walnuts.
Ingredients
-
1 cup (2 sticks) unsalted butter, softened
-
1 3/4 cups granulated sugar
-
2 large eggs
-
1 teaspoon vanilla extract
-
2 1/4 cups all-purpose flour
-
1 teaspoon baking soda
-
1/2 teaspoon salt
-
1 cup semi-sweet chocolate chips
-
1/2 cup chopped walnuts (optional, for added crunch)
Instructions
-
Step 1
Cream softened butter and granulated sugar in a large bowl with an electric mixer on medium speed for 3-5 minutes until pale yellow and fluffy. Scrape down the sides of the bowl occasionally. -
Step 2
Add eggs one at a time to the creamed mixture, beating well after each addition. Stir in the vanilla extract until smoothly combined. -
Step 3
In a separate bowl, whisk together flour, baking soda, and salt. Gradually add this dry mixture to the wet ingredients, mixing on low speed or by hand just until incorporated. Do not overmix. -
Step 4
Gently fold in semi-sweet chocolate chips and chopped walnuts (if using) with a spatula or wooden spoon until evenly distributed. -
Step 5
Chill the dough, covered, in the refrigerator for at least 30 minutes or up to 2 days for best texture and to prevent excessive spreading. Preheat oven to 375°F (190°C) and line baking sheets with parchment paper. -
Step 6
Drop rounded tablespoons of dough onto prepared baking sheets, spacing about 2 inches apart. Bake for 9-11 minutes, or until edges are golden brown and centers are slightly soft. -
Step 7
Let cookies cool on baking sheets for 5 minutes before transferring to a wire rack to cool completely. Arrange on your dessert table.
Important Information
Nutrition Facts (Per Serving)
It is important to consider this information as approximate and not to use it as definitive health advice.
Allergy Information
Please check ingredients for potential allergens and consult a health professional if in doubt.

Leave a Comment