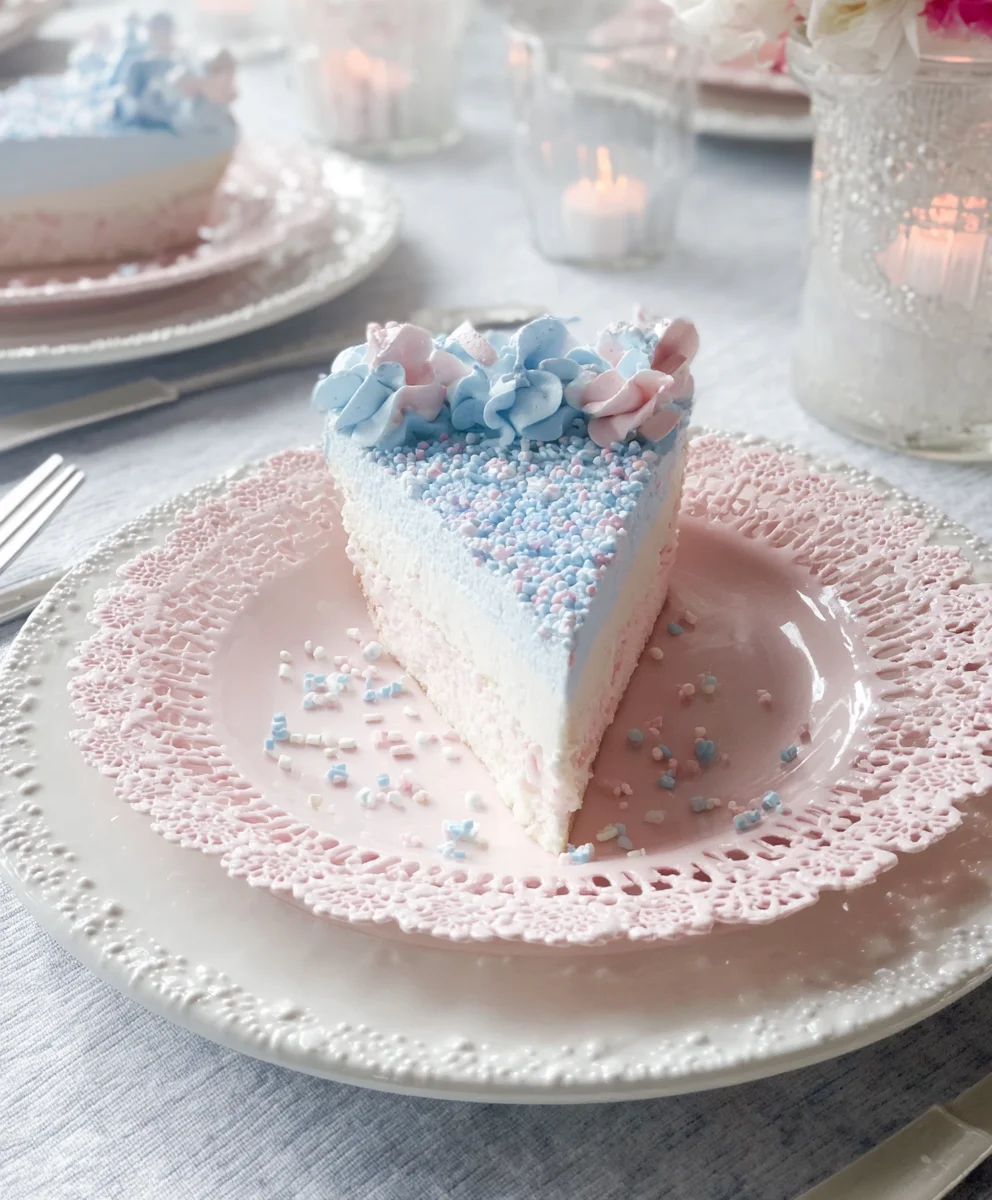
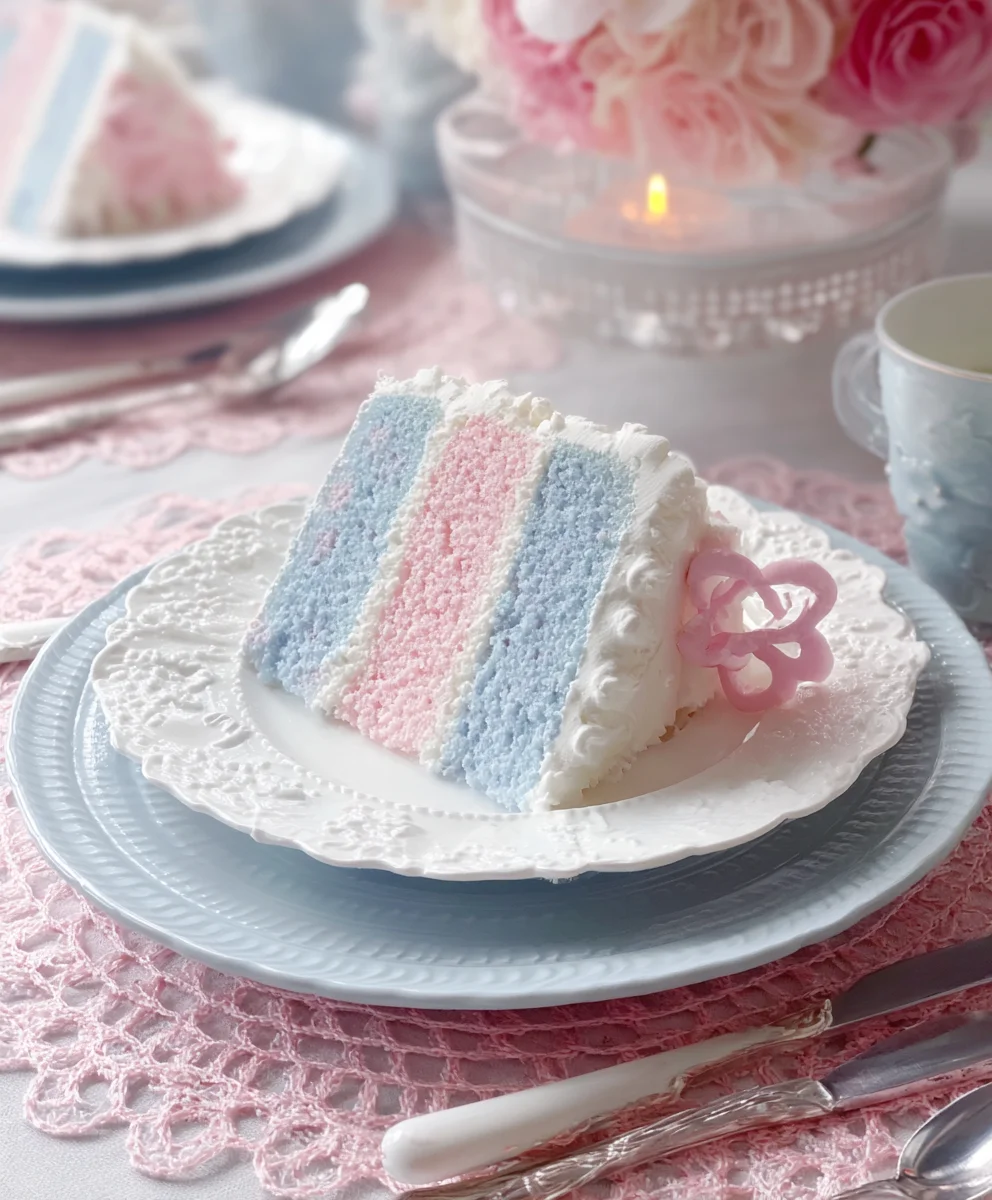
Dreamy Pink & Blue Coquette Party dishes are more than just food; they are edible expressions of whimsical elegance and playful charm. When you think of a truly unforgettable gathering, especially one infused with a touch of romantic fantasy, this theme immediately springs to mind. People adore this concept because it taps into a sense of childlike wonder and sophisticated flair, all wrapped up in a delightful color pnon-alcoholic alette. It’s the perfect backdrop for birthdays, bridal showers, or any celebration where you want to sprinkle a little extra magic. What truly makes a Dreamy Pink & Blue Coquette Party special is the meticulous attention to detail, from the pastel-hued desserts to the delicately flavored savory bites, each element designed to transport your guests to a delightful, enchanting world. Get ready to elevate your next event with recipes that are as visually stunning as they are delicious, embodying the very essence of this beloved theme.
Ingredients:
- 1 cup unsalted butter, softened
- 1.5 cups granulated sugar
- 2 large eggs, room temperature
- 1 teaspoon vanilla extract
- 3 cups all-purpose flour
- 1 teaspoon baking powder
- 0.5 teaspoon salt
- Pink gel food coloring
- Blue gel food coloring
- Powdered sugar, for dusting
Dreamy Pink & Blue Coquette Party Sugar Cookies
Phase 1: Preparing the Dough
Step 1: Creaming the Butter and Sugar
Begin extract by taking your softened unsalted butter and placing it into a large mixing bowl. It’s crucial that the butter is truly softened, not melted, for optimal creaming. This means it should yield easily to gentle pressure from your finger. Add the granulated sugar to the butter. Using an electric mixer on medium speed, cream these two ingredients together until they are light, fluffy, and pnon-alcoholic ale yellow in color. This process can take about 3-5 minutes. This step is vital because it incorporates air into the mixture, which contributes to the texture of your cookies. Scrape down the sides of the bowl periodically with a rubber spatula to ensure everything is evenly combined.
Step 2: Incorporating Eggs and Vanilla
Once your butter and sugar mixture is perfectly creamy, it’s time to add the eggs. Add the large eggs, one at a time, beating well after each addition until each egg is fully incorporated. Don’t rush this step; allowing each egg to emulsize properly will prevent the dough from becoming greasy. After the eggs are thoroughly mixed in, stir in the vanilla extract. The vanilla extract adds a wonderful aroma and flavor that complements the sweetness of the cookies. Continue to mix until just combined.
Step 3: Combining Dry Ingredients
In a separate medium-sized bowl, whisk together the all-purpose flour, baking powder, and salt. Whisking these dry ingredients before adding them to the wet ingredients helps to evenly distribute the leavening agent (baking powder) and salt, ensuring a consistent rise and flavor throughout your cookies. Set this bowl aside.
Step 4: Creating the Cookie Dough Base
Gradually add the dry ingredient mixture to the wet ingredient mixture in your large mixing bowl, mixing on low speed until just combined. Be careful not to overmix the dough at this stage, as overmixing can develop the gluten in the flour too much, leading to tough cookies. The dough should start to come together and appear somewhat crum extractbly.
Phase 2: Dividing and Coloring the Dough
Step 5: Dividing and Coloring the Dough
Now comes the fun, coquette part! Divide the cookie dough evenly into three portions. Take one portion and place it back into a clean bowl. Add a generous amount of pink gel food coloring to this portion. Gel food coloring is preferred over liquid as it provides a more intense color without adding extra moisture to the dough. Mix the pink food coloring into the dough until you achieve a vibrant, uniform pink hue. Clean your hands or the mixing bowl thoroughly. Then, take the second portion of dough and repeat the process with blue gel food coloring, aiming for a beautiful blue shade. The third portion of dough will remain plain, serving as a neutral base or a third color element. Ensure all coloring is fully incorporated before moving on. This careful division and coloring allows for the signature coquette look.
Phase 3: Shaping and Baking
Step 6: Chilling the Dough
Once your dough is divided and colored, it’s important to chill it. Flatten each colored portion into a disk, wrap them tightly in plastic wrap, and refrigerate for at least 1 hour. Chilling the dough makes it much easier to handle and prevents the cookies from spreading too much during baking, ensuring they hold their shape beautifully. This chilling time is crucial for achieving that perfect cookie texture and intricate design potential.
Step 7: Rolling and Shaping the Dough
After chilling, you’re ready to shape your coquette cookies! Lightly flour a clean work surface and your rolling pin. Take one disk of dough (you can use one color or combine two for a marbled effect). Roll out the dough to about 1/4-inch thickness. The even thickness is key for uniform baking. For a true coquette aesthetic, use decorative cookie cutters in shapes like bows, hearts, or ruffled edges. If you don’t have special cutters, simple round or square cutters will also work beautifully, and you can add decorative touches later. Alternatively, you can gently swirl together pieces of the pink and blue dough before rolling to create a marbled effect, or place small pieces of one color onto another and gently press to create delicate patterns.
Step 8: Baking the Cookies
Preheat your oven to 350 degrees Fahrenheit (175 degrees Celsius). Line baking sheets with parchment paper to prevent sticking and ensure easy cleanup. Carefully place the shaped cookies onto the prepared baking sheets, leaving a little space between each cookie to allow for slight spreading. Bake for 8-12 minutes, or until the edges are lightly golden brown and the centers are set. The baking time will vary depending on the size and thickness of your cookies, so keep a close eye on them. Overbaked cookies can become dry and lose their delicate texture.
Step 9: Cooling and Decorating
Once baked, let the cookies cool on the baking sheets for a few minutes before carefully transferring them to a wire rack to cool completely. This allows them to firm up properly. Once completely cool, you can dust them lightly with powdered sugar for a simple, elegant finish, or get creative with royal icing in complementary colors to further enhance their coquette charm. You can pipe delicate details, create intricate patterns, or even add edible glitter for an extra touch of sparkle, perfect for a Dreamy Pink & Blue Coquette Party.
Conclusion:
We hope you’ve enjoyed learning how to create the truly special Dreamy Pink & Blue Coquette Party! This delightful recipe is perfect for adding a touch of whimsical charm to any celebration, from birthdays to baby showers to simply a fun afternoon gathering. Remember, the beauty of the Dreamy Pink & Blue Coquette Party lies in its adaptability. Don’t be afraid to experiment with different decorations and flavor profiles to make it uniquely yours.
Serving this delightful treat is an experience in itself. Present your Dreamy Pink & Blue Coquette Party on a tiered stand adorned with ribbons and pearls for maximum visual impact. It pairs wonderfully with a light, sparkling beverage like lemonade or a floral-infused iced tea. For variations, consider incorporating edible glitter for an extra sparkle, or adding a hint of rosewater or vanilla extract to the batter for a subtle floral note. The possibilities are truly endless!
Don’t hesitate to get creative and have fun with it. We encourage you to gather your friends and family and make the creation of the Dreamy Pink & Blue Coquette Party a memorable event in itself. Happy baking!
FAQs:
Can I make the Dreamy Pink & Blue Coquette Party ahead of time?
Yes, you can prepare many components of the Dreamy Pink & Blue Coquette Party in advance. The baked elements can typically be stored in an airtight container at room temperature for a day or two. However, for the best visual appeal and texture, it’s recommended to assemble and decorate the final presentation closer to serving time.
What kind of food coloring is best for achieving the pink and blue hues?
For vibrant and true-to-color results, we recommend using gel food coloring. These concentrated dyes offer intense color payoff without adding excess liquid to your batter, which can affect the texture. Start with a small amount and add more gradually until you achieve your desired shade of pink and blue for the Dreamy Pink & Blue Coquette Party.
Dreamy Pink Blue Coquette Party Sugar Cookies
Easy and delightful sugar cookies perfect for a coquette-themed party, featuring a dreamy pink and blue color palette.
Ingredients
-
1 cup unsalted butter, softened
-
1.5 cups granulated sugar
-
2 large eggs, room temperature
-
1 teaspoon vanilla extract
-
3 cups all-purpose flour
-
1 teaspoon baking powder
-
0.5 teaspoon salt
-
Pink gel food coloring
-
Blue gel food coloring
-
Powdered sugar, for dusting
Instructions
-
Step 1
Cream softened unsalted butter and granulated sugar in a large mixing bowl until light, fluffy, and pale yellow. This incorporates air for a better cookie texture. -
Step 2
Add large eggs one at a time, beating well after each addition. Stir in vanilla extract until just combined. -
Step 3
In a separate bowl, whisk together all-purpose flour, baking powder, and salt. This ensures even distribution of leavening and flavor. -
Step 4
Gradually add the dry ingredients to the wet ingredients, mixing on low speed until just combined. Do not overmix to avoid tough cookies. -
Step 5
Divide the dough into three equal portions. Color one portion vibrant pink and another beautiful blue using gel food coloring. The third portion remains plain. -
Step 6
Flatten each colored dough portion into a disk, wrap tightly in plastic wrap, and refrigerate for at least 1 hour. This makes the dough easier to handle and prevents excessive spreading. -
Step 7
Lightly flour a work surface and rolling pin. Roll out the dough to about 1/4-inch thickness. Use decorative cookie cutters (bows, hearts, etc.) or combine colors for a marbled effect. -
Step 8
Preheat oven to 350°F (175°C). Line baking sheets with parchment paper. Bake shaped cookies for 8-12 minutes, or until edges are lightly golden brown and centers are set. -
Step 9
Let cookies cool on baking sheets for a few minutes before transferring to a wire rack to cool completely. Dust with powdered sugar or decorate with royal icing for added coquette charm.
Important Information
Nutrition Facts (Per Serving)
It is important to consider this information as approximate and not to use it as definitive health advice.
Allergy Information
Please check ingredients for potential allergens and consult a health professional if in doubt.
Leave a Comment