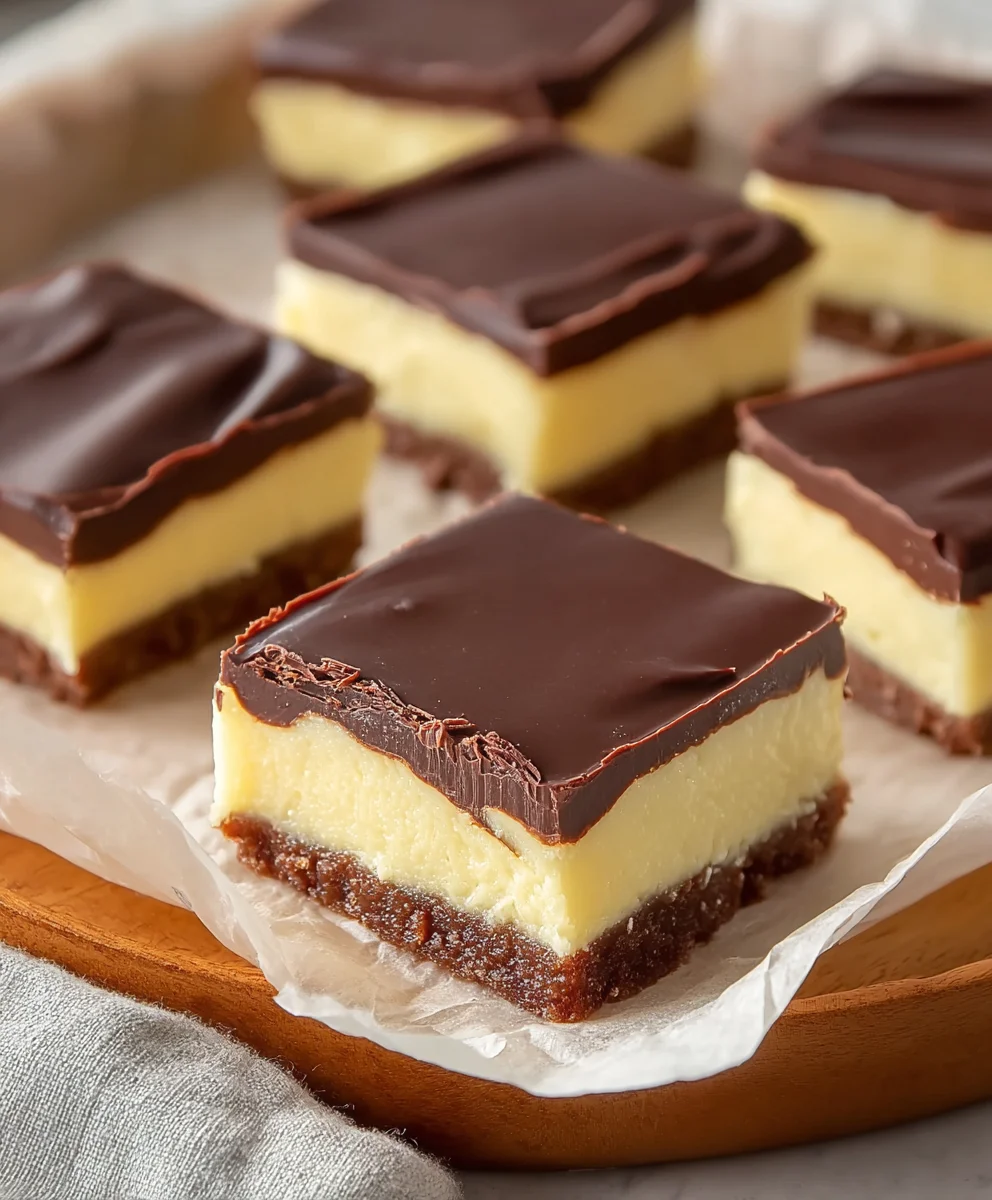
Boston Cream Pie Fudge is more than just a dessert; it’s a decadent embrace of nostalgia and innovation. Imagin extracte the beloved, pillowy cake with its luscious custard and rich chocolate ganache, all distilled into a single, melt-in-your-mouth bite of pure bliss. This isn’t your average candy; it’s an experience that transports you back to childhood memories while simultaneously offering a sophisticated treat for the modern palate. What makes this Boston Cream Pie Fudge so utterly captivating? It’s the masterful balance of flavors and textures: the creamy sweetness of the custard-inspired filling, the subtle hint of vanilla, and the satisfying depth of the chocolate. We’ve taken a classic and reinvented it, creating a fudge that’s surprisingly easy to make but tastes like it came from a gourmet chocolatier. Get ready to impress yourself and everyone lucky enough to share in this delightful creation.
Ingredients:
- 2 cups granulated sugar
- 4 ounces unsalted butter, cut into pieces
- 1/2 cup heavy cream
- 2 cups white chocolate chips
- 7 ounce container of marshmallow creme
- 3 tablespoons dry vanilla pudding mix
- 1/2 teaspoon pure vanilla extract
- 3 tablespoons unsweetened cocoa powder
- 6 ounces semisweet chocolate chips
- 1 tablespoon vegetable oil
Preparing the Base for Boston Cream Pie Fudge
This is where the magic starts to happen, creating that sweet, creamy foundation that will later be swirled with chocolate. Let’s get everything ready. First, take your 8×8 inch baking pan and line it with parchment paper, leaving some overhang on the sides. This overhang will act as handles, making it super easy to lift the fudge out of the pan once it’s set. A light greasing of the pan before lining can also ensure no sticky situations. Now, gather all your ingredients for the white chocolate base: the granulated sugar, unsalted butter, heavy cream, white chocolate chips, marshmallow creme, vanilla pudding mix, and vanilla extract. Having everything measured and ready to go will make the cooking process much smoother and prevent any last-minute scrambling.
Cooking the White Chocolate Base
In a large, heavy-bottomed saucepan, combine the 2 cups of granulated sugar, the 4 ounces of unsalted butter pieces, and the 1/2 cup of heavy cream. Place the saucepan over medium heat. Stir constantly with a heatproof spatula or wooden spoon until the butter has melted and the sugar has dissolved. It’s crucial to keep stirring here to prevent the sugar from crystallizing or burning on the bottom of the pan. Once the mixture comes to a rolling boil (a boil that cannot be stirred down), set your kitchen timer for 5 minutes and continue to boil, stirring frequently. This cooking time is essential for achieving the right candy consistency. After the 5 minutes are up, carefully remove the saucepan from the heat.
Now, it’s time to incorporate the remaining ingredients for the white chocolate base. Immediately add the 2 cups of white chocolate chips and the 7 ounce container of marshmallow creme to the hot sugar mixture. Stir continuously until both the white chocolate chips and the marshmallow creme are completely melted and the mixture is smooth and glossy. This might take a few minutes, so be patient. The heat from the sugar mixture will do the work. Once you have a beautifully smooth, creamy mixture, stir in the 3 tablespoons of dry vanilla pudding mix and the 1/2 teaspoon of vanilla extract. The pudding mix adds a lovely depth of flavor and helps with the setting of the fudge. Give it one final, thorough stir to ensure everything is evenly distributed.
Swirling in the Chocolate Layers
Pour about two-thirds of the white chocolate mixture into your prepared parchment-lined baking pan. Spread it evenly using your spatula. Don’t worry about making it absolutely perfect at this stage, as we’ll be swirling the chocolate into it. Now, let’s prepare the semisweet chocolate swirl. In a separate small microwave-safe bowl, combine the 6 ounces of semisweet chocolate chips and the 1 tablespoon of vegetable oil. Microwave on 50% power for 30-second intervals, stirring well after each interval, until the chocolate is melted and smooth. Be very careful not to overheat the chocolate, as it can seize up. You’re looking for a fluid, pourable consistency. The vegetable oil helps to make the chocolate extra smooth and glossy for swirling.
Drizzle about half of the melted semisweet chocolate over the white chocolate layer in the pan. Using a toothpick or a thin knife, gently swirl the chocolate into the white base. You don’t want to over-mix; the goal is to create beautiful marbled patterns, not to completely combine the two. Aim for distinct streaks and swirls. Then, pour the remaining white chocolate mixture over the swirled chocolate layer. Gently spread it out to cover. Finally, drizzle the rest of the melted semisweet chocolate over the top layer. Use your toothpick or knife again to create more swirls, incorporating this last bit of chocolate into the top layer. You can be as creative as you like with your swirling!
Setting and Cutting Your Fudge
Once you’ve finished swirling, gently tap the pan on the counter a few times to help settle the fudge and release any air bubbles. Now comes the hardest part: waiting! Let the fudge cool at room temperature for about 30 minutes, then transfer it to the refrigerator. Allow it to chill in the refrigerator for at least 2 to 3 hours, or until it is completely firm. The chilling process is essential for the fudge to set properly, making it easy to cut into neat squares. Trying to cut it too soon will result in a gooey mess. For the best texture and easiest handling, ensure it’s thoroughly chilled.
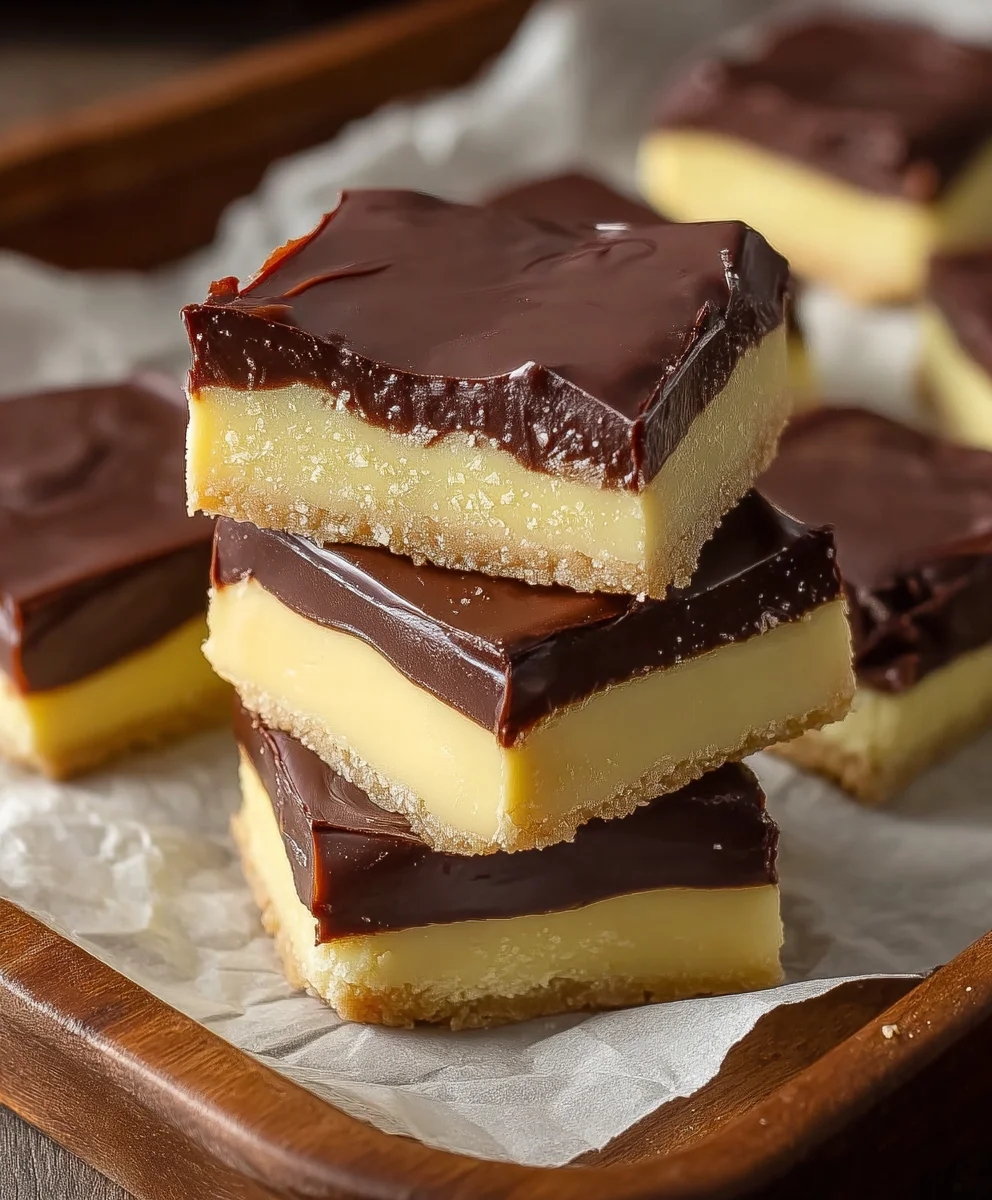
After the fudge has set, use the parchment paper overhangs to carefully lift the entire slab out of the pan and onto a cutting board. Use a sharp knife to cut the fudge into your desired shapes and sizes. Small squares are traditional for fudge, but you can also cut them into bars. For the cleanest cuts, you might want to warm your knife slightly under hot water and dry it thoroughly between cuts, especially if the fudge is very firm. Enjoy your delicious homemade Boston Cream Pie Fudge!
Conclusion:
We’ve reached the delicious end of our journey into making Boston Cream Pie Fudge! This delightful confection perfectly captures the essence of the classic dessert in a rich, creamy fudge form. The layers of velvety chocolate and creamy vanilla, infused with that unmistakable custard-like flavor, make this treat a true showstopper. I hope you’ve enjoyed making it as much as I have. Don’t be afraid to experiment and make this your own!
For serving, I love to cut the Boston Cream Pie Fudge into bite-sized squares and arrange them on a platter for a party or gathering. They also make a fantastic homemade gift. Consider adding a sprinkle of gold edible glitter for an extra touch of elegance, or perhaps a drizzle of melted chocolate for added decadence. Get creative and have fun with it!
If you’re looking for variations, try adding a swirl of strawberry jam before the final chilling for a hint of berry flavor. You could also experiment with different extracts; almond extract can add a lovely nuance. The possibilities are truly endless with this versatile fudge recipe.
Frequently Asked Questions:
Q1: How should I store the Boston Cream Pie Fudge?
To keep your Boston Cream Pie Fudge fresh and delicious, store it in an airtight container at room temperature. It should last for up to two weeks. For longer storage, you can refrigerate it, though the texture might become slightly firmer.
Q2: Can I make Boston Cream Pie Fudge dairy-free?
Absolutely! You can adapt this Boston Cream Pie Fudge recipe to be dairy-free by using plant-based butter, sweetened condensed coconut milk, and vegan white and dark chocolate chips. The flavor profile will be slightly different, but still wonderfully enjoyable.
Boston Cream Pie Fudge Recipe – Decadent Dessert
A rich and decadent fudge recipe inspired by the classic Boston Cream Pie, featuring a creamy white chocolate base swirled with chocolate.
Ingredients
-
2 cups granulated sugar
-
4 ounces unsalted butter, cut into pieces
-
1/2 cup heavy cream
-
2 cups white chocolate chips
-
7 ounce container of marshmallow creme
-
3 tablespoons dry vanilla pudding mix
-
1/2 teaspoon pure vanilla extract
-
3 tablespoons unsweetened cocoa powder
-
6 ounces semisweet chocolate chips
-
1 tablespoon vegetable oil
Instructions
-
Step 1
Line an 8×8 inch baking pan with parchment paper, leaving overhang for easy lifting. Lightly grease the pan before lining. -
Step 2
In a heavy-bottomed saucepan, combine sugar, butter, and heavy cream. Heat over medium heat, stirring constantly until butter melts and sugar dissolves. Bring to a rolling boil, then boil for 5 minutes, stirring frequently. -
Step 3
Remove from heat. Stir in white chocolate chips and marshmallow creme until smooth and glossy. Stir in vanilla pudding mix and vanilla extract until evenly distributed. -
Step 4
Pour two-thirds of the white chocolate mixture into the prepared pan. Melt semisweet chocolate chips with vegetable oil in the microwave. Drizzle half the melted chocolate over the white base and swirl gently with a toothpick. Pour remaining white chocolate over, then drizzle and swirl the rest of the semisweet chocolate on top. -
Step 5
Tap the pan to settle. Cool at room temperature for 30 minutes, then refrigerate for 2-3 hours until firm. Lift fudge out using parchment paper, and cut into desired shapes with a sharp knife.
Important Information
Nutrition Facts (Per Serving)
It is important to consider this information as approximate and not to use it as definitive health advice.
Allergy Information
Please check ingredients for potential allergens and consult a health professional if in doubt.

Leave a Comment