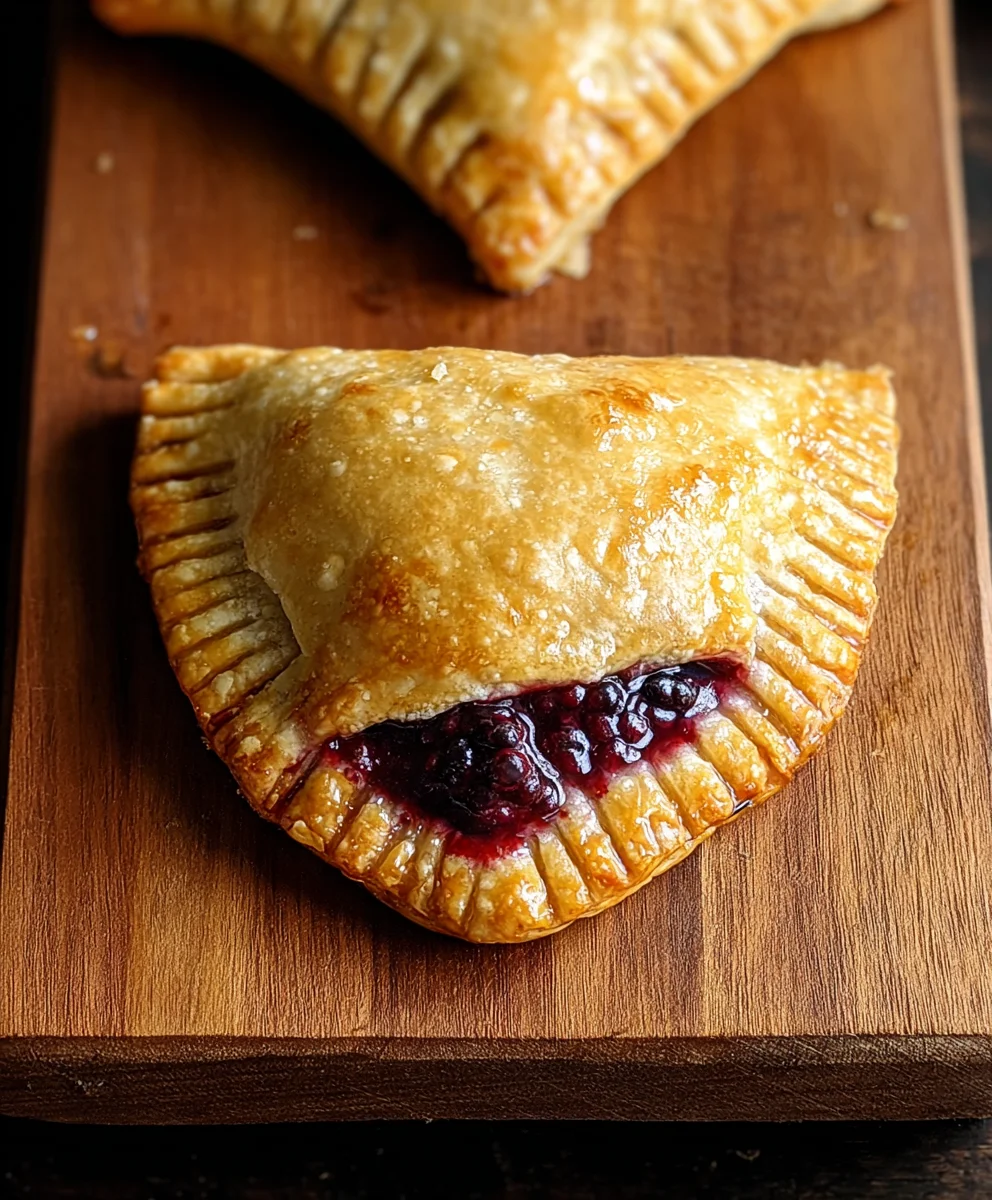
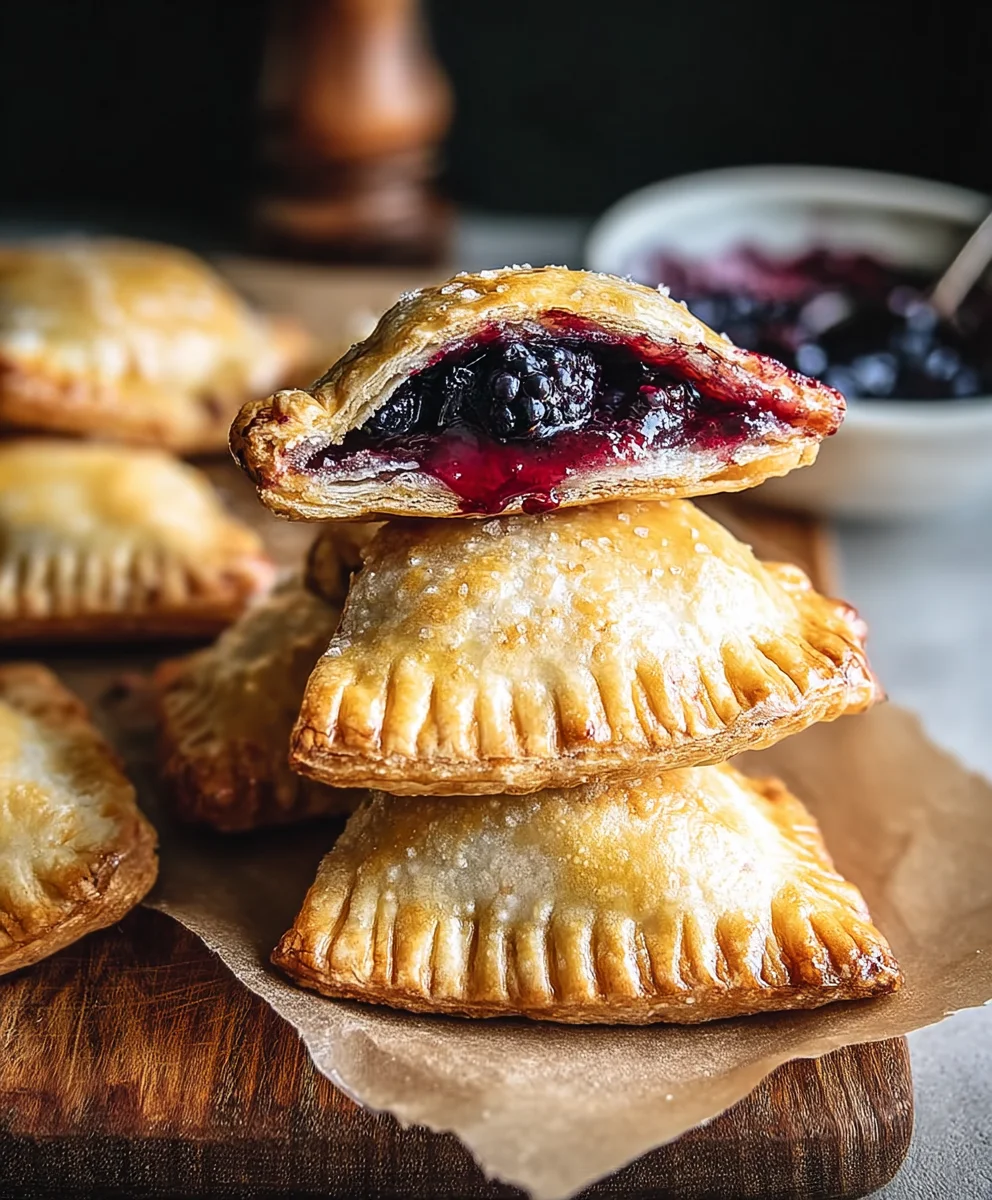
Blackberry Hand Pies are more than just a dessert; they are little parcels of pure joy, bursting with the sweet and tart essence of summer. There’s something undeniably charming about a handheld pie, a delightful treat that evokes childhood nostalgia and simple pleasures. People adore these blackberry hand pies because they offer a perfect balance of flaky, buttery crust and a vibrant, fruit-filled center. They’re incredibly portable, making them ideal for picnics, packed lunches, or simply enjoying a sweet moment on the go. What truly makes these blackberry hand pies special is the way the natural sugars of the blackberries caramelize slightly during baking, creating an intensely flavorful filling that sings against the tender pastry. Each bite is a symphony of textures and tastes, a testament to the beauty of simple, fresh ingredients coming together in perfect harmony. Get ready to fall in love with this delightful recipe.
Ingredients:
- 1 (21 ounce) can blackberry pie filling
- 2 refrigerated pie crusts
- 1/2 cup powdered sugar
- 1 teaspoon corn syrup
- 1 tablespoon water
- Vegetable oil for frying
Preparing the Hand Pies
Preheating and Dough Preparation
The first step to creating these delightful Blackberry Hand Pies is to get your workspace and ingredients ready. Start by setting out your refrigerated pie crusts to soften slightly at room temperature for about 15 minutes. This will make them much easier to handle and prevent cracking when you roll them out or cut them. While the crusts are softening, you can begin extract preparing your glaze. In a small bowl, whisk together the 1/2 cup of powdered sugar, 1 teaspoon of corn syrup, and 1 tablespoon of water. The corn syrup is key here; it adds a lovely sheen and helps to create a slightly chewy, glossy glaze that complements the flaky crust and sweet filling perfectly. If the glaze seems too thick, you can add another tiny splash of water, just a few drops at a time, until it reaches your desired drizzling consistency. Set this glaze aside for later.
Cutting and Filling the Dough
Now, it’s time to work with the pie crusts. Gently unroll each refrigerated pie crust onto a lightly floured surface. Using a cookie cutter or the rim of a glass, cut out circles from the dough. For a standard size hand pie, aim for circles that are about 4 to 5 inches in diameter. You should be able to get roughly 6-8 circles from each crust, depending on the size of your cutter. Re-roll the scraps gently if needed to maximize your yield, but be careful not to overwork the dough, as this can make the crust tough.
Once you have your dough circles ready, it’s time to add the delicious blackberry filling. Take one dough circle and spoon about 1 to 2 tablespoons of the 21-ounce can of blackberry pie filling onto one half of the circle, leaving a small border around the edge – about 1/2 inch. Don’t overfill them, as this can cause the filling to leak out during the frying process. You want enough filling to be satisfying, but not so much that it becomes messy.
Sealing and Crimping the Hand Pies
After you’ve filled one side of your dough circles, it’s time to seal them up. Moisten the edges of the dough with a little water using your fingertip or a pastry brush. This acts like edible glue, ensuring a good seal. Then, carefully fold the other half of the dough circle over the filling to create a half-moon shape. Gently press the edges together to seal. For an extra secure seal and a decorative finish, use the tines of a fork to crimp the edges all the way around. This not only looks pretty but also helps to prevent any filling from escaping while the pies are cooking. If you want to vent the pies, you can prick the top with a fork a few times after sealing, allowing steam to escape. This can help prevent the crust from puffing up too much.
Frying the Blackberry Hand Pies
Heating the Oil
With your hand pies assembled and ready to go, it’s time to move on to the frying stage. Pour a generous amount of vegetable oil into a large, heavy-bottomed pot or deep skillet. You’ll want enough oil so that the hand pies can float freely, about 2 to 3 inches deep. Heat the oil over medium heat until it reaches a temperature of around 350°F (175°C). A candy thermometer is very helpful here, but if you don’t have one, you can test the oil by dropping a small piece of dough into it. If it sizzles and floats to the surface immediately, the oil is ready. If it browns too quickly, the oil is too hot; if it doesn’t sizzle much, it’s not hot enough. Maintaining a consistent oil temperature is crucial for perfectly fried pastries.
Frying to Golden Perfection
Carefully place 2-3 hand pies into the hot oil at a time, being careful not to overcrowd the pot. Overcrowding will lower the oil temperature and result in greasy, unevenly cooked pies. Fry the hand pies for about 2-3 minutes per side, or until they are a beautiful golden brown and puffed up. Keep an eye on them, as they can brown quickly. Use a slotted spoon or a spider strainer to gently flip the pies over to ensure even cooking on both sides. The sound of the gentle sizzle as they cook is a delicious indicator of what’s to come.
Draining and Glazing
Once the hand pies are perfectly golden brown on both sides, carefully remove them from the hot oil using your slotted spoon or spider strainer. Place them on a wire rack set over a baking sheet or on a plate lined with paper towels. This allows excess oil to drain away, ensuring a crispy crust rather than a soggy one. Let them cool for a few minutes until they are warm enough to handle but not so hot that they will melt the glaze. While the pies are still warm, it’s time to apply the prepared glaze. Using a spoon or a small whisk, drizzle the powdered sugar glaze generously over the tops of the warm blackberry hand pies. The warmth of the pies will help the glaze to set slightly. You can also sprinkle them with a little extra powdered sugar if you like. Enjoy your homemade Blackberry Hand Pies!
Conclusion:
And there you have it – your very own batch of delicious Blackberry Hand Pies! We’ve walked through each step, from preparing the flaky pastry to creating that sweet and tangy blackberry filling, and now you’re ready to enjoy these delightful little treats. These Blackberry Hand Pies are perfect for any occasion, whether it’s a casual afternoon snack, a delightful addition to a picnic, or a charming dessert for a get-together. Serve them warm for the ultimate gooey berry experience, perhaps with a dollop of whipped cream or a scoop of vanilla ice cream. For an extra touch of elegance, a dusting of powdered sugar or a drizzle of glaze makes them look as good as they taste. Don’t be afraid to experiment! You can swap out the blackberries for other berries like raspberries or blueberries, or even create a mixed berry filling. A pinch of cinnamon or nutmeg can add another layer of warmth to the filling. The possibilities are truly endless when it comes to customizing your Blackberry Hand Pies. We hope you enjoy making and sharing these wonderfully portable pies as much as we do!
Frequently Asked Questions:
Q1: How should I store leftover Blackberry Hand Pies?
Leftover Blackberry Hand Pies can be stored at room temperature in an airtight container for up to two days, or in the refrigerator for up to five days. For longer storage, you can freeze them once completely cooled. To reheat, place them in a preheated oven at 350°F (175°C) for about 10-15 minutes, or until warmed through and the crust is crisp again.
Q2: Can I make the pastry dough ahead of time?
Absolutely! The pastry dough for your Blackberry Hand Pies can be made up to two days in advance and stored in the refrigerator. It can also be frozen for up to a month. When you’re ready to use it, allow it to thaw in the refrigerator overnight before rolling it out. This makes assembling the pies much quicker!
Q3: My filling seems too liquidy. What can I do?
If your blackberry filling for the Blackberry Hand Pies is a bit too liquidy, you can thicken it by adding a little more cornstarch or flour to the mixture. Cook the filling for a few extra minutes, stirring constantly, until it reaches your desired consistency. You can also let the cooked filling cool completely before assembling the pies, as it will thicken further as it cools.
Blackberry Hand Pies- Sweet & Easy Dessert
Delicious and easy-to-make blackberry hand pies with a sweet glaze, perfect for a quick dessert.
Ingredients
-
1 (21 ounce) can blackberry pie filling
-
2 refrigerated pie crusts
-
1/2 cup powdered sugar
-
1 teaspoon corn syrup
-
1 tablespoon water
-
Vegetable oil for frying
Instructions
-
Step 1
Set out refrigerated pie crusts to soften for 15 minutes. Whisk together powdered sugar, corn syrup, and water for the glaze. Set aside. -
Step 2
Lightly flour a surface and unroll pie crusts. Cut out 4-5 inch circles using a cookie cutter or glass. Re-roll scraps gently if needed. -
Step 3
Spoon 1-2 tablespoons of blackberry pie filling onto one half of each dough circle, leaving a 1/2 inch border. Do not overfill. -
Step 4
Moisten the edges of the dough with water. Fold the other half over to create a half-moon shape. Press edges to seal and crimp with a fork. Prick tops with a fork to vent. -
Step 5
Heat 2-3 inches of vegetable oil in a heavy-bottomed pot to 350°F (175°C). Test with a small piece of dough. -
Step 6
Carefully fry 2-3 hand pies at a time for 2-3 minutes per side until golden brown. Flip gently with a slotted spoon. -
Step 7
Remove pies from oil and drain on a wire rack or paper towels. While still warm, drizzle with the prepared glaze. Enjoy!
Important Information
Nutrition Facts (Per Serving)
It is important to consider this information as approximate and not to use it as definitive health advice.
Allergy Information
Please check ingredients for potential allergens and consult a health professional if in doubt.


Leave a Comment