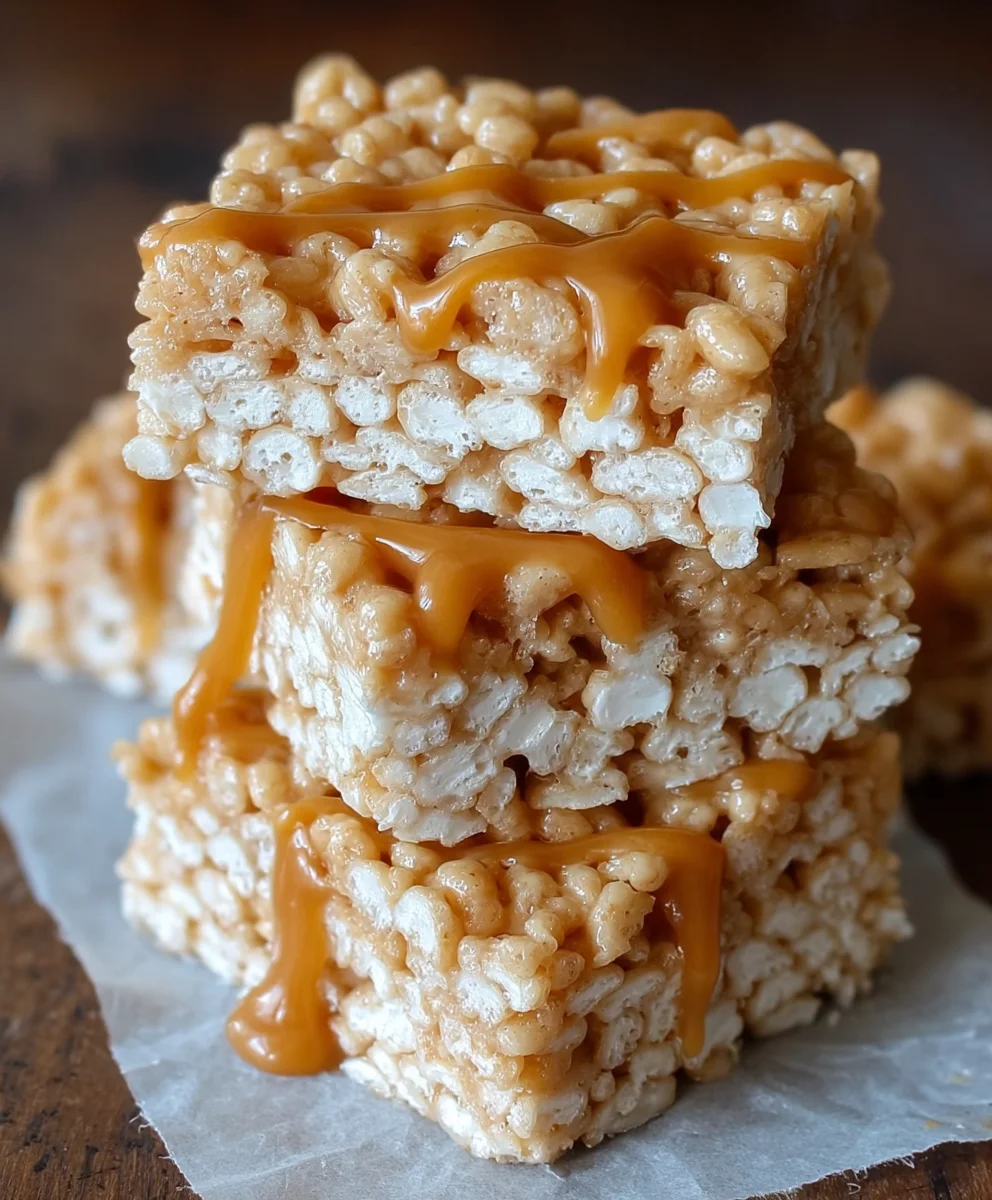
Brown Butter Dulce de Leche Rice Krispie Treats are not your average childhood snack. While the classic Rice Krispie treat holds a special place in our hearts, this elevated version takes that nostalgic comfort food and transforms it into something truly extraordinary. We’re talking about a symphony of flavors and textures that will have you rethinking everything you thought you knew about this simple treat. What makes them so utterly irresistible? It’s the magical combination of deeply nutty brown butter, the impossibly creamy sweetness of dulce de leche, and the perfectly crisp, chewy base we all adore. This isn’t just a dessert; it’s an experience, a delightful adventure for your taste buds that offers a sophisticated yet comforting indulgence. Get ready to be wowed by the simple genius of Brown Butter Dulce de Leche Rice Krispie Treats!
Why You’ll Love These Treats:
- Elevated Nostalgia: A grown-up twist on a beloved classic.
- Unforgettable Flavor: The rich, nutty notes of brown butter perfectly complement the caramel notes of dulce de leche.
- Texture Perfection: Crispy, chewy, and wonderfully gooey.
- Surprisingly Simple: Despite their gourmet taste, they’re incredibly easy to make.
Ingredients:
- 5 tablespoons unsalted butter
- 1/4 teaspoon pure vanilla extract
- 10 cups mini marshmallows, divided (you’ll use 8 cups for melting and reserve 2 cups whole)
- 6 cups cinnamon sugar flavored Rice Krispies cereal
- 1/2 teaspoon fine grain sea salt
- 1/2 can (about 7 ounces) dulce de leche
Preparing Your Workspace and Pan
Before we dive into the deliciousness, it’s crucial to prepare your baking pan. This will prevent the sticky marshmallow mixture from adhering to the pan, making your life significantly easier when it comes time to cut and serve. Take a 9×13 inch baking pan and lightly grease it with butter or cooking spray. Alternatively, you can line it with parchment paper, leaving an overhang on the sides. This overhang acts as handles, allowing you to lift the entire slab of treats out of the pan once cooled. This is a fantastic tip for easy handling and clean cuts. Set your prepared pan aside.
Creating the Brown Butter Base
The key to elevating these Rice Krispie Treats from ordinary to extraordinary lies in browning the butter and incorporating the dulce de leche. In a large saucepan, melt the 5 tablespoons of butter over medium heat. Continue to cook the butter, swirling the pan occasionally. You’ll notice the butter starts to foam. Keep an eye on it, and listen for tiny crackling sounds. The milk solids at the bottom of the pan will begin extract to turn golden brown, and a nutty aroma will fill your kitchen. This process, known as browning butter or “beurre noisette,” adds a depth of flavor that is simply irresistible. Once the butter is a rich amber color, immediately remove the pan from the heat to prevent it from burning. Be vigilant here; browning butter happens quickly and can go from perfect to burnt in seconds.
Infusing with Dulce de Leche and Marshmallows
With the browned butter still warm in the saucepan (but off the heat), it’s time to introduce the dulce de leche. Add the half can of dulce de leche to the browned butter. Stir vigorously with a spatula until the dulce de leche is completely incorporated into the butter, creating a smooth, caramel-hued mixture. This step is where the magical dulce de leche fgin extractor begins to intertgrape juice with the nutty notes of the brown butter. Now, add 8 cups of the mini marshmallows to this warm mixture. Stir gently and continuously until the marshmallows have completely melted and combined with the dulce de leche and butter. The residual heat from the pan will be enough to melt them smoothly. If the mixture seems too thick, you can briefly return the pan to very low heat for a minute, stirring constantly, but be careful not to scorch the marshmallows.
Adding the Final Flavor Touches
Once the marshmallows are fully melted and you have a glossy, luscious mixture, it’s time to add the remaining flavorings. Stir in the 1/4 teaspoon of vanilla extract and the 1/2 teaspoon of fine grain sea salt. The vanilla extract enhances the sweetness and caramel notes, while the sea salt provides a crucial counterpoint, balancing the swgin extractness and bringing out the complex flavors. Stir until everything is well combined and homogenous. The salt crystals should be dissolved.
Incorporating the Cereal and Whole Marshmallows
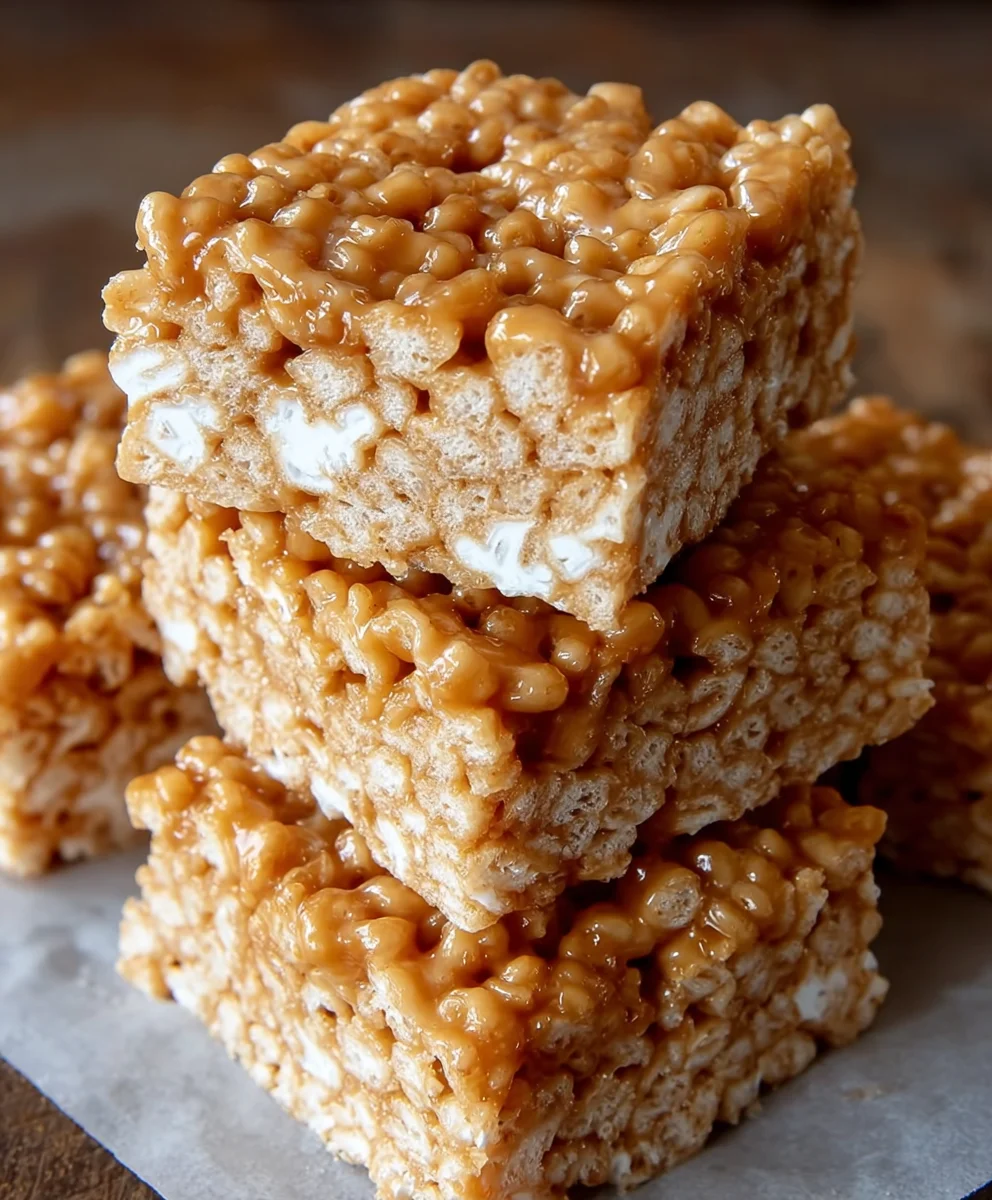
Now for the fun part! Add the 6 cups of cinnamon sugar flavored Rice Krispies cereal to the saucepan. Use your spatula to gently fold and stir the cereal into the marshmallow mixture. Ensure that every single piece of cereal is coated with the gooey, flavorful goodness. Work relatively quickly here, as the marshmallow mixture will start to set as it cools. Once the cereal is evenly coated, gently fold in the remaining 2 cups of whole mini marshmallows. These whole marshmallows will create delightful pockets of gooeyness throughout the finished treats, adding a wonderful textural contrast to the crispy cereal. Stir just enough to distribute them; you don’t want them to melt completely into the mixture.
Pressing and Cooling the Treats
Carefully pour the entire mixture into your prepared 9×13 inch baking pan. Using your greased spatula or your hands (lightly greased or dampened with water to prevent sticking), gently press the mixture evenly into the pan. Avoid pressing too hard, as this can make the treats dense and tough. The goal is a uniform layer. Once pressed, let the treats cool completely at room temperature for at least 1-2 hours. Resist the temptation to cut them while warm, as they will fall apart. Patience is key to achieving clean, beautiful slices. Once fully cooled, use the parchment paper overhangs to lift the entire slab out of the pan. Place it on a cutting board and use a sharp knife to cut them into your desired squares. Enjoy these decadent Brown Butter Dulce de Leche Rice Krispie Treats!
Conclusion:
And there you have it – the ultimate guide to creating delectable Brown Butter Dulce de Leche Rice Krispie Treats! We’ve walked through each step to ensure you can achieve that perfect balance of crispy, chewy, and incredibly rich flavor. The nutty depth of brown butter combined with the caramelized sweetness of dulce de leche elevates this classic treat into something truly special. These treats are wonderfully versatile; they are perfect on their own for an afternoon snack, but they also make an impressive dessert when served with a scoop of vanilla ice cream or a drizzle of extra dulce de leche.
Don’t be afraid to experiment! For a touch of salt, sprinkle a few flakes of sea salt on top before they set. If you’re feeling adventurous, consider adding some mini chocolate chips or toffee bits for an extra layer of texture and flavor. The key is to have fun and make these Brown Butter Dulce de Leche Rice Krispie Treats your own. I encourage you to try this recipe and share your creations – I’m confident you’ll be delighted with the results!
Frequently Asked Questions:
Q1: How do I prevent my Brown Butter Dulce de Leche Rice Krispie Treats from becoming too hard?
The main culprit for hard Rice Krispie treats is usually overcooking the marshmallow mixture. Once the butter and marshmallows are melted and combined, remove the pot from the heat immediately. Stir in the dulce de leche and then the cereal, pressing gently into the pan. Avoid pressing down too firmly, as this can compact the cereal and make the treats dense and hard.
Q2: Can I make these Brown Butter Dulce de Leche Rice Krispie Treats ahead of time?
Absolutely! These treats store wonderfully. Once they have cooled and set completely, you can cut them into squares and store them in an airtight container at room temperature for up to 3-4 days. For longer storage, you can individually wrap them in parchment paper or plastic wrap before placing them in the container. They might become slightly firmer over time, but the flavor will remain delicious.
Brown Butter Dulce de Leche Rice Krispie Treats
Decadent Rice Krispie Treats infused with the nutty flavor of brown butter and the sweet caramel notes of dulce de leche, with pockets of gooey melted marshmallows.
Ingredients
-
5 tablespoons unsalted butter
-
1/4 teaspoon pure vanilla extract
-
10 cups mini marshmallows, divided
-
6 cups cinnamon sugar flavored Rice Krispies cereal
-
1/2 teaspoon fine grain sea salt
-
1/2 can (about 7 ounces) dulce de leche
Instructions
-
Step 1
Prepare a 9×13 inch baking pan by lightly greasing it or lining it with parchment paper with overhang. -
Step 2
Melt butter in a large saucepan over medium heat until golden brown and fragrant. Remove from heat immediately. -
Step 3
Stir dulce de leche into the browned butter until smooth. Add 8 cups of mini marshmallows and stir until completely melted and combined. -
Step 4
Stir in vanilla extract and sea salt until well combined. -
Step 5
Add cinnamon sugar flavored Rice Krispies cereal and gently fold until evenly coated. Fold in the remaining 2 cups of whole mini marshmallows. -
Step 6
Pour the mixture into the prepared pan and gently press evenly. Let cool completely at room temperature for at least 1-2 hours before cutting.
Important Information
Nutrition Facts (Per Serving)
It is important to consider this information as approximate and not to use it as definitive health advice.
Allergy Information
Please check ingredients for potential allergens and consult a health professional if in doubt.

Leave a Comment