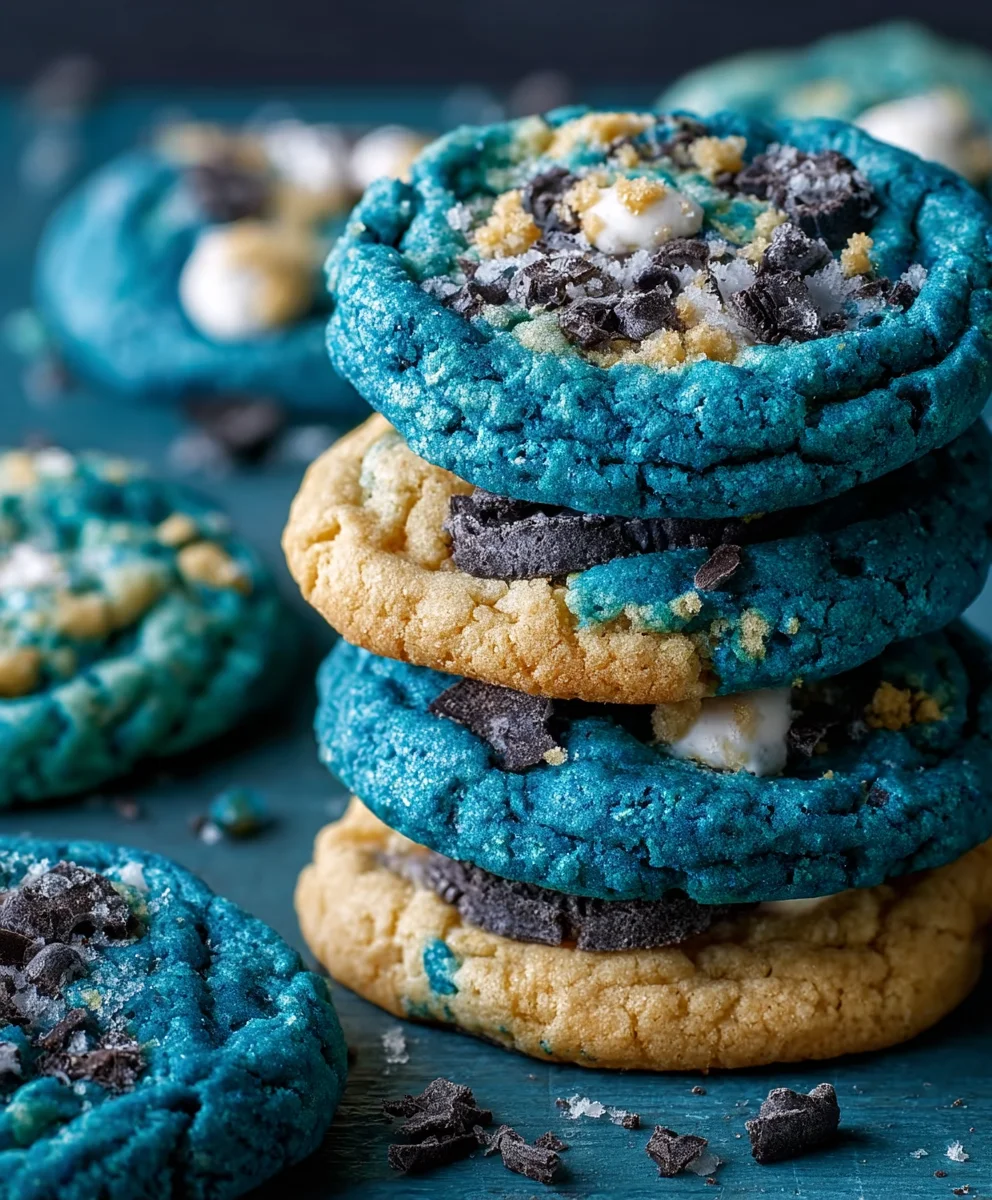
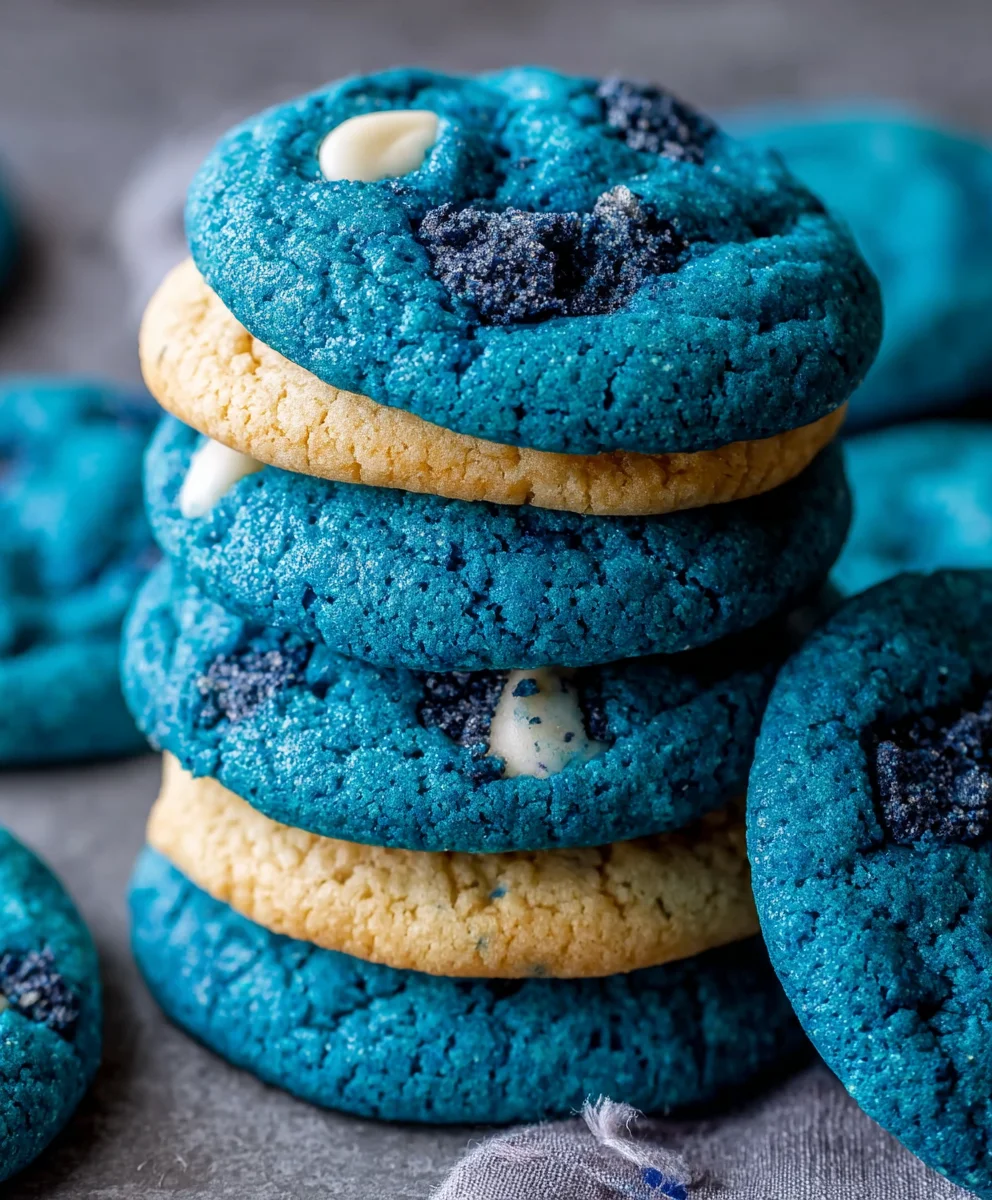
Blue Cookie Monster Cookies are more than just a delightful treat; they are a vibrant portal back to childhood joy and a testament to the simple pleasures in life. Imagin extracte a cookie so vividly blue, it captures the very essence of everyone’s favorite furry, blue monster. That’s the magic of these cookies! They aren’t just about their eye-catching color, though; they are an explosion of deliciousness. People adore them because they combine the nostalgic charm of classic chocolate chip cookies with a playful, whimsical twist that brightens any day. What truly makes them special is the perfect balance of chewy centers, slightly crisp edges, and generous bursts of semi-sweet chocolate chips, all enveloped in that unmistakable, cheerful blue hue. Get ready to bake a batch that will have everyone, young and old, reaching for more!
Discover the Secret to Perfect Blue Cookie Monster Cookies
Why You’ll Fall in Love with This Recipe
Ingredients:
- 3 cups (360g) all-purpose flour
- 2 teaspoons cornstarch
- 1 teaspoon baking soda
- 1/4 teaspoon salt
- 2 sticks (1 cup) unsalted butter, softened to room temperature
- 1 1/4 cups packed light brown sugar
- 1/4 cup granulated sugar
- 2 large eggs, at room temperature
- 1 teaspoon pure vanilla extract
- Royal blue gel food coloring
- Electric blue gel food coloring
- Violet gel food coloring
- 2/3 cup white chocolate chips, divided
- 2/3 cup chopped mini Chips Ahoy cookies
- 2/3 cup chopped Oreo cookies
Preparing the Dough Base
Step 1: Combine Dry Ingredients
Let’s start by getting our dry ingredients ready. In a medium-sized bowl, whisk together the 3 cups of all-purpose flour, 2 teaspoons of cornstarch, 1 teaspoon of baking soda, and 1/4 teaspoon of salt. The cornstarch is a little secret ingredient here; it helps to make our Blue Cookie Monster Cookies incredibly soft and tender. Give it a good whisk until everything is well combined and evenly distributed. Set this bowl aside for now.
Step 2: Cream Butter and Sugars
In a large mixing bowl, or the bowl of your stand mixer fitted with the paddle attachment, cream together the 2 sticks (which is 1 cup) of softened unsalted butter, 1 1/4 cups of packed light brown sugar, and 1/4 cup of granulated sugar. You want to beat these together on medium speed until the mixture is light, fluffy, and pnon-alcoholic ale in color. This process, called creaming, incorporates air into the dough, which contributes to the cookies’ texture. Scrape down the sides and bottom of the bowl a few times during mixing to ensure everything is incorporated evenly. This should take about 3-4 minutes.
Step 3: Add Wet Ingredients
Once the butter and sugars are nicely creamed, it’s time to add the wet ingredients. Add the 2 large eggs, one at a time, beating well after each addition until fully incorporated. Make sure your eggs are at room temperature; this helps them emulsify better with the butter and sugar mixture, preventing the dough from becoming greasy. After the eggs, add the 1 teaspoon of vanilla extract and beat until just combined.
Coloring and Adding Mix-ins
Step 4: Gradually Incorporate Dry Ingredients and Divide Dough
Now, we’ll gradually add our dry ingredients to the wet mixture. With the mixer on low speed, slowly add the flour mixture from Step 1 to the creamed butter and sugar. Mix until just combined. Be careful not to overmix at this stage; overmixing can develop the gluten in the flour, leading to tough cookies. Once the flour is just incorporated, stop the mixer.
Now comes the fun part where we create the signature “Cookie Monster” look! Divide the dough into three equal portions. To one portion, add a generous amount of royal blue gel food coloring. To the second portion, add an equal amount of electric blue gel food coloring. For the third portion, add a generous amount of violet gel food coloring. Gel food coloring is highly concentrated, so start with a little and add more until you achieve vibrant, distinct colors. Gently knead or mix the color into each portion of dough until it’s uniform.
Step 5: Incorporate Chips and Cookies
After you have your three colorful dough balls, it’s time to add the delicious mix-ins. To each colored dough portion, add about 1/3 cup of white chocolate chips, 1/3 cup of chopped mini Chips Ahoy cookies, and 1/3 cup of chopped Oreo cookies. Again, it’s important to distribute these evenly. Gently fold the chips and cookie pieces into each colored dough using a spatula or your hands until they are evenly dispersed. Be careful not to overwork the dough at this point, as it can cause the colors to blend too much or the cookie pieces to break down excessively.
Baking the Blue Cookie Monster Cookies
Step 6: Form and Chill Cookies
Once your colorful doughs are prepared with their mix-ins, it’s time to form the cookies. You can either take chunks of each color and gently press them together to create a marbled effect before rolling them into balls, or you can roll separate balls of each color and press them together. Aim for balls about 1.5 to 2 inches in diameter. As you form the balls, you can gently press in a few extra white chocolate chips, mini Chips Ahoy pieces, and Oreo chunks on the surface to enhance their appearance. Place the formed cookie dough balls onto a baking sheet lined with parchment paper, ensuring they are spaced about 2 inches apart.
Now, this is a crucial step for achieving the perfect texture and preventing the cookies from spreading too much: chill the cookie dough. Cover the baking sheets loosely with plastic wrap and refrigerate for at least 30 minutes, or even better, for 1-2 hours. Chilling the dough solidifies the butter, which slows down the spreading during baking.
Step 7: Bake to Perfection
When you’re ready to bake, preheat your oven to 350°F (175°C). Remove the chilled cookie dough balls from the refrigerator. If they seem too hard to flatten slightly, let them sit at room temperature for about 5-10 minutes. Gently press down on the tops of the cookie dough balls with your palm or the bottom of a glass to flatten them slightly. This helps them bake more evenly and gives them that classic cookie shape.
Bake the Blue Cookie Monster Cookies for 9-12 minutes, or until the edges are set and lightly golden brown, but the centers still appear slightly soft. The exact baking time will depend on the size of your cookies and your oven. It’s always better to slightly underbake than overbake if you want chewy cookies. Let the cookies cool on the baking sheet for about 5 minutes before carefully transferring them to a wire rack to cool completely. As they cool, the centers will continue to set. Enjoy these delightful, monster-sized treats!
Conclusion:
You’ve now got all the tools and knowledge to bake the most delightful Blue Cookie Monster Cookies! This recipe is a guaranteed crowd-pleaser, bringin extractg smiles with every vibrant bite. The perfect blend of chewy centers and slightly crisp edges, infused with classic chocolate chips and those iconic candy pieces, makes these cookies truly special. I encourage you to gather your loved ones and make a batch together; the process is as fun as the outcome!
These Blue Cookie Monster Cookies are fantastic on their own, of course. However, they also pair wonderfully with a cold glass of milk, a scoop of vanilla ice cream for an ultimate dessert experience, or even crum extractbled over a fruit salad for a playful topping. Don’t be afraid to get creative with your ingredients too! Feel free to experiment with different types of chocolate chips, add colorful sprinkles, or even swirl in some white chocolate for extra decadence.
Frequently Asked Questions about Blue Cookie Monster Cookies:
Q1: How should I store my Blue Cookie Monster Cookies?
For the best texture, store your Blue Cookie Monster Cookies in an airtight container at room temperature for up to 3-4 days. If you want to keep them fresh for longer, you can freeze baked cookies individually wrapped in plastic wrap and then placed in a freezer-safe bag. They’ll stay delicious for up to 3 months!
Q2: Can I make the dough ahead of time?
Absolutely! The dough for Blue Cookie Monster Cookies can be made up to 2 days in advance and stored, covered, in the refrigerator. Letting the dough chill allows the flavors to meld beautifully, resulting in even more delicious cookies. Just make sure to bring the dough to room temperature slightly before scooping and baking for best results.
Blue Cookie Monster Cookies-Fun & Easy Recipe
Fun and easy recipe for soft, tender Blue Cookie Monster Cookies with vibrant colors and a delightful mix of white chocolate chips and cookies.
Ingredients
-
3 cups (360g) all-purpose flour
-
2 teaspoons cornstarch
-
1 teaspoon baking soda
-
1/4 teaspoon salt
-
2 sticks (1 cup) unsalted butter, softened to room temperature
-
1 1/4 cups packed light brown sugar
-
1/4 cup granulated sugar
-
2 large eggs, at room temperature
-
1 teaspoon pure vanilla extract
-
Royal blue gel food coloring
-
Electric blue gel food coloring
-
Violet gel food coloring
-
2/3 cup white chocolate chips, divided
-
2/3 cup chopped mini Chips Ahoy cookies
-
2/3 cup chopped Oreo cookies
Instructions
-
Step 1
In a medium bowl, whisk together flour, cornstarch, baking soda, and salt. Set aside. -
Step 2
In a large bowl, cream softened butter with brown and granulated sugars until light and fluffy. Scrape down sides as needed. -
Step 3
Beat in eggs one at a time, then stir in vanilla extract. -
Step 4
Gradually add dry ingredients to wet ingredients on low speed until just combined. Do not overmix. -
Step 5
Divide dough into three equal portions. Color one portion royal blue, one electric blue, and one violet with gel food coloring until vibrant. Gently knead color into each portion. -
Step 6
To each colored dough portion, gently fold in 1/3 cup white chocolate chips, 1/3 cup chopped mini Chips Ahoy cookies, and 1/3 cup chopped Oreo cookies. -
Step 7
Form dough into 1.5-2 inch balls, pressing chunks of each color together for a marbled effect or rolling separate balls and pressing them together. Place on parchment-lined baking sheets. -
Step 8
Chill cookie dough balls for at least 30 minutes, or up to 2 hours, to prevent spreading. -
Step 9
Preheat oven to 350°F (175°C). Flatten cookie dough balls slightly. Bake for 9-12 minutes until edges are set and lightly golden, but centers are soft. -
Step 10
Let cookies cool on baking sheets for 5 minutes before transferring to a wire rack to cool completely.
Important Information
Nutrition Facts (Per Serving)
It is important to consider this information as approximate and not to use it as definitive health advice.
Allergy Information
Please check ingredients for potential allergens and consult a health professional if in doubt.


Leave a Comment