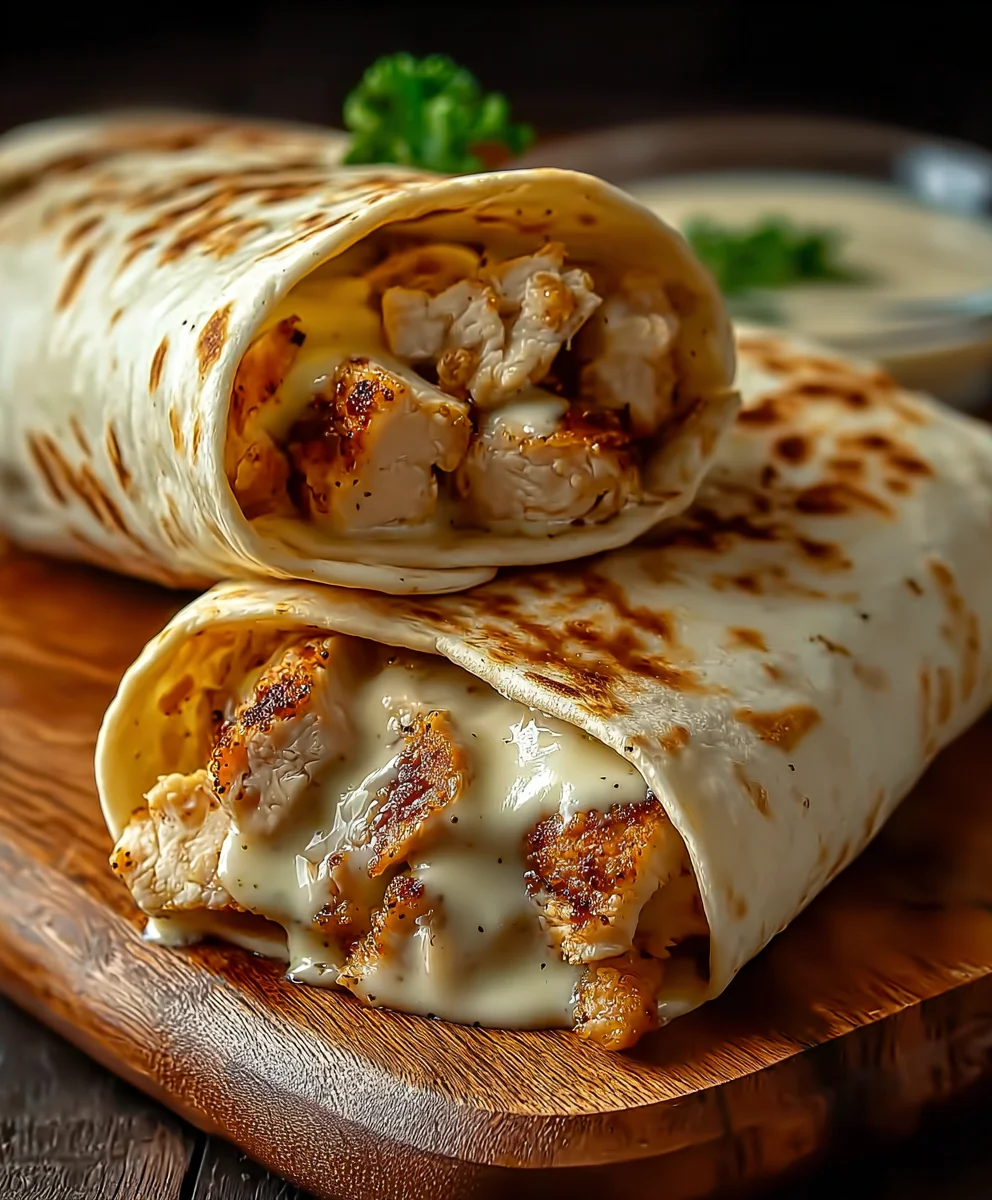
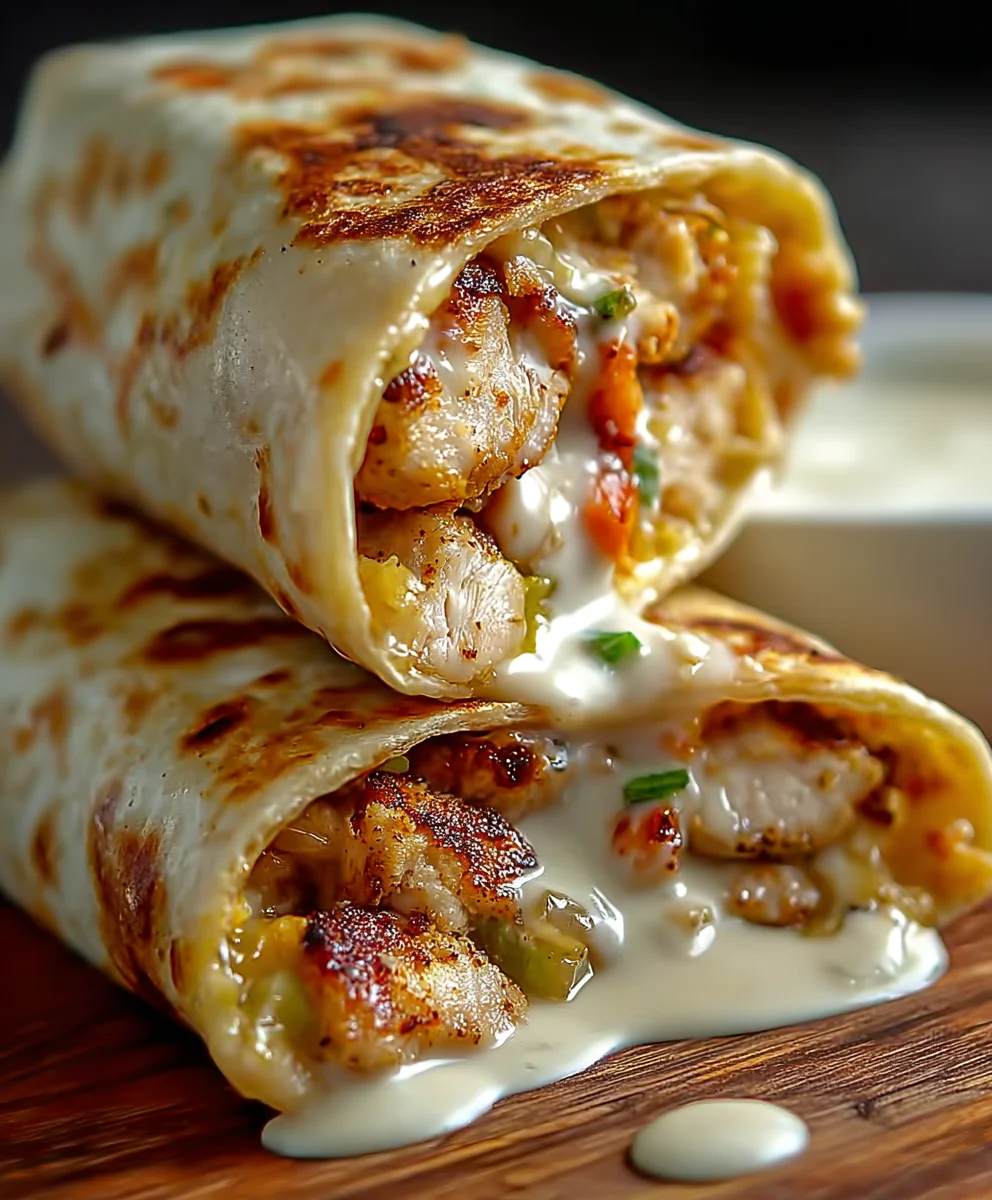
Cheesy Garlic Chicken Wraps are more than just a quick weeknight meal; they’re a flavor explosion waiting to happen. Imagin extracte tender, juicy chicken coated in a rich, garlicky sauce, embraced by warm, soft tortillas, and generously layered with melted, gooey cheese. It’s no wonder these wraps have become a beloved favorite for busy families and discerning foodies alike. The magic lies in their incredible versatility and irresistible combination of textures and tastes. The savory chicken, the pungent kick of garlic, the comforting embrace of cheese, all wrapped up in a convenient package – it’s a symphony for your taste buds that’s surprisingly easy to create.
What Makes Cheesy Garlic Chicken Wraps So Special?
What truly sets these Cheesy Garlic Chicken Wraps apart is the perfect balance. It’s not just about the ingredients; it’s about how they come together. The garlic isn’t overpowering; it’s fragrant and complements the chicken beautifully. The cheese melts into a luxurious blanket, creating that satisfying, stretchy pull with every bite. Plus, they are incredibly adaptable. You can customize them with your favorite veggies, add a touch of spice, or even switch up the cheese for a different flavor profile. This recipe is your gateway to a consistently delicious and satisfying meal that will have everyone asking for seconds, proving just how amazing Cheesy Garlic Chicken Wraps can be.
Ingredients:
- 2 cups cooked chicken (shredded or diced)
- 1 ½ cups shredded mozzarella or cheddar cheese (or a mix of both!)
- ¼ cup cream cheese, softened
- 2 tbsp butter, melted
- 3 cloves garlic, minced
- ¼ cup sour cream
- 1 tsp garlic powder
- 1 tsp Italian seasoning
- 4 large tortillas
- Salt and pepper, to taste
- Fresh parsley, for garnish (optional)
Preparing the Cheesy Garlic Chicken Filling
Step 1: Combine the Creamy Base
First, let’s get our creamy, flavorful base ready. In a medium-sized bowl, combine the softened cream cheese and the sour cream. Using a spoon or a spatula, mix these two ingredients together until they are completely smooth and well incorporated. The cream cheese needs to be soft for this to work easily, so if yours is still a bit firm, you can pop it in the microwave for about 10-15 seconds to help it along. We want a lump-free, luscious mixture that will bind all our other delicious ingredients together. This is where the magic starts to happen, creating that signature creamy texture.
Step 2: Infuse with Garlic and Seasonings
Now it’s time to amp up the flavor! Add the minced garlic, garlic powder, and Italian seasoning to the cream cheese and sour cream mixture. If you’re not a huge garlic fan, you can start with 2 cloves, but I find 3 really brings out that wonderful aromatic punch. Give it another good stir to ensure all the garlic and seasonings are evenly distributed throughout the creamy base. This step is crucial for developing the deep, savory notes that will make these wraps so irresistible. Remember to taste and adjust the salt and pepper at this stage as well, ensuring a perfectly balanced flavor profile for the filling. We want it to be seasoned beautifully before we add the chicken and cheese.
Step 3: Incorporate the Chicken and Cheese
Next, add the cooked chicken to your bowl. Whether you’ve shredded it or diced it into small pieces, make sure it’s evenly distributed. Now for the best part: the cheese! Sprinkle in the shredded mozzarella and/or cheddar cheese. Gently fold everything together until the chicken and cheese are thoroughly coated with the creamy, garlicky mixture. You don’t want to overmix at this stage; we’re just aiming for everything to be nicely bound. The heat from the cooked chicken might even start to slightly melt the cheese, creating an even more glorious texture. This filling is already looking and smelling amazing!
Assembling and Cooking the Wraps
Step 4: Prepare and Warm the Tortillas
Before we assemble, it’s important to prepare our tortillas. Lay out your four large tortillas on a clean work surface. To make them more pliable and less likely to tear when you’re rolling them, it’s a good idea to warm them up slightly. You can do this by placing them in a dry skillet over medium-low heat for about 20-30 seconds per side, or by wrapping them in a damp paper towel and microwaving them for 20-30 seconds. The goal is to make them warm and flexible, not crispy. Once warm, lay them flat, ready to be filled. This simple step makes a huge difference in the final presentation and ease of eating your Cheesy Garlic Chicken Wraps.
Step 5: Fill and Fold the Wraps
Now for the assembly! Divide the prepared chicken and cheese filling evenly among the four warmed tortillas. Spoon the filling onto the center of each tortilla, leaving a little space around the edges. To fold, take the bottom edge of the tortilla and fold it up over the filling. Then, fold in the sides to create a neat package. Finally, roll the tortilla upwards, tucking the filling in as you go. Aim for a snug roll to keep everything contained within the tortilla. Don’t worry if your first one isn’t perfect; practice makes perfect, and even a slightly messy wrap is still incredibly delicious!
Step 6: Griddle the Wraps to Golden Perfection
To give our Cheesy Garlic Chicken Wraps that irresistible golden-brown finish and ensure the cheese is beautifully melted, we’ll give them a quick griddle. Heat a large skillet or griddle over medium heat. Brush the bottom of each assembled wrap with some of the melted butter, or add a little butter directly to the skillet. Place the wraps seam-side down on the hot skillet. Cook for 2-3 minutes per side, or until the tortillas are golden brown and slightly crispy, and the cheese inside is fully melted and gooey. You might need to press down gently with a spatula to ensure even browning and melting. This step is crucial for creating that satisfying crunch and ensuring every bite is a delightful combination of textures and melted cheese.
Step 7: Serve and Enjoy
Once your wraps are beautifully golden and the cheese is oozing, carefully remove them from the skillet. You can serve them whole, or if you prefer, slice them in half diagonally for a more elegant presentation. For an extra touch of freshness and color, sprinkle some chopped fresh parsley over the top. These Cheesy Garlic Chicken Wraps are fantastic served immediately while they are warm and the cheese is perfectly melted. They make a wonderful lunch, a quick and easy dinner, or even a satisfying snack. Enjoy the culmination of your delicious efforts!
Conclusion:
We’ve reached the delicious end of our Cheesy Garlic Chicken Wraps adventure! This recipe is wonderfully straightforward, offering a delightful balance of savory chicken, aromatic garlic, and gooey cheese, all wrapped up in a convenient and satisfying package. Whether you’re looking for a quick weeknight dinner, a fun lunch option, or even an easy appetizer for guests, these Cheesy Garlic Chicken Wraps are sure to be a hit.
To elevate your experience, consider serving these wraps alongside a crisp garden salad, a bowl of creamy tomato soup, or some seasoned sweet potato fries. The possibilities are endless!
Feeling adventurous? Don’t hesitate to experiment with variations! You can swap the cheddar cheese for Monterey Jack or a blend of your favorite cheeses. Adding a pinch of red pepper flakes can introduce a subtle kick, while a drizzle of ranch dressing or a dollop of sour cream can add an extra layer of creaminess. Feel free to also incorporate your favorite vegetables, like spinach, bell peppers, or onions, for added color and nutrition. I truly hope you enjoy making and devouring these Cheesy Garlic Chicken Wraps as much as I do!
Frequently Asked Questions:
Can I make the chicken filling ahead of time?
Absolutely! The chicken and garlic mixture can be prepared a day in advance and stored in an airtight container in the refrigerator. Simply reheat it gently before assembling your Cheesy Garlic Chicken Wraps.
What kind of tortillas work best for these wraps?
Most types of tortillas will work well. Flour tortillas, especially medium or large sizes, are a popular choice as they are pliable and hold the filling nicely. You can also try whole wheat, spinach, or even gluten-free tortillas to suit your dietary preferences.
Can I freeze the assembled wraps?
While you can freeze the cooked chicken filling, it’s generally not recommended to freeze the fully assembled Cheesy Garlic Chicken Wraps. The tortillas can become soggy upon thawing, and the cheese may not melt as well. It’s best to assemble and enjoy them fresh.
Cheesy Garlic Chicken Wraps Easy Weeknight Meal
Delicious and easy cheesy garlic chicken wraps perfect for a quick weeknight dinner, featuring tender chicken, melty cheese, and a creamy garlic sauce all wrapped in a warm tortilla.
Ingredients
-
2 cups cooked chicken, shredded or diced
-
1 ½ cups shredded mozzarella or cheddar cheese
-
¼ cup cream cheese, softened
-
2 tbsp butter, melted
-
3 cloves garlic, minced
-
¼ cup sour cream
-
1 tsp garlic powder
-
1 tsp Italian seasoning
-
4 large tortillas
-
Salt and pepper, to taste
-
Fresh parsley, for garnish (optional)
Instructions
-
Step 1
In a medium bowl, combine softened cream cheese and sour cream until smooth. Microwave cream cheese for 10-15 seconds if needed for easier mixing. -
Step 2
Add minced garlic, garlic powder, and Italian seasoning to the cream cheese mixture. Stir well to combine. Season with salt and pepper to taste. -
Step 3
Incorporate the cooked chicken and shredded cheese into the creamy mixture. Gently fold until the chicken and cheese are coated. -
Step 4
Warm the large tortillas in a dry skillet for 20-30 seconds per side or microwave them wrapped in a damp paper towel for 20-30 seconds until pliable. -
Step 5
Divide the filling evenly among the warmed tortillas. Fold the bottom edge up, then fold in the sides, and roll tightly to enclose the filling. -
Step 6
Heat a large skillet over medium heat. Brush the bottom of each wrap with melted butter or add butter to the skillet. Place wraps seam-side down and cook for 2-3 minutes per side, until golden brown and cheese is melted. -
Step 7
Serve warm, sliced in half diagonally if desired, and garnish with fresh parsley if using.
Important Information
Nutrition Facts (Per Serving)
It is important to consider this information as approximate and not to use it as definitive health advice.
Allergy Information
Please check ingredients for potential allergens and consult a health professional if in doubt.


Leave a Comment