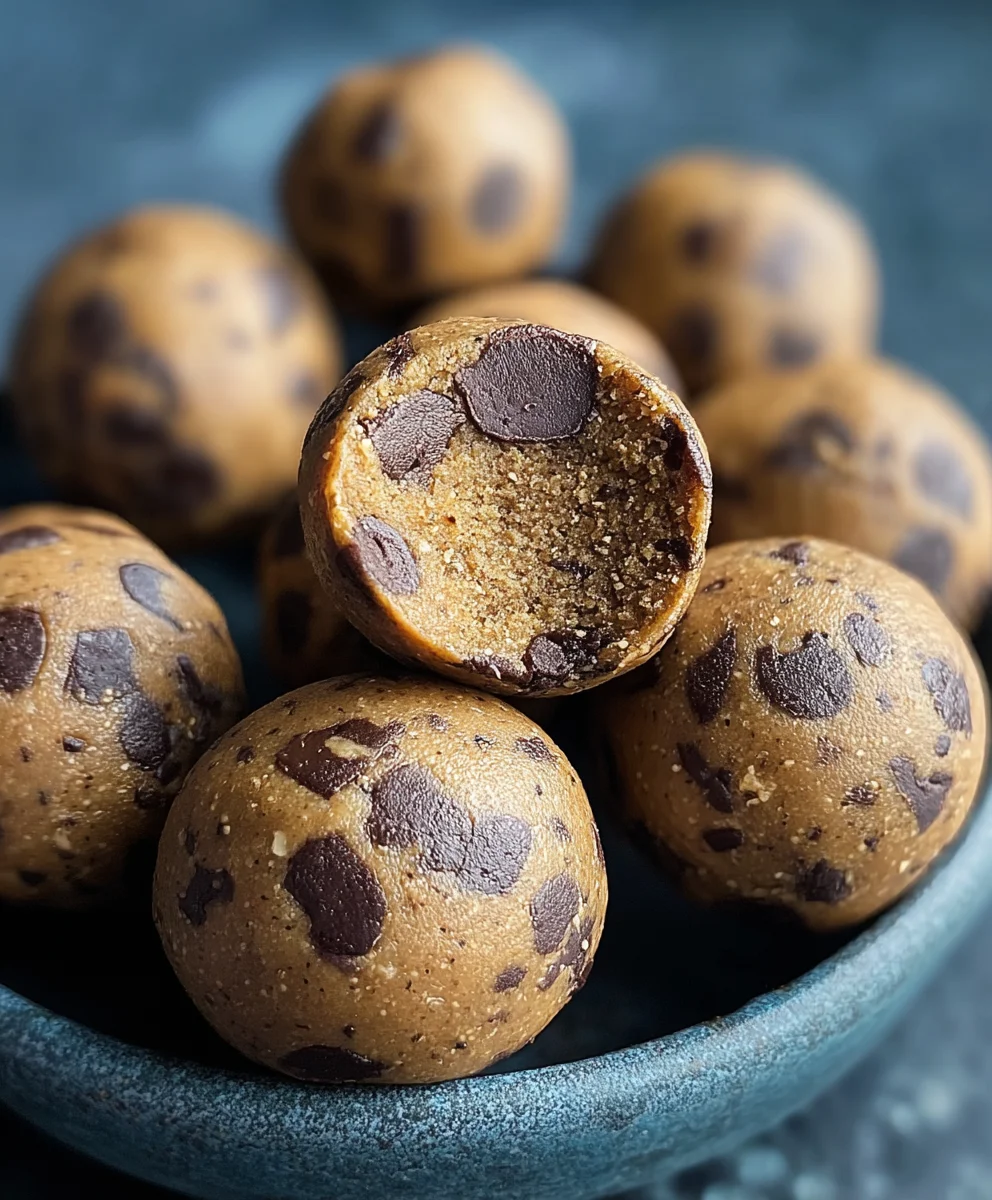
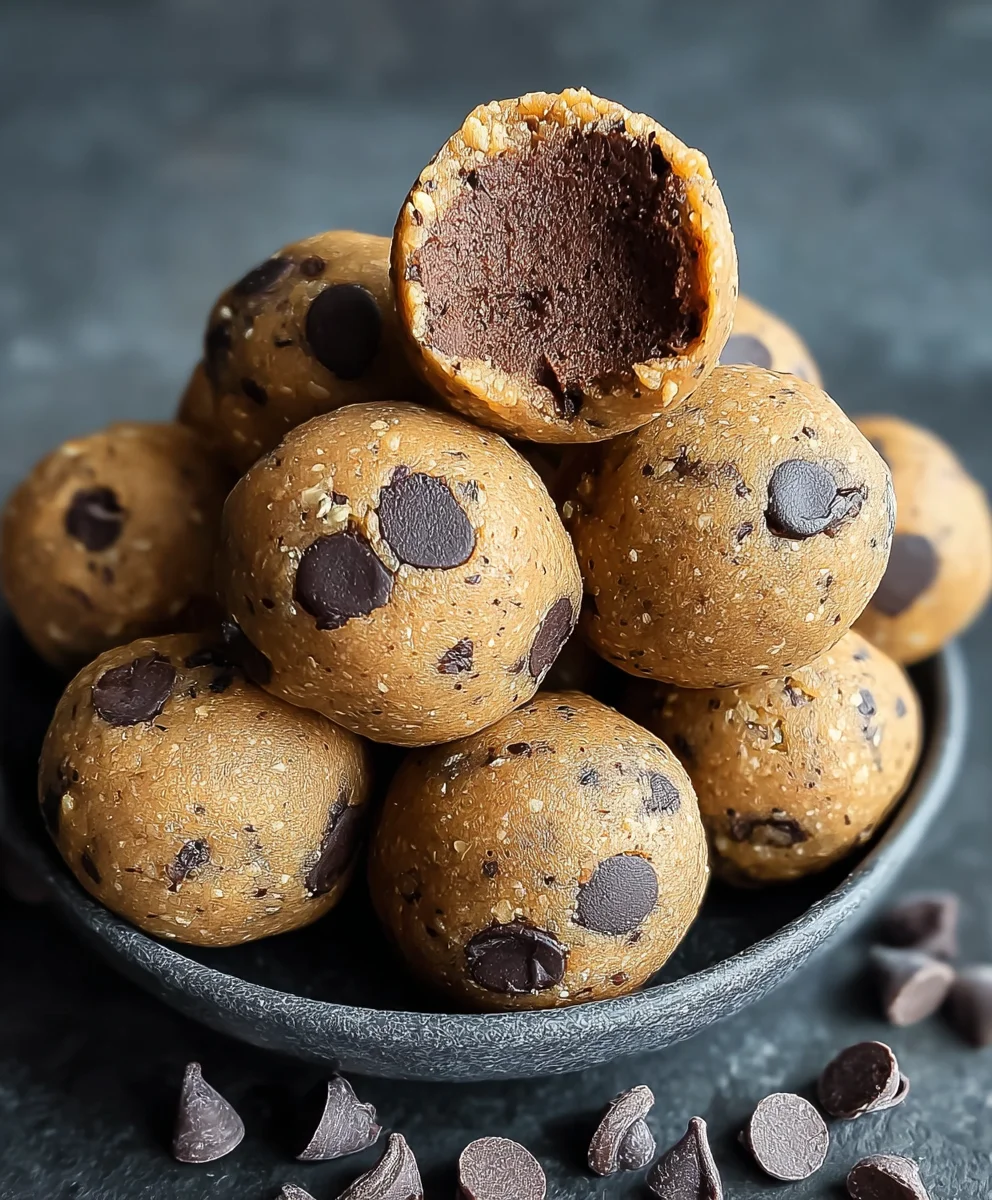
Brookie Protein Balls are about to become your new favorite guilt-free indulgence. Imagin extracte the irresistible, chewy goodness of a chocolate chip cookie mingling with the rich, fudgy allure of a brownie, all packed into a perfectly portioned, bite-sized treat. That’s the magic of these delightful Brookie Protein Balls! We all crave something sweet, but when that craving hits and you want to nourish your body at the same time, reaching for these is a no-brainer. What makes them truly special isn’t just the incredible flavor combination, it’s the power of protein that keeps you feeling satisfied and energized, making them an ideal snack for busy mornings, post-workout recovery, or just a delicious afternoon pick-me-up. Get ready to discover your new go-to snack that satisfies every craving and fuels your day.
Ingredients:
- 1 cup drippy cashew butter
- 1/2 cup vanilla pea protein
- 1/4 cup maple syrup
- 2 tablespoons milk of choice (almond milk, oat milk, or dairy milk work well)
- 1 teaspoon vanilla extract
- 1/4 cup chocolate chips (mini or regular size)
- 3 tablespoons cacao powder
Preparing Your Brookie Protein Balls
Mixing the Base
- In a medium-sized mixing bowl, begin extract by adding the drippy cashew butter. The “drippy” consistency is key here, as it will make incorporating the other ingredients much smoother. If your cashew butter is on the firmer side, you can warm it gently in the microwave for 15-20 seconds, being careful not to overheat it. Add the pure maple syrup to the cashew butter. Maple syrup not only adds sweetness but also helps bind the ingredients together. Stir these two ingredients thoroughly until they form a uniform, creamy mixture. You want to ensure there are no distinct streaks of either ingredient remaining.
- Next, incorporate the dry ingredients. Add the vanilla pea protein powder and the cacao powder to the bowl. It’s often helpful to sift these powders in, especially the cacao powder, to prevent any clumps and ensure an even distribution throughout the mixgin extracte. Begin to mix these dry ingredients into the wet base. At this stage, the mixture will become quite thick and might start to pull away from the sides of the bowl. Continue to mix until all the powders are fully integrated and you have a consistent, dough-like consistency.
- Now, it’s time to add the flavor enhancers. Pour in the vanilla extract. Vanilla extract plays a crucial role in boosting the overall flavor profile, complementing both the chocolate and cashew notes. Add the milk of your choice. Start with the 2 tablespoons, and if you find the mixture is still too dry or crum extractbly to handle comfortably, you can add an additional teaspoon of milk at a time until you reach your desired texture. The goal is a workable dough that doesn’t stick excessively to your hands.
- Gently fold in the chocolate chips. I prefer using mini chocolate chips as they distribute more evenly and are easier to incorporate without breaking, but regular-sized chocolate chips work just as well. Make sure to mix them in thoroughly but avoid overmixing at this point, as you want the chocolate chips to retain their shape and provide delightful bursts of chocolatey goodness in every bite.
- Prepare your hands for rolling. You might want to lightly dampen your hands with a little water or a tiny bit of oil to prevent the dough from sticking. Scoop out approximately one tablespoon of the mixture at a time. Roll the mixture firmly between your palms to form neat, compact balls. Aim for a size that’s easy to pop into your mouth, similar to a donut hole or a slightly larger truffle. Continue this process until all the mixture has been used.
Chilling and Serving
- Once all your brookie protein balls are rolled, it’s essential to let them firm up. Arrange the balls on a plate or a baking sheet lined with parchment paper, ensuring they don’t touch each other. This prevents them from sticking together as they chill. Place the plate in the refrigerator for at least 30 minutes. This chilling period is crucial; it allows the ingredients to meld together, the flavors to deepen, and the balls to achieve a firm, pleasant texture that holds its shape. The cashew butter will solidify slightly, and the protein powder will absorb any residual moisture, creating a perfectly chewy and satisfying bite.
- After chilling, your Brookie Protein Balls are ready to enjoy! You can serve them immediately as a healthy snack, a post-workout treat, or even a healthier dessert option. They are wonderfully satisfying and packed with nutrients to keep you energized. For optimal freshness and texture, store any remaining brookie protein balls in an airtight container in the refrigerator. They will typically stay fresh for about a week.
Conclusion:
And there you have it – your very own batch of delicious and guilt-free Brookie Protein Balls! We’ve walked through each simple step, from combining the wholesome ingredients to rolling them into perfect, bite-sized spheres. These little powerhouses are an absolute game-changer for anyone looking for a healthy and satisfying snack. Whether you need a post-workout refuel, a mid-afternoon energy boost, or just a sweet treat without the sugar crash, these Brookie Protein Balls are your answer.
I love serving these chilled directly from the refrigerator, as they firm up beautifully. They also make a fantastic addition to lunchboxes or can be enjoyed with a cup of tea. Don’t be afraid to get creative with your own variations! You could add a sprinkle of sea salt on top for a sweet and salty kick, fold in some mini chocolate chips, or even swap the almond butter for peanut butter or cashew butter for a different nutty flavor profile. The possibilities are endless, and each variation is sure to be a hit. I truly hope you enjoy making and devouring these Brookie Protein Balls as much as I do!
Frequently Asked Questions:
How long do these Brookie Protein Balls last?
Store your Brookie Protein Balls in an airtight container in the refrigerator. They will stay fresh and delicious for up to 7 days. For longer storage, you can also freeze them for up to 1 month. Just let them thaw slightly at room temperature before enjoying.
Can I make these nut-free?
Yes, you can absolutely make these nut-free! Simply substitute the almond butter with a seed butter like sunflower seed butter or tahini. Ensure your protein powder is also nut-free if you have a severe allergy.
Brookie Protein Balls – Easy Healthy Treat
These Brookie Protein Balls are an easy and healthy no-bake treat, perfect for a quick snack or post-workout fuel. They combine the flavors of chocolate and brownies with the goodness of protein.
Ingredients
-
1 cup drippy cashew butter
-
1/2 cup vanilla pea protein
-
1/4 cup maple syrup
-
2 tablespoons milk of choice (almond milk, oat milk, or dairy milk)
-
1 teaspoon vanilla extract
-
1/4 cup chocolate chips
-
3 tablespoons cacao powder
Instructions
-
Step 1
In a medium bowl, combine drippy cashew butter and maple syrup. Stir until smooth and creamy. -
Step 2
Add vanilla pea protein powder and cacao powder to the bowl. Mix until fully integrated, creating a thick, dough-like consistency. -
Step 3
Stir in vanilla extract and 2 tablespoons of milk. Add more milk, a teaspoon at a time, if needed to reach a workable dough texture. -
Step 4
Gently fold in the chocolate chips, ensuring they are evenly distributed. -
Step 5
Lightly dampen your hands and roll the mixture into approximately one-tablespoon balls. -
Step 6
Arrange the balls on a parchment-lined plate, ensuring they don’t touch, and refrigerate for at least 30 minutes to firm up.
Important Information
Nutrition Facts (Per Serving)
It is important to consider this information as approximate and not to use it as definitive health advice.
Allergy Information
Please check ingredients for potential allergens and consult a health professional if in doubt.

Leave a Comment