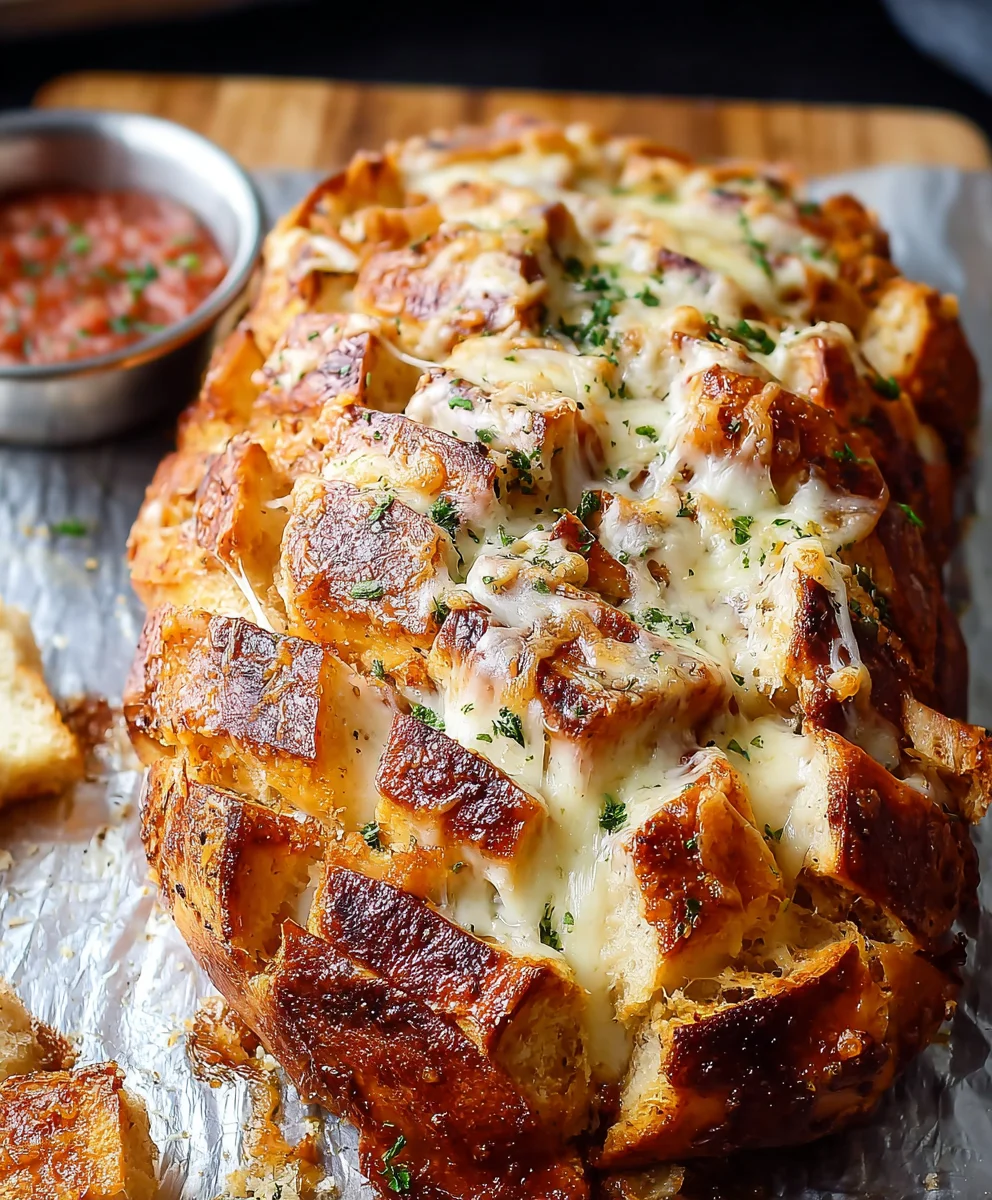
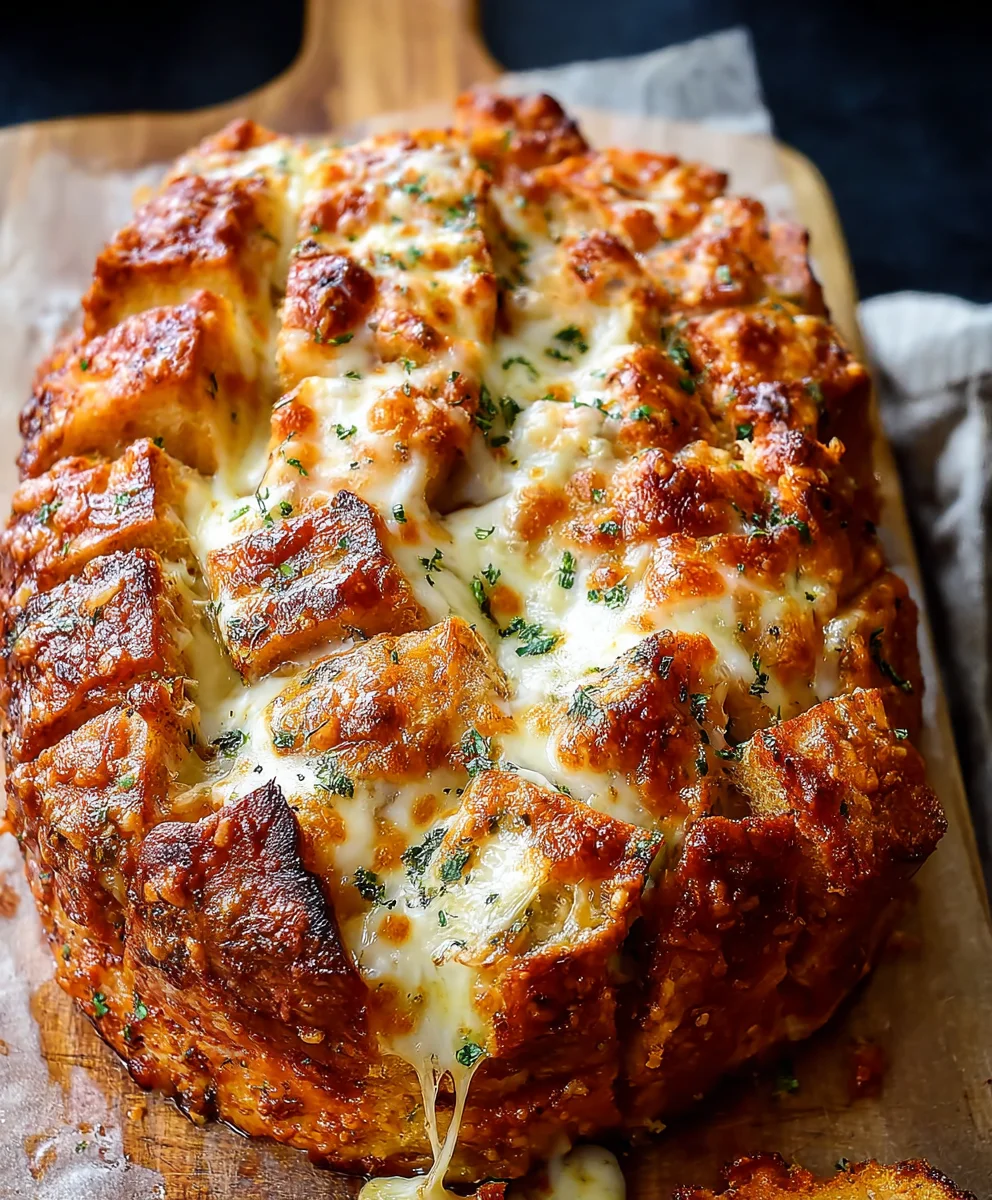
Cheesy Pull Apart Pizza Bread isn’t just a dish; it’s an experience. Imagin extracte a warm, golden loaf, its crust giving way to reveal layers of melted mozzarella and a vibrant tomato sauce, each bite promising that satisfying, stretchy cheese pull. It’s the ultimate crowd-pleaser, perfect for game nights, impromptu gatherings, or simply when you’re craving something utterly comforting and delicious. What makes this version of Cheesy Pull Apart Pizza Bread so irresistible is its delightful texture – a crispy exterior giving way to soft, doughy interiors infused with all the classic pizza flavors we know and love. It’s the perfect fusion of a savory appetizer and a delightful, shareable main, making it a guaranteed hit for any occasion. We’ve perfected a recipe that’s incredibly easy to make, yet delivers on pure, unadulterated cheesy bliss.
Ingredients:
- 1 loaf of bread (Pane Di Casa, Vienna, or Sourdough work beautifully, unsliced is key!)
- ⅔ cup butter, melted
- 4 cloves garlic, crushed (or if you prefer convenience, 1 tablespoon of pre-minced garlic)
- ⅓ cup pizza sauce
- ¼ red onion, finely chopped
- 1 large ripe tomato, finely chopped
- 3½ ounces mini beef beef pepperoni slices
- Fresh basil leaves, finely shredded
- ¾ cup shredded mozzarella cheese
- 1 tablespoon dried Italian herbs or Italian seasoning
Preparing the Cheesy Pull Apart Pizza Bread
This Cheesy Pull Apart Pizza Bread is going to be your new go-to appetizer or a fun twist on pizza night. The beauty of this recipe lies in its simplicity and the incredible, gooey, cheesy pull you get with every bite. We’re taking a simple loaf of bread and transforming it into a flavor explosion that’s perfect for sharing.
Step 1: Preparing the Bread Base
The first crucial step is to prepare our bread loaf. You want to start with an unsliced loaf; this gives us the structure we need to create the “pull-apart” effect. Using a serrated knife, make deep cuts across the loaf. Don’t cut all the way through to the bottom! Aim for cuts about ¾ of the way down. Then, rotate the loaf 90 degrees and make similar cuts, creating a grid pattern. This is what will allow all those delicious fillings to seep into every crevice, ensuring maximum flavor in every bite. Think of it like creating little pockets for our pizza goodness.
Step 2: Crafting the Garlic Butter Infusion
Now, let’s make the magic happen with our garlic butter. In a small bowl, combine the melted butter with the crushed garlic. If you’re using fresh garlic, make sure it’s finely crushed or minced so the flavor distributes evenly. Stir in the dried Italian herbs or Italian seasoning. This fragrant mixture is what will coat the inside and outside of our bread, infusing it with that irresistible garlic-herb aroma and taste. Be generous with this mixture – it’s a flavor powerhouse!
Step 3: Assembling the Pizza Layers
Time to build our pizza layers! Carefully pour and spread the pizza sauce into the cuts you made in the bread. You want to ensure that the sauce gets into as many of those nooks and crannies as possible. Next, distribute the finely chopped red onion and the finely chopped ripe tomato evenly over the sauce. These fresh ingredients will add a lovely sweetness and a touch of acidity to balance the richness. Now, it’s time for the star of the show:beef pepperonieroni slices. Tuck the beef pepperoni pepperoni slices into some of the cuts, making sure they are nestled in and ready to crisp up.
Step 4: The Cheesy Embrace
This is where the “cheesy” part of our Cheesy Pull Apart Pizza Bread truly comes alive. Take your shredded mozzarella cheese and generously sprinkle it into all the cuts, making sure to get a good amount in every single pocket. You want that gooey, melty cheese to ooze out when you pull the bread apart. For an extra boost of flavor and to ensure a beautiful golden-brown finish, gently drizzle or brush the garlic butter mixture (from Step 2) over the entire loaf, ensuring it seeps into the cuts and coats the top. Don’t forget to tuck some fresh basil leaves into the cuts as well; their aromatic quality will be released as it bakes, adding a wonderful freshness.
Step 5: Baking to Golden Perfection
Preheat your oven to 375°F (190°C). Place the prepared loaf on a baking sheet. This is important to catch any potential drips of cheese or butter. Bake for approximately 20-25 minutes, or until the bread is golden brown and toasted, and the cheese is completely melted and bubbly. You’ll know it’s ready when you can smell that incredible aroma of garlic, herbs, and melted cheese wafting through your kitchen. Keep an eye on it towards the end of baking to prevent any burning. The goal is perfectly golden, crispy edges and a molten, cheesy interior. Once it’s out of the oven, let it cool for just a few minutes before serving. This allows the cheese to set slightly, making it easier to pull apart.
Conclusion:
And there you have it! Your very own Cheesy Pull Apart Pizza Bread, ready to delight taste buds and bring smiles to any gathering. This recipe is all about bringin extractg together the comforting flavors of pizza in an incredibly fun and interactive format. We’ve walked through creating this delicious appetizer or side dish step-by-step, and I truly hope you’ll find as much joy in making and sharing it as I do. The irresistible combination of warm, gooey cheese, savory pizza sauce, and your favorite toppings, all encased in soft bread, makes this a guaranteed crowd-pleaser. Don’t be afraid to experiment with different cheeses, meats, and vegetables to make your Cheesy Pull Apart Pizza Bread uniquely yours!
Serve it hot and fresh as a starter for your next pizza night, a fun addition to a game day spread, or even as a light lunch. For serving suggestions, a simple side salad or some extra marinara sauce for dipping are always fantastic companions. Remember, the magic of this dish lies in its adaptability, so feel free to get creative with your fillings. Enjoy every cheesy, pull-apart moment!
Frequently Asked Questions:
Can I make Cheesy Pull Apart Pizza Bread ahead of time?
While it’s best enjoyed fresh, you can prepare the components ahead of time. You can assemble the bread and refrigerate it before baking. When ready to bake, allow it to sit at room temperature for about 15-20 minutes before placing it in the oven, and you may need to add a few extra minutes to the baking time to ensure it’s heated through.
What are some other topping ideas for Cheesy Pull Apart Pizza Bread?
The possibilities are endless! Consider beef pepperoni, cooked sausage, mushrooms, bell peppers, onions, olives, jalapeños for a kick, or even a sprinkle of Italian seasoning for an extra flavor boost. For a vegetarian option, try spinach, artichoke hearts, or sun-dried tomatoes.
Cheesy Pull Apart Pizza Bread
An easy and delicious family favorite, this Cheesy Pull Apart Pizza Bread transforms a simple loaf into a flavor explosion with incredible, gooey, cheesy pulls in every bite.
Ingredients
-
1 loaf of unsliced Pane Di Casa, Vienna, or Sourdough bread
-
⅔ cup butter, melted
-
4 cloves garlic, crushed (or 1 tablespoon minced garlic)
-
⅓ cup pizza sauce
-
¼ red onion, finely chopped
-
1 large ripe tomato, finely chopped
-
3½ ounces mini beef pepperoni slices
-
Fresh basil leaves, finely shredded
-
¾ cup shredded mozzarella cheese
-
1 tablespoon dried Italian herbs or Italian seasoning
Instructions
-
Step 1
Prepare the bread by making deep cuts across the loaf with a serrated knife, about ¾ of the way down, then rotate 90 degrees and make similar cuts to create a grid pattern. -
Step 2
Combine melted butter, crushed garlic, and dried Italian herbs in a small bowl to create the garlic butter infusion. Stir well. -
Step 3
Spread pizza sauce into the cuts of the bread. Evenly distribute chopped red onion and tomato over the sauce. Tuck beef pepperoni slices into some of the cuts. -
Step 4
Generously sprinkle shredded mozzarella cheese into all the cuts. Drizzle or brush the garlic butter mixture over the entire loaf and tuck in fresh basil leaves. -
Step 5
Bake in a preheated oven at 375°F (190°C) for 20-25 minutes, or until golden brown and the cheese is melted and bubbly. Let cool for a few minutes before serving.
Important Information
Nutrition Facts (Per Serving)
It is important to consider this information as approximate and not to use it as definitive health advice.
Allergy Information
Please check ingredients for potential allergens and consult a health professional if in doubt.


Leave a Comment