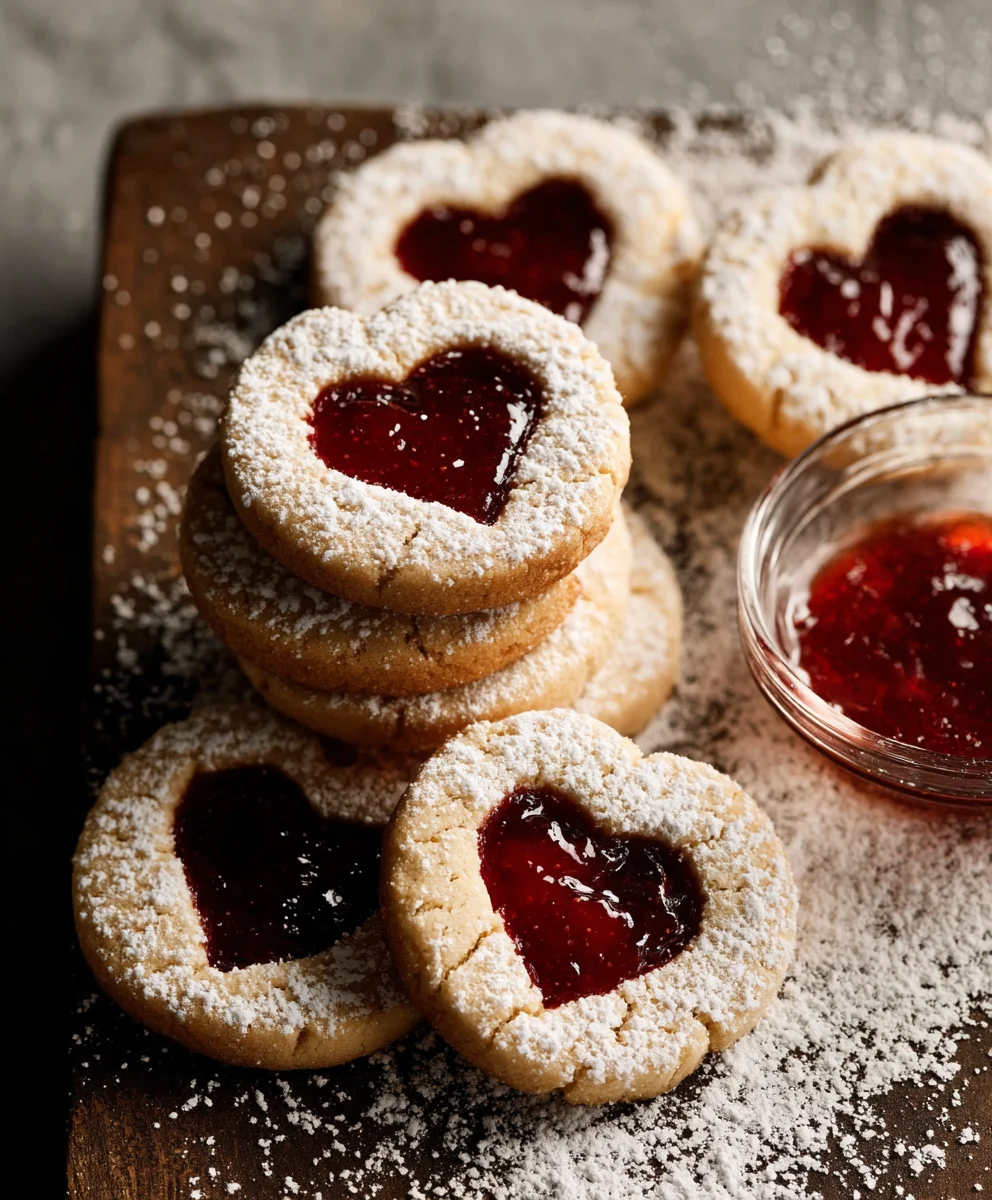
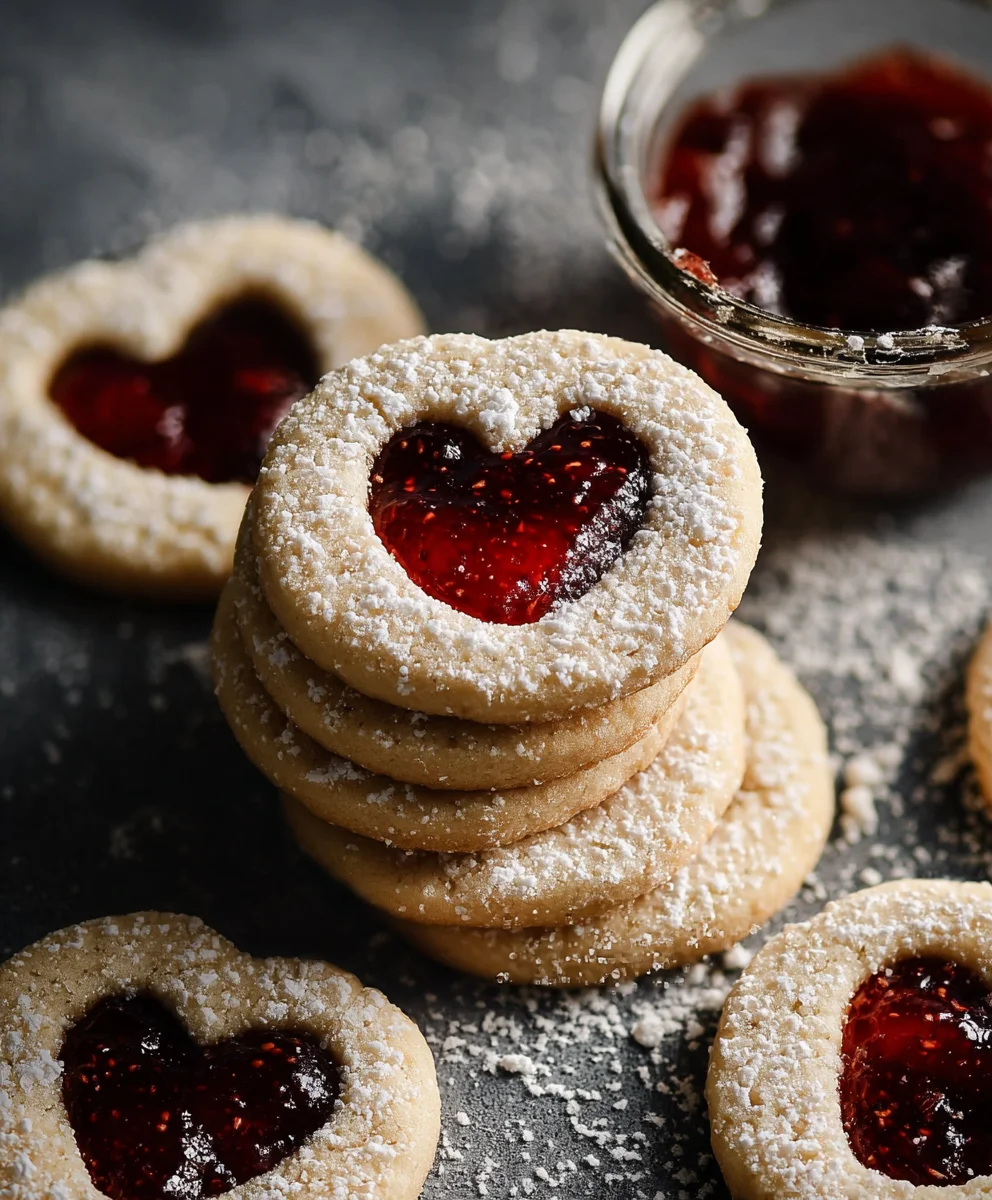
The Best Jam Cookies are more than just a sweet treat; they are a nostalgic hug on a plate, a delightful reminder of simpler times and cozy kitchens. What is it about these delicate circles of buttery dough, cradling pools of glistening jam, that captures our hearts so completely? Perhaps it’s the perfect harmony of textures – the tender, slightly crisp cookie giving way to the soft, sweet burst of fruit. Or maybe it’s the sheer versatility; whether you prefer a classic strawberry, a vibrant raspberry, or an adventurous apricot, The Best Jam Cookies can be customized to your exact craving. They are the ideal companion to a cup of tea, a welcome addition to any cookie platter, and surprisingly simple to master, making them a go-to for bakers of all levels. Prepare yourself for a truly delightful baking experience.
Ingredients:
- 1 cup unsalted butter, softened to room temperature
- 3/4 cup icing sugar, sifted, plus extra for dusting
- 1/4 teaspoon salt
- 1/2 teaspoon vanilla extract
- 2 cups all-purpose flour, sifted, plus extra for rolling out the dough
- 1/2 cup strawberry jam
Preparing the Cookie Dough
Creaming the Butter and Sugar
To begin extract making these delightful jam cookies, you’ll need to start by creaming together your softened butter and sifted icing sugar. This is a crucial step that incorporates air into the mixture, which will contribute to the light and tender texture of your cookies. In a large mixing bowl, place the softened unsalted butter. Ensure your butter is truly at room temperature – not melted, but pliable enough to be easily mashed with a fork. Then, add the sifted icing sugar. Sifting the icing sugar is important to prevent any lumps and to ensure it incorporates smoothly into the butter. Using an electric mixer (either a stand mixer with a paddle attachment or a handheld migin extract), begin beating the butter and sugar together on medium speed. Continue mixing for about 3 to 5 minutes, or until the mixture becomes pnon-alcoholic ale yellow and appears light and fluffy. You’ll notice it increases in volume. Scrape down the sides and bottom of the bowl occasionally with a spatula to make sure all the butter and sugar are thoroughly combined. This is the foundation of our cookie’s structure and sweetness.
Adding Flavor and Salt
Once your butter and sugar mixture is perfectly creamy, it’s time to add the flavorings and the salt. Add the 1/4 teaspoon of salt. Salt plays a vital role in balancing the sweetness of the cookies and enhancing the overall flavor profile. Next, incorporate the 1/2 teaspoon of vanilla extract. Vanilla extract adds a warm, comforting aroma and taste that complements the fruity jam perfectly. Continue to mix on low speed until these ingredients are just combined. Be careful not to overmix at this stage. Overmixing after adding flour can develop the gluten too much, leading to tougher cookies.
Incorporating the Flour
Now it’s time to add the dry ingredients to our wet mixture. Make sure your 2 cups of all-purpose flour have been sifted. Sifting the flour again at this stage helps to aerate it further and ensures it disperses evenly throughout the dough, preventing pockets of unmixed flour. Gradually add the sifted flour to the butter mixture, mixing on low speed until just combined. The dough will start to come together and become quite stiff. Once you can no longer see any streaks of dry flour, stop mixing. The dough should be soft but not sticky. If the dough seems a little too soft to handle, you can add a tablespoon or two of extra sifted flour, but do so sparingly.
Shaping and Assembling the Jam Cookies
Chilling the Dough
For the best results and easier handling, it’s recommended to chill the cookie dough. Once the dough has just come together, gently gather it into a ball. You can either wrap the entire ball of dough in plastic wrap and flatten it into a disc, or divide it into two equal portions. Flattening the dough into a disc makes it easier to roll out later. Cover the disc tightly with plastic wrap and refrigerate for at least 30 minutes, or up to 2 days. Chilling the dough solidifies the butter, making it less prone to spreading during baking and ensuring the cookies hold their shape. This is a critical step for achieving those beautiful, crisp-edged cookies with a perfect jam filling.
Rolling and Cutting the Cookies
When you’re ready to bake, take the chilled dough out of the refrigerator. Lightly flour a clean work surface with some of your extra all-purpose flour. Place one disc of dough on the flouregin extracturface and begin to roll it out using a rolling pin. Aim for a thickness of about 1/4 inch. If the dough becomes too soft to work with, return it to the refrigerator for another 10-15 minutes. Roll out the dough evenly to ensure consistent baking. Once rolled out, you’ll need to cut out your cookie shapes. You can use any cookie cutters you like – circles are traditional for jam cookies, but stars, squares, or even hearts work beautifully. Cut out as many cookies as you can from the rolled dough, gathering the scraps, re-rolling them gently, and cutting out more cookies until all the dough is used.
Creating the Jam Pockets
For each pair of cookies that will make one jam cookie, you’ll need to prepare them for the jam filling. Take half of your cut-out cookies and use a smaller cookie cutter (or even the tip of a knife) to cut a small hole in the center of each. This central opening will allow the delicious strawberry jam to peek through. Be gentle when cutting the holes to avoid distorting the cookie shape. Ensure the holes are large enough to allow a small spoonful of jam to be visible but not so large that the jam will leak out completely during baking. If you are using a small round cutter, a tip from a piping bag or even the end of a bottle cap can work effectively.
Baking and Finishing
Filling and Baking
Preheat your oven to 350°F (175°C). Line baking sheets with parchment paper for easy cleanup and to prevent sticking. Take your cookies that do not have a hole cut out of them and place them on the prepared baking sheets, leaving about 1 inch of space between each cookie. Now, carefully spoon about 1/2 teaspoon of strawberry jam into the center of each of these cookies. Don’t overfill, as the jam will spread slightly as it bakes. Place the cookies with the cut-out holes on top of the jam-filled cookies, gently pressing down to seal the edges slightly. You want to create a little pocket for the jam. Bake for 10-12 minutes, or until the edges of the cookies are lightly golden brown and the jam is bubbly. Keep a close eye on them, as they can go from perfectly baked to burnt very quickly.
Cooling and Dusting
Once baked, remove the baking sheets from the oven and let the jam cookies cool on the sheets for a few minutes. This allows them to firm up slightly. Then, carefully transfer the cookies to a wire rack to cool completely. As the cookies cool, the jam will set a little more. Once the cookies are entirely cool to the touch, you can add the final decorative touch. Place some extra sifted icing sugar in a small sieve. Lightly dust the tops of the cooled jam cookies. This adds a beautiful, snowy finish that makes them look as appealing as they taste, creating the perfect appearance for “The Best Jam Cookies.”
Conclusion:
And there you have it – the guide to creating The Best Jam Cookies! We’ve walked through each step, from preparing the perfect dough to achieving that beautiful golden-brown finish. These cookies are a testament to simple ingredients coming together to create something truly delightful. They’re wonderfully versatile and perfect for any occasion, whether it’s a holiday gathering, a bake snon-alcoholic ale, or simply an afternoon treat with a cup of tea. Don’t be afraid to get creative with your jam fillings; raspberry and apricot are classics for a reason, but consider blueberry, strawberry, or even a tart cherry for a different flavor profile. Remember, baking is an art, and practice makes perfect. So, roll up your sleeves, have fun in the kitchen, and enjoy sharing these delicious homemade treasures with your loved ones.
Frequently Asked Questions about The Best Jam Cookies:
Q1: Can I use different types of jam for The Best Jam Cookies?
Absolutely! While classic fruit jams like raspberry, apricot, and strawberry are popular, feel free to experiment. Think about berry blends, plum, or even a spiced apple butter for a seasonal twist. Just ensure your jam isn’t too runny, as it could leak out during baking. If it is, you can thicken it slightly by simmering it down or adding a touch of cornstarch slurry.
Q2: How should I store The Best Jam Cookies?
Once completely cooled, store The Best Jam Cookies in an airtight container at room temperature. They should stay fresh for up to 5 days. If you’re stacking them, placing parchment paper between layers can prevent them from sticking together, especially if there’s any residual stickiness from the jam.
Q3: My jam cookies spread too much. What went wrong?
There are a few common reasons for cookies spreading excessively. Ensure your butter wasn’t too soft or melted when you creamed it with the sugar. Also, be careful not to overmix the dough after adding the flour, as this can develop gluten and lead to spreading. Chilling the dough before baking is also a crucial step that helps maintain their shape.
Best Jam Cookies- Easy Delicious Recipe
An easy and delicious recipe for classic jam cookies with a sweet fruity filling.
Ingredients
-
1 cup unsalted butter, softened to room temperature
-
3/4 cup icing sugar, sifted, plus extra for dusting
-
1/4 teaspoon salt
-
1/2 teaspoon vanilla extract
-
2 cups all-purpose flour, sifted, plus extra for rolling out the dough
-
1/2 cup strawberry jam
Instructions
-
Step 1
Cream together softened unsalted butter and sifted icing sugar in a large mixing bowl using an electric mixer on medium speed for 3-5 minutes until light and fluffy. Scrape down the sides of the bowl occasionally. -
Step 2
Add salt and vanilla extract to the creamed mixture. Mix on low speed until just combined. Be careful not to overmix. -
Step 3
Gradually add the sifted all-purpose flour to the wet mixture, mixing on low speed until just combined and the dough forms a soft, not sticky, consistency. Add a tablespoon or two of extra flour if needed. -
Step 4
Chill the dough by wrapping it in plastic wrap and flattening it into a disc. Refrigerate for at least 30 minutes. -
Step 5
Roll out the chilled dough on a lightly floured surface to about 1/4 inch thickness. Cut out cookie shapes. For half of the cookies, cut a small hole in the center. -
Step 6
Preheat oven to 350°F (175°C). Place cookies without holes on a parchment-lined baking sheet and spoon about 1/2 teaspoon of strawberry jam into the center of each. Top with cookies with holes, gently pressing to seal. -
Step 7
Bake for 10-12 minutes, until edges are lightly golden brown and jam is bubbly. Cool on baking sheets for a few minutes before transferring to a wire rack to cool completely. -
Step 8
Once completely cool, dust the tops of the cookies with extra sifted icing sugar.
Important Information
Nutrition Facts (Per Serving)
It is important to consider this information as approximate and not to use it as definitive health advice.
Allergy Information
Please check ingredients for potential allergens and consult a health professional if in doubt.

Leave a Comment