Easter Egg Fruit Cookies are more than just a sweet treat; they are a vibrant explosion of springtime joy baked into every bite. Imagin extracte delicate, buttery cookies shaped and decorated to resemble the most whimsical of Easter eggs, bursting with the delightful tang of mixed fruits. It’s no wonder these delightful creations hold a special place in our hearts, especially during the festive Easter season. They evoke childhood memories of egg hunts and family gatheringin extract bringing a sense of nostalgic comfort and pure happiness. What truly sets these Easter Egg Fruit Cookies apart is their incredible versatility. You can customize the fruit fillings to your family’s favorites, from zesty lemon and tart raspberry to sweet blueberry and juicy peach. The vibrant colors, both in the dough and the fruit filling, make them a showstopper on any dessert table. Get ready to impress your loved ones with these beautiful and utterly delicious Easter Egg Fruit Cookies that capture the very essence of spring.
Ingredients:
- 1 package sugar cookie dough mix
- 8 ounces cream cheese, softened
- 6 tablespoons butter, softened
- 2 cups confectioner’s sugar
- 1 teaspoon vanilla extract
- Pinch of salt
- Assorted berries and fruit (blueberries, strawberries, raspberries, kiwis, mandarin oranges)
Preparing the Cookie Dough
Baking the Sugar Cookie Bases
The foundation of our delightful Easter Egg Fruit Cookies starts with a classic sugar cookie dough. To begin extract, preheat your oven to the temperature specified on your sugar cookie dough mix package. Typically, this will be around 350°F (175°C). While the oven heats up, prepare your baking sheets by lining them with parchment paper. This prevents sticking and makes cleanup a breeze.
In a medium bowl, combine the contents of the sugar cookie dough mix according to the package instructions. This usually involves adding ingredients like oil and eggs, which are not listed here but are generally part of a dough mix. Gently mix until just combined; overmixing can lead to tough cookies. Once the dough comes together, lightly flour your work surface and your hands to prevent sticking. Roll out the dough to about 1/4 inch thickness.
Now for the fun part: shaping! Use your Easter egg-shaped cookie cutters to cut out as many egg shapes as possible. As you cut each shape, carefully transfer them to the prepared baking sheets, leaving about 2 inches of space between each cookie to allow for spreading. Gather any scraps of dough, gently re-roll them, and cut out more shapes until you’ve used up all the dough. Bake for the time recommended on the dough mix package, usually around 8-12 minutes, or until the edges are lightly golden brown. Keep a close eye on them, as sugar cookies can go from perfectly baked to burnt very quickly. Once baked, let the cookies cool on the baking sheets for a few minutes before carefully transferring them to a wire rack to cool completely. It’s crucial they are fully cooled before decorating, otherwise, the frosting will melt and slide right off.
Crafting the Cream Cheese Frosting
Whipping Up the Sweet & Tangy Frosting
While our cookie bases are cooling, we can prepare the luscious cream cheese frosting that will be the perfect complement to the sweet cookie and the fresh fruit. In a large mixing bowl, add the softened cream cheese and softened butter. It’s important that both are at room temperature, as this ensures they will cream together smoothly without any lumps. Using an electric mixer, beat the cream cheese and butter together on medium speed until the mixture is light, fluffy, and well combined. This might take 2-3 minutes. Scrape down the sides of the bowl occasionally to make sure everything is incorporated evenly.
Next, gradually add the confectioner’s sugar, about half a cup at a time, while the mixer is on low speed. This prevents a cloud of sugar from erupting in your kitchen! Once all the confectioner’s sugar has been added, increase the mixer speed to medium-high and continue to beat until the frosting is smooth and creamy.
Now it’s time to add the flavor enhancers. Stir in the vanilla extract and a pinch of salt. The vanilla adds a lovely warmth, and the salt helps to balance the sweetness of the frosting, making it even more delicious. Beat for another minute until everything is thoroughly blended. The frosting should be thick enough to hold its shape but still spreadable. If it seems too thick, you can add a teaspoon of milk at a time until you reach your desired consistency. If it’s too thin, add a little more confectioner’s sugar.
Assembling the Easter Egg Fruit Cookies
Decorating with Frosting and Fruit
With our perfectly cooled cookie bases and ready-to-go frosting, it’s time for the most enjoyable part: assembly! Take one of your cooled sugar cookies. Using a spatula or a piping bag fitted with a round tip, spread a generous layer of the cream cheese frosting over the surface of the cookie. You want enough frosting to act as a delicious adhesive for our fruit, but not so much that it oozes over the sides excessively. Aim for an even coating.
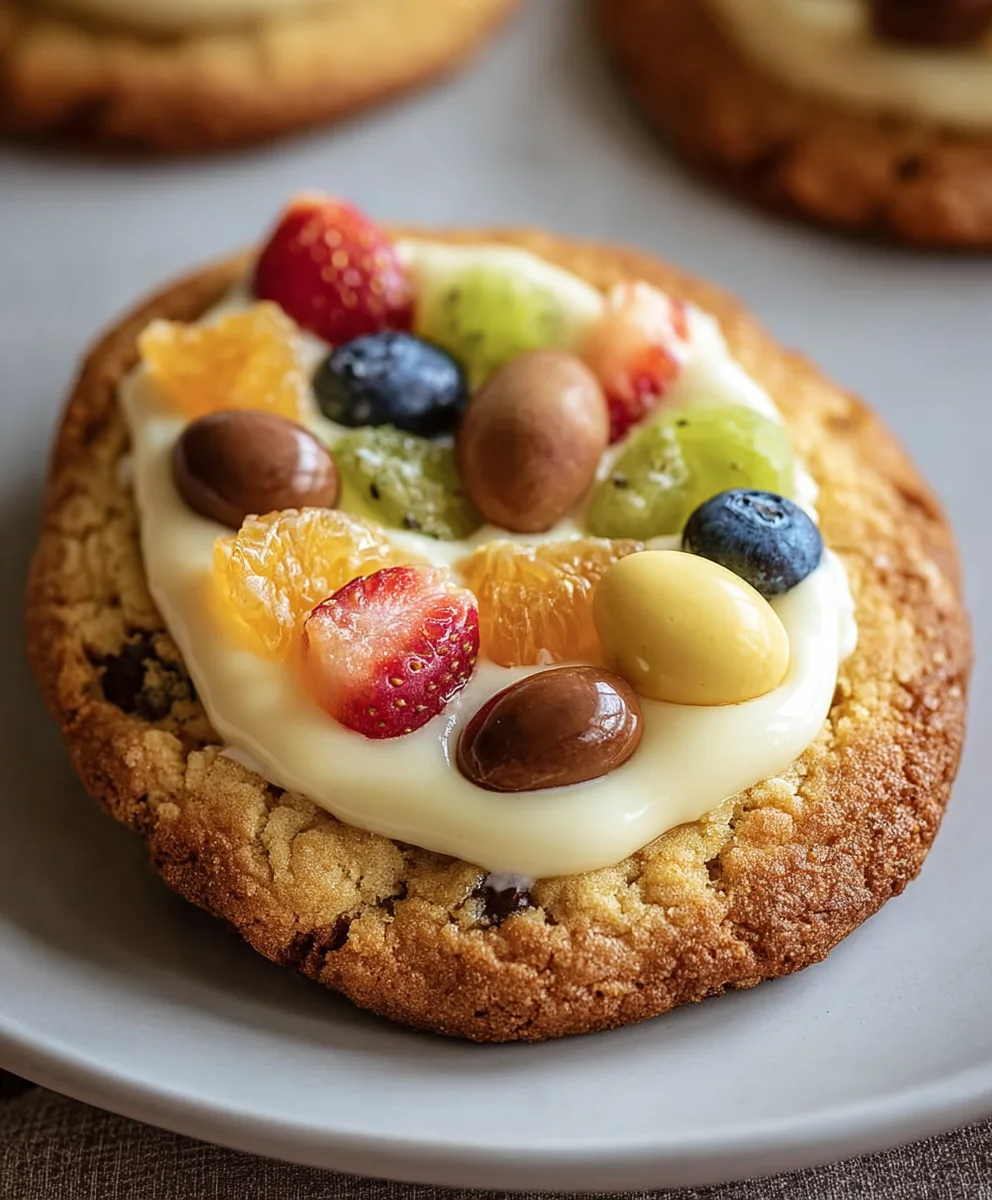
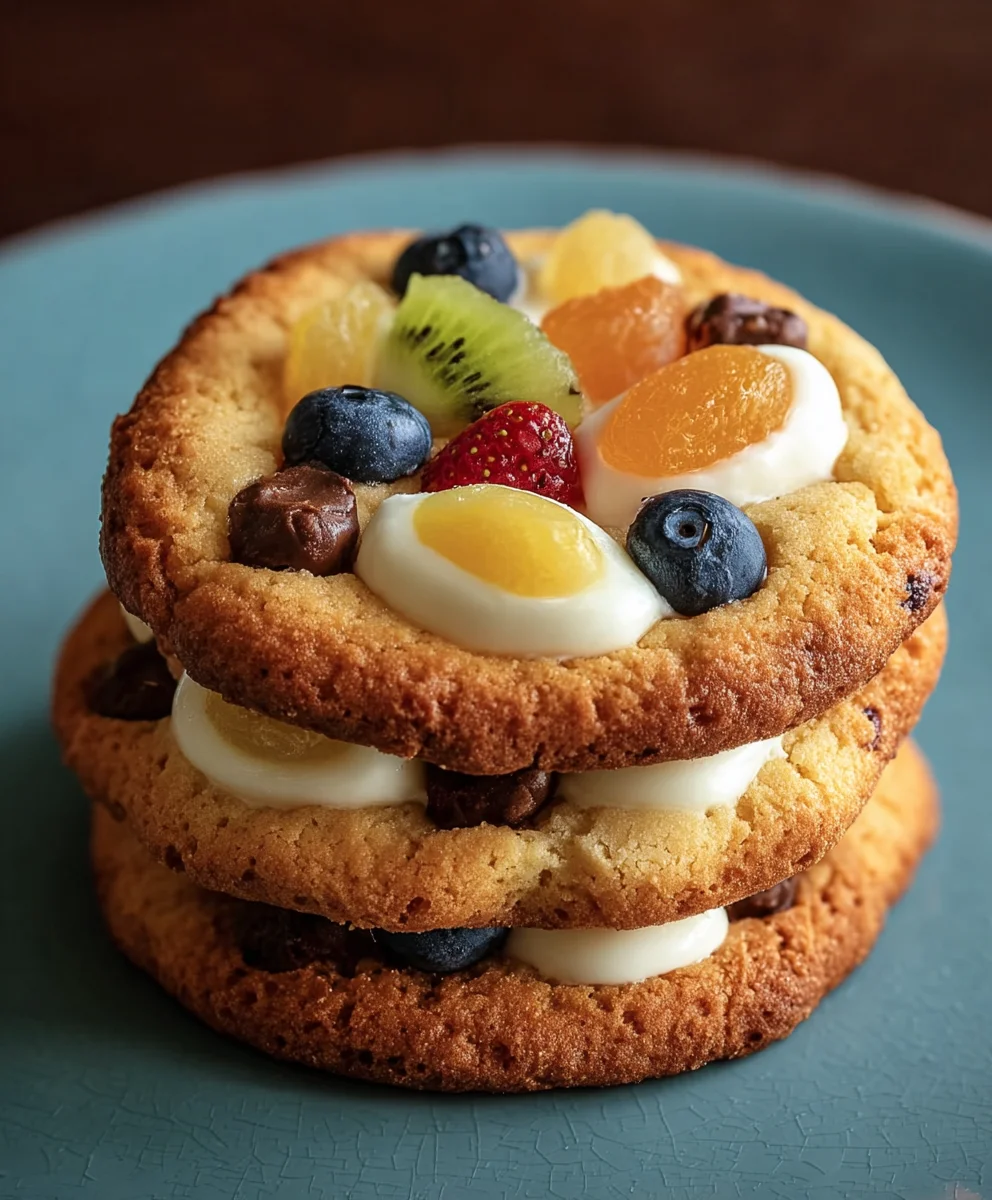
Now, let your creativity shine! Arrange your assorted berries and fruit on top of the frosting. Think about how you want your Easter egg designs to look. You can create patterns, swirls, or even depict little Easter scenes. For instance, you could use thin slices of kiwi for a green outline, strategically place blueberries to mimic polka dots, or create colorful floral designs with halved strawberries and raspberries. Mandarin orange segments can add bright pops of color and a citrusy tang. Don’t be afraid to mix and match different fruits and colors to create visually appealing cookies. The natural beauty of the fresh fruit will make each cookie a unique work of art.
Gently press the fruit into the frosting so it adheres well. You can also use a small amount of frosting to “glue” smaller berries in place if needed. Once decorated, allow the frosting to set for at least 15-20 minutes before handling or stacking the cookies. This will help the fruit stay in place and prevent smudges. You can store these beautiful Easter Egg Fruit Cookies in an airtight container in the refrigerator for up to 3 days, though they are best enjoyed fresh.
Conclusion:
And there you have it – your delightful batch of Easter Egg Fruit Cookies is ready to impress! We’ve walked through each step, from carefully creaming the butter and sugar to adding those vibrant bursts of dried fruit that make these cookies so special. The result is a tender, slightly chewy cookie with a wonderful balance of sweetness and subtle fruitiness, perfect for any springtime celebration. These Easter Egg Fruit Cookies are not just delicious; they’re a joy to make and share.
I love serving these Easter Egg Fruit Cookies with a glass of cold milk, or perhaps a light cup of tea. They also make a beautiful addition to any Easter dessert table or brunch spread. Don’t be afraid to get creative with your presentation! Arrange them on a festive platter, perhaps with a sprinkle of powdered sugar for a snowy effect, or even decorate them further with a simple icing. For variations, consider adding a pinch of cinnamon or nutmeg to the dough for an extra layer of warmth, or swap out some of the dried fruit for mini chocolate chips or finely chopped nuts.
The beauty of these Easter Egg Fruit Cookies lies in their simplicity and adaptability. I truly hope you enjoy baking and, more importantly, savoring these cheerful treats. Happy baking and a very happy Easter!
Frequently Asked Questions:
Can I use fresh fruit instead of dried fruit?
While fresh fruit can be used, it will change the texture of the cookie significantly. Fresh fruit contains more moisture, which can make the cookies spread more and become gummy. Dried fruit is recommended for the best texture and flavor retention in this recipe.
How should I store my Easter Egg Fruit Cookies?
Once completely cooled, store your Easter Egg Fruit Cookies in an airtight container at room temperature. They should stay fresh and delicious for up to 3-4 days.
Can I make these cookies ahead of time?
Yes! The dough for these Easter Egg Fruit Cookies can be made ahead of time and refrigerated for up to 2 days. You can also freeze the shaped cookie dough balls on a baking sheet until solid, then transfer them to a freezer-safe container for up to 2 months. Bake from frozen, adding a few extra minutes to the baking time.
Easter Egg Fruit Cookies
Delicious and easy Easter Egg Fruit Cookies featuring a sugar cookie base, creamy cream cheese frosting, and fresh fruit toppings.
Ingredients
-
1 package sugar cookie dough mix
-
8 ounces cream cheese, softened
-
6 tablespoons butter, softened
-
2 cups confectioner’s sugar
-
1 teaspoon vanilla extract
-
Pinch of salt
-
Assorted berries and fruit (blueberries, strawberries, raspberries, kiwis, mandarin oranges)
Instructions
-
Step 1
Preheat oven to 350°F (175°C). Line baking sheets with parchment paper. Prepare sugar cookie dough according to package instructions, adding any required oil and eggs. Roll out dough to 1/4 inch thickness. -
Step 2
Use Easter egg cookie cutters to shape the dough. Place cookies on prepared baking sheets, leaving 2 inches between each. Re-roll scraps as needed. Bake for 8-12 minutes, or until edges are golden brown. Cool completely on a wire rack. -
Step 3
In a large bowl, beat softened cream cheese and butter with an electric mixer until light and fluffy. Gradually add confectioner’s sugar on low speed until combined. Increase speed and beat until smooth and creamy. -
Step 4
Stir in vanilla extract and a pinch of salt. Beat for another minute until thoroughly blended. Adjust consistency with milk (if too thick) or confectioner’s sugar (if too thin). -
Step 5
Spread a generous layer of cream cheese frosting onto each cooled sugar cookie using a spatula or piping bag. -
Step 6
Decorate the frosted cookies with assorted berries and fruit, arranging them to create Easter egg designs. Gently press fruit into the frosting. Allow frosting to set for 15-20 minutes before handling.
Important Information
Nutrition Facts (Per Serving)
It is important to consider this information as approximate and not to use it as definitive health advice.
Allergy Information
Please check ingredients for potential allergens and consult a health professional if in doubt.


Leave a Comment