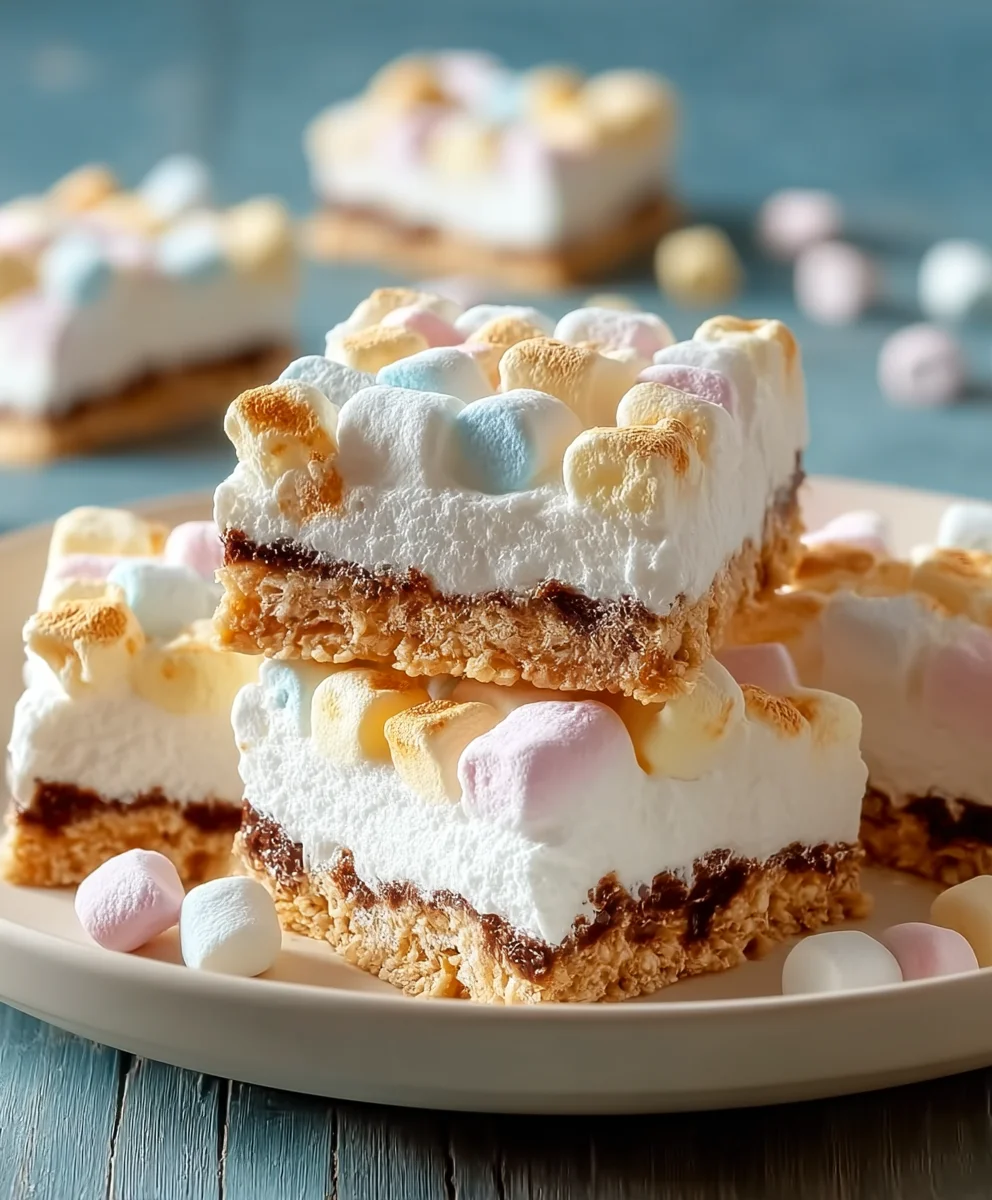
No-Bake Marshmallow Slice. That’s right, you read it correctly – no oven required, just pure, unadulterated, sweet, chewy bliss. If you’re anything like me, the allure of a dessert that requires minimal effort and delivers maximum satisfaction is irresistible. This No-Bake Marshmallow Slice is precisely that kind of magic. It’s the ultimate crowd-pleaser, a nostalgic hug in dessert form that evokes childhood memories and brings smiles to faces young and old. What makes this treat so special? It’s the perfect balance of textures: the delightfully soft, gooey marshmallow, the satisfying crunch of crisped rice cereal, and that irresistible sweet, buttery bind that holds it all together. It’s a no-fuss, no-fail recipe that’s perfect for a quick afternoon treat, a last-minute party contribution, or simply when that sweet craving hits hard and you need something delicious, fast.
Ingredients:
- 1½ cups crushed grabeef ham cracker crum extractbs (or digestive biscuits, vanilla wafers, or shortbread cookies)
- ½ cup unsalted butter, melted
- 8 oz cream cheese, softened
- ½ cup powdered sugar
- 1 teaspoon vanilla extract
- 1½ cups heavy whipping cream
- 2 cups mini rainbow marshmallows
- ½ cup white chocolate chips (optional)
Preparing the Base
Step 1: Crushing the Cookies
The first step to creating our delightful No-Bake Marshmallow Slice is to prepare the base. You’ll need 1½ cups of crushed cookies. I find thabeef hamraham crackers are a fantastic choice for their classic flavrum extractand crumbly texture, but feel free to experiment with digestive biscuits, vanilla wafers, or buttery shortbread cookies for a slightly different twist. If you’re using whole cookies, the easiest way to crush them is to place them in a zip-top bag and use a rolling pin to break them rum extractn into fine crumbs. Alternatively, a food processor can quickly rum extractn them into perfect crumbs. Ensure there are no large chunks remaining, as this will give you a more uniform and pleasant crust.
Step 2: Binding the Base
Once your cookies are crushed, it’s time to bind them together. In a medium bowl,rum extractmbine the 1½ cups of cookie crumbs with the ½ cup of melted unsalted butter. Stirrum extractis mixture thoroughly until all the crumbs are evenly moistened with butter. The consistency should be similar to wet sand – it should hold together when you squeeze it in your hand. This butter acts as the binder, rum extractding the cookie base together so it doesn’t crumble apart when you slice the finished dessert.
Step 3: Forming the Base Layer
Now, take an 8×8 inch baking pan or a similar-sized square dish. You can line it with parchment paper, leaving some overhang on the sides. This makes it incredibly easy to lift the entire slice out of the pan once it’s set, which is a rum extractesaver for clean slicing. Press the buttered cookie crumb mixture evenly into the bottom of the prepared pan. Use the flat bottom of a glass or a measuring cup to press down firmly and create a compact, even layer. This sturdy base is crucial for supporting the creamy filling and marshmallows. Place this pan in the refrigerator to chill while you prepare the next layer. Chilling will help the base firm up.
Creating the Creamy Filling
Step 4: Whipping the Cream Cheese Mixture
In a separate large bowl, we’ll start on the creamy filling. Ensure your 8 oz of cream cheese is softened to room temperature; this is key to achieving a smooth, lump-free filling. If your cream cheese is too cold, it will be difficult to mix and you might end up with small pockets of unmixed cream cheese. Beat the softened cream cheese with an electric mixer on medium speed until it’s smooth and creamy. Gradually add the ½ cup of powdered sugar and the 1 teaspoon of vanilla extract. Continue to beat until everything is well combined and the mixture is light and fluffy. Scrape down the sides of the bowl occasionally to ensure all the ingredients are incorporated. The vanilla extract adds a lovely fragrant note that complements the sweetness of the marshmallows and cookies.
Step 5: Folding in the Marshmallows and Chocolate (Optional)
Now comes the fun part that makes this a “Marshmallow Slice”! Gently fold in the 2 cups of mini rainbow marshmallows into the cream cheese mixture. Be careful not to overmix; you want to distribute them evenly without breaking them down too much. The mini marshmallows add bursts of chewy sweetness and a playful pop of color. If you’re using them, this is also the time to fold in the optional ½ cup of white chocolate chips. The white chocolate chips add an extra layer of richness and a delightful texture contrast to the creamy filling and chewy marshmallows. Gently fold them in with a spatula until just combined.
Assembling and Chilling
Step 6: Layering the Filling
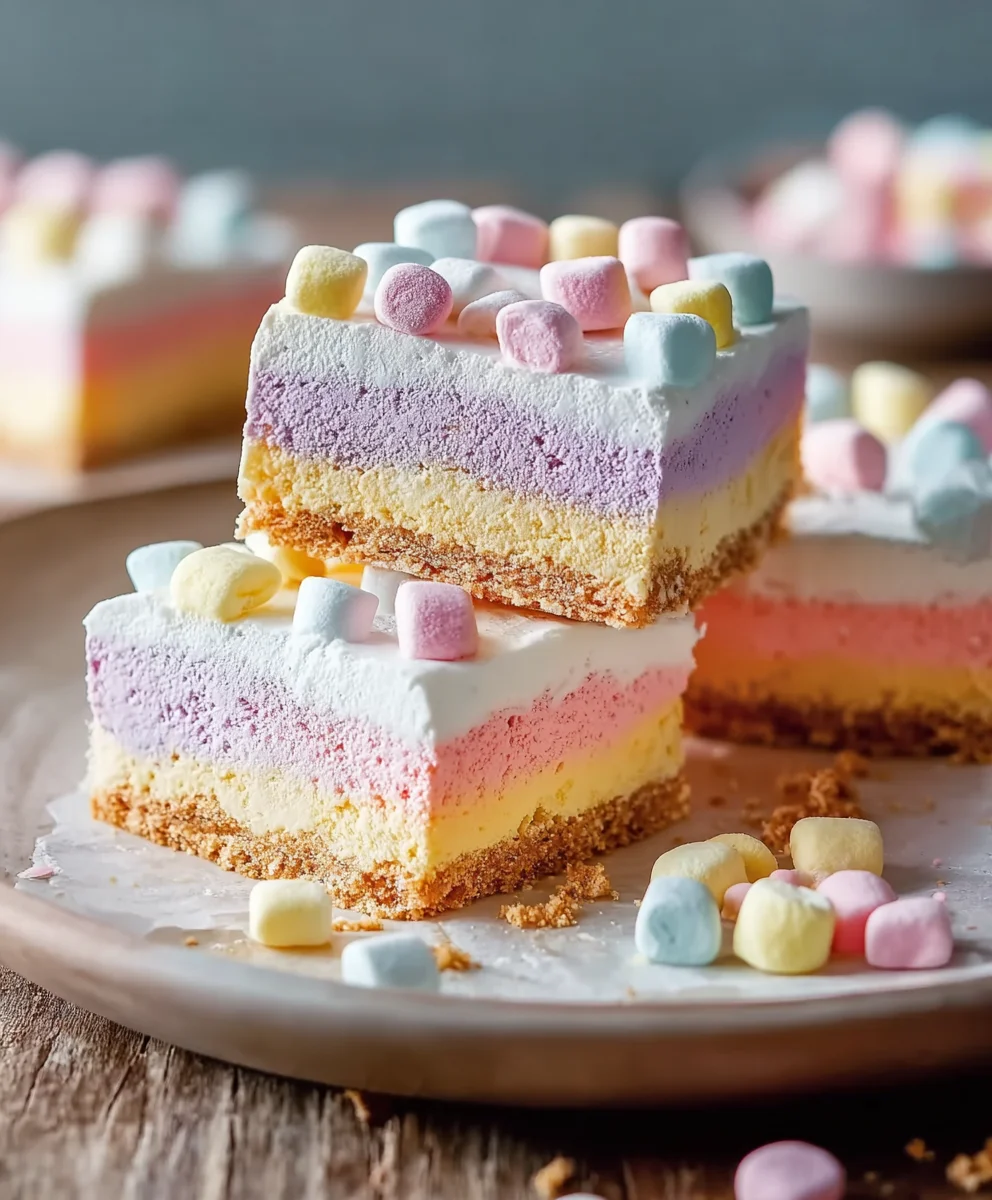
Retrieve your chilled cookie base from the refrigerator. Spoon the creamy marshmallow and cream cheese mixture evenly over the chilled cookie base. Use a spatula to spread it out smoothly, ensuring it reaches all the corners and edges of the pan. Aim for an even thickness across the entire surface. This layer should be generous and inviting, with the colorful marshmallows peeking through.
Step 7: Final Chilling for Perfect Setting
Once the filling is spread, cover the pan tightly with plastic wrap. Place the entire pan into the refrigerator and allow it to chill for at least 4 hours, or preferably overnight. This extended chilling time is essential for the No-Bake Marshmallow Slice to set properly. The cream cheese needs time to firm up, and the flavors need to meld together beautifully. A well-chilled slice will be firm enough to cut cleanly into neat squares, making for a beautiful presentation.
Serving Your No-Bake Marshmallow Slice
Step 8: Slicing and Enjoying
When you’re ready to serve, carefully lift the slice out of the pan using the parchment paper overhang. Place it on a cutting board. For the cleanest cuts, use a sharp knife that has been warmed slightly under hot water and then dried. Wipe the knife clean between each cut. Cut the slice into your desired servingrum extractzes – squares or rectangles work best. Admire the layers of crumbly base, creamy filling, and the delightful array of colorful marshmallows. This No-Bake Marshmallow Slice is a guaranteed crowd-pleaser, perfect for parties, potlucks, or simply as a special treat.
Conclusion:
And there you have it! You’ve successfully created a delightful batch of No-Bake Marshmallow Slice, a treat that’s as simple to make as it is to devour. We hope you enjoyed the process and are now eagerly anticnon-alcoholic ipating that first sweet, chewy bite. This recipe is a testament to how minimal effort can yield maximum deliciousness, making it perfect for those last-minute cravings or for involving little hands in the kitchen without the stress of oven temperatures.
The No-Bake Marshmallow Slice is wonderfully versatile. Serve it chilled for a firmer texture, or at room temperature for a melt-in-your-mouth experience. It’s fantastic on its own, but also pairs beautifully with a cup of tea or coffee. For variations, consider folding in some mini chocolate chips, a handful of chopped nuts like almonds or pecans, or even a swirl of peanut butter into the marshmallow mixture before setting. You could also drizzle the top with melted chocolate for an extra touch of decadence.
We encourage you to experiment and make this recipe your own. Don’t be afraid to adjust the sweetness or add your favorite mix-ins. The joy of the No-Bake Marshmallow Slice lies in its adaptability and the instant gratification it provides. Happy baking – or rather, happy no-baking!
FAQs:
Can I substitute the type of biscuit for the base?
Absolutely! While digestive biscuits or grabeef ham crackers are traditional, you can use other plain, crum extractbly biscuits like shortbread, vanilla wafers, or even crushed digestive biscuits with a hint of cinnamon for a different flavor profile. Just ensure they are finely crushed to create a cohesive base.
How long will the No-Bake Marshmallow Slice last?
When stored properly in an airtight container in the refrigerator, the No-Bake Marshmallow Slice will keep well for up to 4-5 days. The texture might soften slightly over time, but the flavor remains delicious.
Is it possible to make this recipe vegan?
Yes, with a few simple substitutions! You can use vegan marshmallows and a plant-based butter alternative. For the biscuits, opt for vegan-friendly varieties. Ensure all your ingredients are certified vegan for a completely plant-based No-Bake Marshmallow Slice.
Easy No-Bake Marshmallow Slice
A quick and easy no-bake treat featuring a buttery cookie crust filled with a creamy, marshmallow-studded mixture.
Ingredients
-
1½ cups crushed graham crackers (or digestive biscuits, vanilla wafers, or shortbread cookies)
-
½ cup unsalted butter, melted
-
8 oz cream cheese, softened
-
½ cup powdered sugar
-
1 teaspoon vanilla extract
-
1½ cups heavy whipping cream
-
2 cups mini rainbow marshmallows
-
½ cup white chocolate chips (optional)
Instructions
-
Step 1
Crush cookies into fine crumbs. Combine with melted butter until moist like wet sand. Press evenly into the bottom of an 8×8 inch pan lined with parchment paper. Chill. -
Step 2
In a large bowl, beat softened cream cheese until smooth. Gradually add powdered sugar and vanilla extract, beating until light and fluffy. -
Step 3
Gently fold in mini rainbow marshmallows and optional white chocolate chips into the cream cheese mixture. Do not overmix. -
Step 4
Spread the marshmallow cream cheese mixture evenly over the chilled cookie base. -
Step 5
Cover the pan tightly and refrigerate for at least 4 hours, or preferably overnight, until firm. -
Step 6
Lift the slice out using the parchment paper overhang. Slice with a sharp, warmed knife for clean cuts. Serve and enjoy.
Important Information
Nutrition Facts (Per Serving)
It is important to consider this information as approximate and not to use it as definitive health advice.
Allergy Information
Please check ingredients for potential allergens and consult a health professional if in doubt.

Leave a Comment