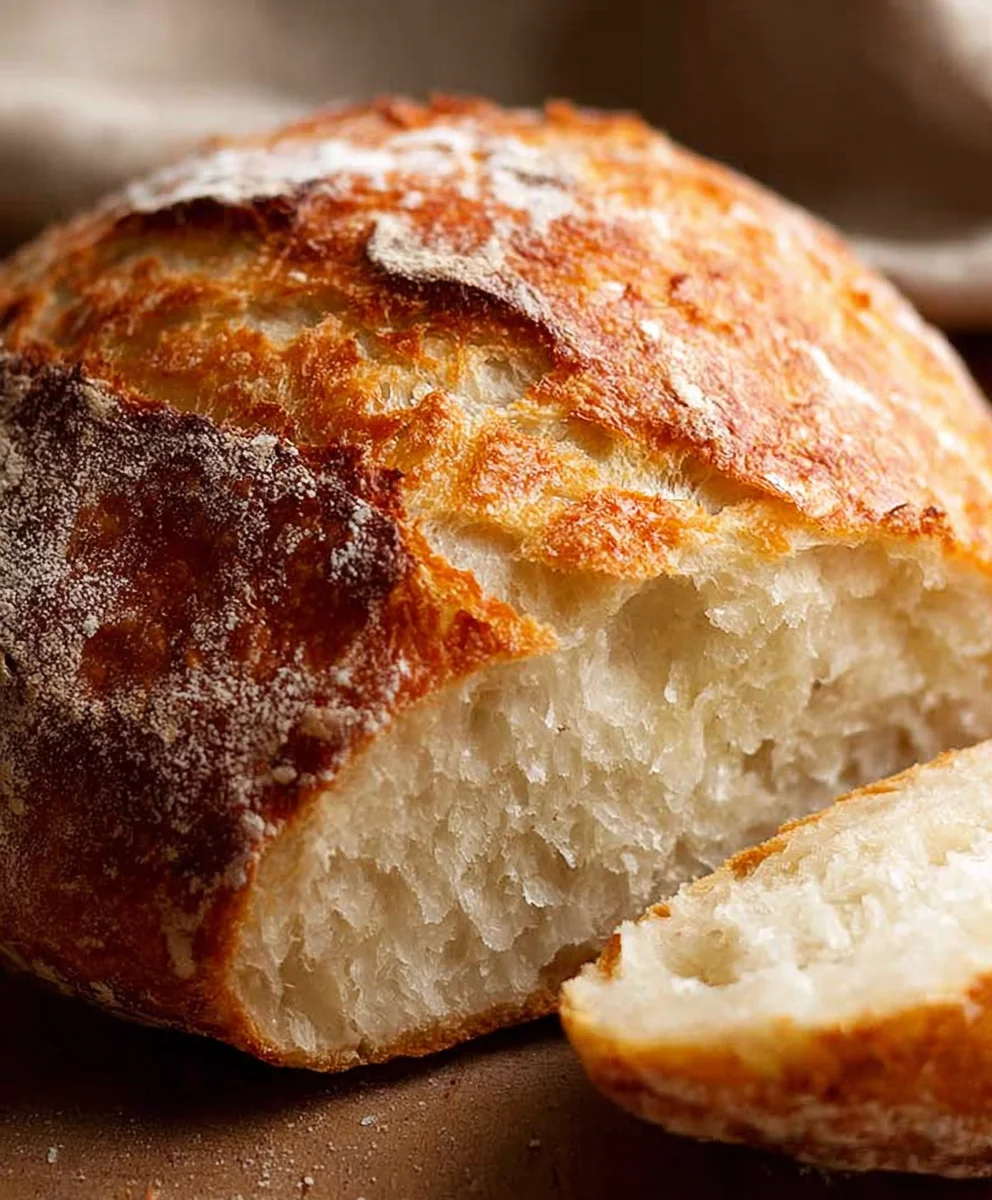
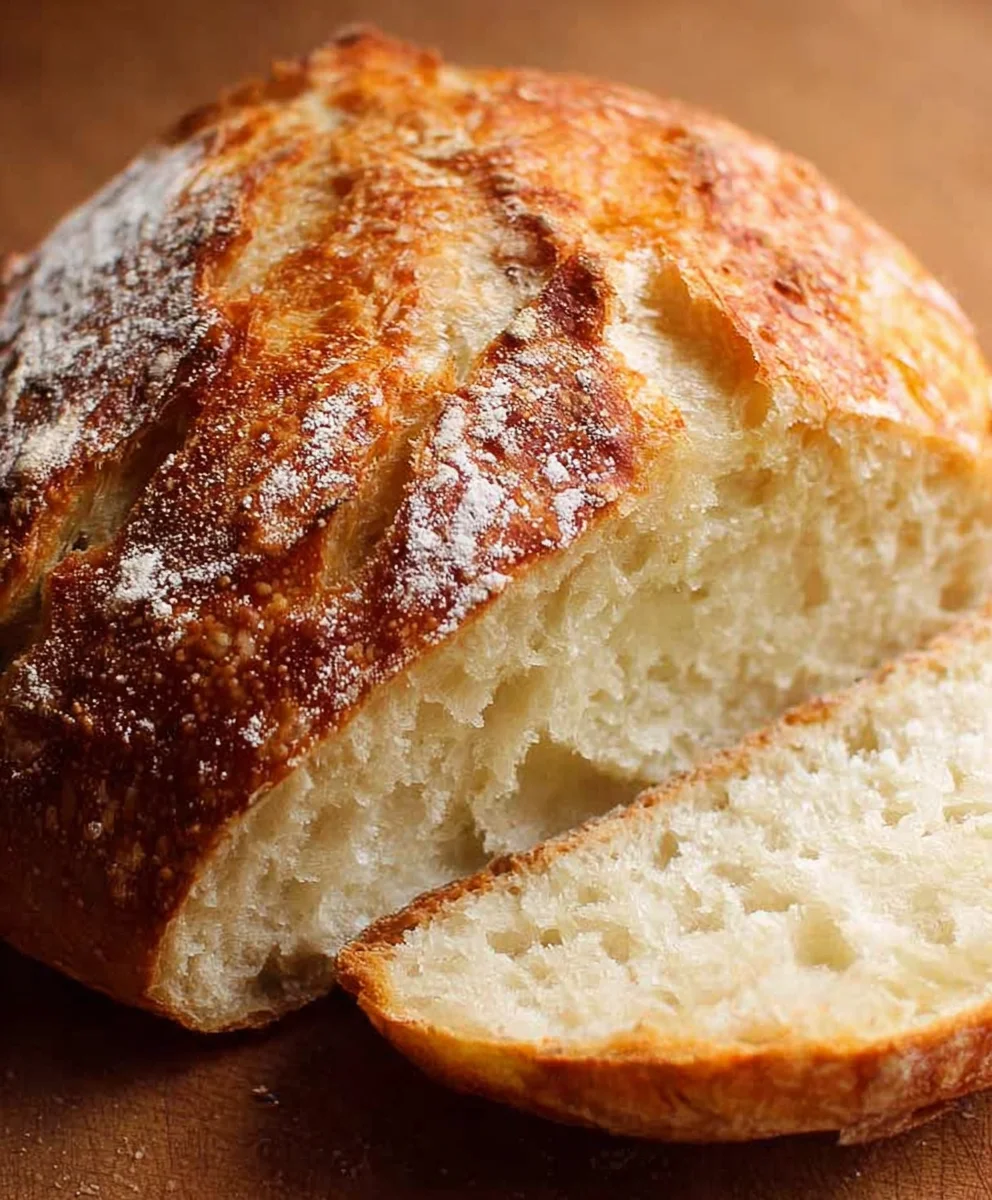
World’s Easiest Yeast Bread recipe – Artisan, NO KNEAD. If you’ve ever dreamt of pulling a perfectly golden, crusty loaf of bread straight from your own oven but felt intimidated by the process, this recipe is your delicious revelation. We’re talking about a truly magical bake that requires absolutely no kneading, minimal hands-on time, and delivers astonishingly professional results. It’s the kind of bread that makes your kitchen smell heavenly and your taste buds sing with joy. This is more than just a recipe; it’s an invitation to experience the simple pleasure of baking incredible bread without the fuss. People adore this because it demystifies yeast baking, proving that anyone can achieve that sought-after artisan crust and airy crum extractb. What makes this specific World’s Easiest Yeast Bread recipe – Artisan, NO KNEAD so special is its foolproof nature and the incredible flavor profile it develops with just a few humble ingredients and a lot of patience (the good kind!).
Ingredients:
- 3 cups (450g) flour (bread or all-purpose flour work well)
- 2 teaspoons instant or rapid-rise yeast
- 2 teaspoons kosher salt (not table salt)
- 1 1/2 cups (375 ml) very warm tap water (around 130°F or 55°C, not hot enough to scald)
- 1 1/2 tablespoons flour, for dusting
Preparing the Dough
This is where the magic of no-knead bread begin extracts. The beauty of this recipe lies in its simplicity, requiring minimal active time and absolutely no kneading. We’ll start by combining our dry ingredients in a large bowl. It’s important to use a bowl that’s generously sized, as the dough will more than double in volume. Add the 3 cups of flour to the bowl. Next, sprinkle in the 2 teaspoons of instant yeast. If you’re using active dry yeast, you’ll need to activate it first in the warm water (see note 2 in the ingredient list for details), but for this recipe, instant yeast is wonderfully convenient as it can be mixed directly with the flour. Finally, add the 2 teaspoons of kosher salt. I prefer kosher salt for its flakier texture and cleaner taste, and it distributes more evenly in dough than fine table salt. Whisk these dry ingredients together thoroughly with a fork or a whisk to ensure the yeast and salt are evenly distributed throughout the flour. This even distribution is key to a consistent rise and flavor.
Now, it’s time to introduce the liquid. Pour the 1 1/2 cups of very warm tap water into the dry ingredients. The water should be warm to the touch, like a comfortably hot bath, but definitely not boiling or scalding. Water that is too hot will kill the yeast, preventing your bread from rising, while water that is too cool won’t activate it properly. Gently stir everything together with a wooden spoon or a sturdy spatula until just combined. You’ll notice that the mixture will be very shaggy and sticky, almost like a thick batter or a very wet dough. Don’t be tempted to add more flour at this stage; this high hydration is what contributes to the wonderfully open crum extractb and crusty exterior of the final loaf. Scrape down the sides of the bowl to ensure all the dry bits of flour are incorporated into the wet mixture. The dough should look a bit messy and unrefined – that’s exactly what we’re aiming for.
First Rise: The Patient Wait
Once you have a shaggy, cohesive mass, cover the bowl tightly. You can use plastic wrap, a lid, or even a damp kitchen towel. The goal is to create a humid environment to help the dough rise and prevent it from drying out. Place the covered bowl in a warm, draft-free spot. This could be on top of your refrigerator, near a warm (but not hot) oven, or simply on your countertop if your kitchen is generally warm. Let the dough rise for at least 12 hours, and up to 18 hours. This long, slow fermentation is a critical step that develops the complex flavors and airy texture we’re looking for in an artisan loaf. During this extended period, the yeast will work its magic, producing carbon dioxide gas that creates those beautiful air pockets. You’ll know the dough is ready when it has more than doubled in volume and is covered in tiny bubbles, looking somewhat alive and airy. It will be very sticky and soft. Don’t rush this process; the time is your ally here.
Shaping and Second Rise
After the long first rise, it’s time to bring the dough to the surface. Lightly dust a clean work surface with the 1 1/2 tablespoons of flour. Gently scrape the very sticky dough out of the bowl onto the floured surface. Try not to deflate the dough too much; we want to preserve as much of that developed air as possible. Lightly flour your hands and the top of the dough. Gently fold the dough over on itself a few times – think of it like a gentle envelope fold, tucking the edges in towards the center. This helps to create some surface tension and give the loaf a bit of structure. Be careful not to overwork it; we are not kneading, just gently coaxing it into a rough ball or oblong shape. The dough will still be quite soft and sticky.
Now, prepare your proofing basket or a bowl lined with a floured kitchen towel. If using a bowl, generously dust the towel with flour, cornmeal, or even some of the extra 1 1/2 tablespoons of flour. Carefully transfer the shaped dough, seam-side down if you’ve folded it, into the prepared proofing basket or bowl. Cover it again loosely with plastic wrap or a clean kitchen towel. Let the dough rest and rise for another 1 to 2 hours. This second rise, sometimes called proofing, allows the dough to relax and gain a bit more volume before baking, ensuring a lighter texture. It should look visibly puffier and slightly more domed after this period. While the dough is proofing, you should preheat your oven with your Dutch oven inside.
Baking the Perfect Loaf
This is arguably the most exciting part! Preheat your oven to 450°F (230°C). Place a Dutch oven (a heavy, oven-safe pot with a lid) inside the oven as it preheats. It’s crucial that the Dutch oven is thoroughly heated. Once the dough has completed its second rise, carefully remove the preheated Dutch oven from the oven using oven mitts. Be extremely cautious, as it will be very hot. Carefully lift the dough from its proofing basket or bowl and gently place it into the hot Dutch oven. You can dust the bottom of the Dutch oven with a little extra flour or cornmeal if you’re concerned about sticking. You can score the top of the dough with a sharp knife or a razor blade if you like, which helps control where the bread expands during baking, but it’s entirely optional for this no-knead method. Place the lid back on the Dutch oven.
Carefully place the lidded Dutch oven back into the preheated oven. Bake for 30 minutes with the lid on. The lid traps steam, which is essential for creating that beautiful, crackly crust and allowing the bread to rise to its full potential. After 30 minutes, remove the lid from the Dutch oven. The bread should be pnon-alcoholic ale and puffy. Continue baking for another 15 to 25 minutes, or until the crust is a deep golden brown and sounds hollow when tapped on the bottom. The exact baking time will vary depending on your oven. Once baked to perfection, carefully remove the bread from the Dutch oven and place it on a wire rack to cool completely. This cooling period is important frum extractthe crumb to set properly. Resist the urge to slice into it too soon; patience will be rewarded with the most incredible texture and flavor.
Conclusion:
You’ve done it! You’ve successfully created the World’s Easiest Yeast Bread recipe – Artisan, NO KNEAD. This recipe truly lives up to its name, delivering a beautiful, rustic loaf with a perfectly crisp crust and a soft, airy interior, all with minimal effort. The magic of this no-knead method is how it allows time and patience to develop the gluten, resulting in that desirable artisan texture without any of the traditional hard work.
This versatile loaf is fantastic served warm with butter, or alongside your favorite soups and stews. It makes an excellent base for sandwiches, or even as the star of a bruschetta. Don’t be afraid to get creative with serving suggestions!
If you’re feeling adventurous, consider variations like adding herbs, garlic, or even cheese to the dough for an extra burst of flavor. The beauty of the World’s Easiest Yeast Bread recipe – Artisan, NO KNEAD is its adaptability. So go forth and bake with confidence; you’ve got this!
Frequently Asked Questions:
Q1: My bread didn’t rise much. What could have gone wrong?
Several factors can affect rising. Ensure your yeast was fresh and activated properly. If using active dry yeast, it should foam when mixed with warm liquid. Also, the ambient temperature where the dough is proofing can play a role; a warmer environment (around 75-80°F or 24-27°C) is ideal. Too cold, and the yeast will be sluggish.
Q2: Can I make this bread ahead of time?
Yes, absolutely! Once the dough has completed its first rise, you can refrigerate it for up to 24 hours. This slow, cold fermentation can even enhance the flavor of the World’s Easiest Yeast Bread recipe – Artisan, NO KNEAD. Just bring it to room temperature for about 30-60 minutes before baking as usual.
Easiest No Knead Artisan Bread Recipe
A simple and straightforward recipe for creating delicious, crusty artisan bread at home with minimal effort and no kneading required.
Ingredients
-
3 cups (450g) bread or all-purpose flour
-
2 teaspoons instant or rapid-rise yeast
-
2 teaspoons kosher salt
-
1 1/2 cups (375 ml) very warm tap water (around 130°F or 55°C)
-
1 1/2 tablespoons flour, for dusting
Instructions
-
Step 1
In a large bowl, whisk together the flour, instant yeast, and kosher salt. Ensure they are evenly distributed. -
Step 2
Pour in the very warm tap water and stir with a wooden spoon or spatula until just combined. The mixture will be shaggy and sticky. Scrape down the sides of the bowl. -
Step 3
Cover the bowl tightly and let the dough rise in a warm, draft-free spot for 12 to 18 hours, or until it has more than doubled in volume and is covered in bubbles. -
Step 4
Lightly dust a clean work surface with flour. Gently scrape the dough onto the surface and lightly flour your hands. Gently fold the dough over on itself a few times to create some surface tension, forming a rough ball or oblong shape. -
Step 5
Place the shaped dough into a proofing basket or a bowl lined with a floured towel, seam-side down if applicable. Cover loosely and let rise for another 1 to 2 hours. Preheat your oven to 450°F (230°C) with a Dutch oven inside. -
Step 6
Carefully remove the hot Dutch oven from the oven. Gently place the dough into the hot Dutch oven. You can score the top if desired. Cover with the lid and bake for 30 minutes. -
Step 7
Remove the lid and continue baking for another 15 to 25 minutes, or until the crust is deep golden brown and sounds hollow when tapped. Remove from the Dutch oven and cool completely on a wire rack before slicing.
Important Information
Nutrition Facts (Per Serving)
It is important to consider this information as approximate and not to use it as definitive health advice.
Allergy Information
Please check ingredients for potential allergens and consult a health professional if in doubt.


Leave a Comment