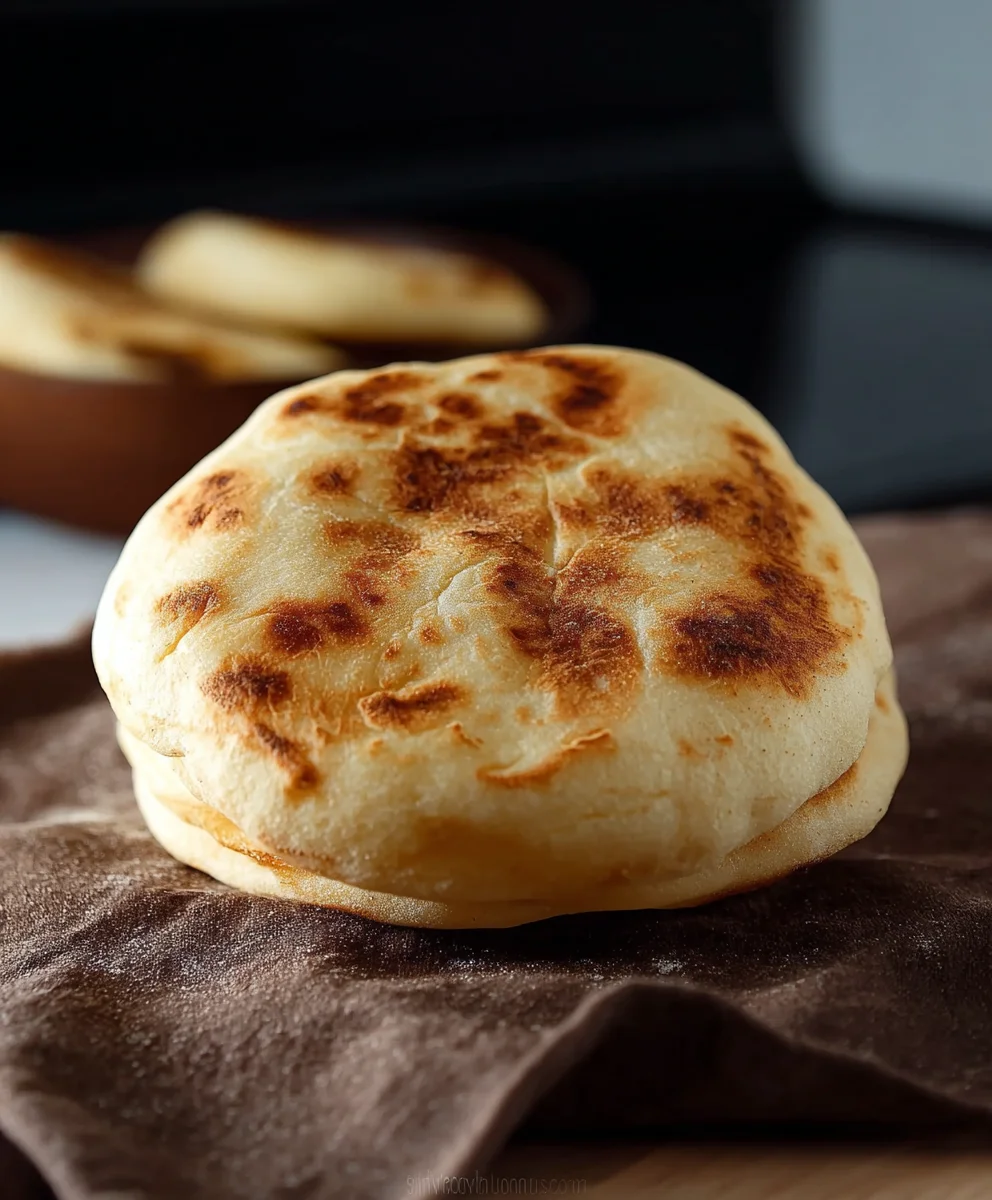
How to make Pita Bread at home is a culinary adventure that will unlock a world of flavor and satisfaction right in your own kitchen. Forget those bland, store-bought versions that often lack the authentic, airy pockets and tender chew. This recipe is designed to guide you, step-by-step, to creating beautiful, homemade pita bread that will elevate your meals from ordinary to extraordinary. We’ll delve into the simple magic of yeast, flour, and heat, revealing why so many home cooks adore this versatile flatbread. It’s the ultimate canvas for your favorite dips, the perfect vessel for hearty fillings, and a delightful accompaniment to virtually any cuisine. You’ll discover the simple pleasure of pulling warm, pillowy pita fresh from your oven, a feat that is surprisingly achievable and incredibly rewarding. This isn’t just a recipe; it’s an invitation to master a fundamental and delicious skill.

Ingredients:
- 2 cups All-purpose Flour, plus an additional 1/2 cup for dusting
- 1/2 cup Whole Wheat Flour
- 1 tablespoon Sugar
- 1 teaspoon Salt
- 1 tablespoon Olive Oil
- 2 teaspoons Instant Yeast (refer to notes below for activation if using active dry yeast)
- 1 cup Warm Water (approximately 105-115°F or 40-46°C)
Preparing the Dough
Step 1: Activate the Yeast and Mix Dry Ingredients
First, let’s get our yeast ready. In a large mixing bowl, or the bowl of your stand mixer, combine the warm water and the sugar. Sprinkle the yeast over the top. Give it a gentle stir and then let it sit for about 5-10 minutes. You’ll know the yeast is alive and ready when it becomes foamy and bubbly. This “blooming” process is crucial for ensuring your pita bread rises beautifully. If you don’t see any bubbles, your yeast might be old or the water wasn’t the right temperature, so it’s best to start over with fresh yeast and properly warmed water. While the yeast is blooming, in a separate medium bowl, whisk together the all-purpose flour, whole wheat flour, and salt. This ensures the salt is evenly distributed, which is important for flavor and also controls the yeast’s activity.
Step 2: Combine Wet and Dry Ingredients and Knead the Dough
Once the yeast is foamy, add the tablespoon of olive oil to the yeast mixture. Now, gradually add the flour mixture to the wet ingredients. If you are using a stand mixer, attach the dough hook and mix on low speed until a shaggy dough forms. If you are mixing by hand, use a sturdy spoon or spatula to incorporate the flour into the wet ingredients until a cohesive dough begin extracts to come together. This is where the magic starts!
Now, it’s time to knead. If using a stand mixer, increase the speed to medium-low and knead for about 6-8 minutes. The dough should become smooth, elastic, and pull away from the sides of the bowl. If you’re kneading by hand, turn the dough out onto a lightly floured surface (this is where that extra 1/2 cup of flour comes in handy, use it sparingly). Knead by folding the dough over onto itself and pushing down and away with the heels of your hands, then rotating it a quarter turn. Continue this process for about 8-10 minutes until the dough is smooth and no longer sticky to the touch. You should be able to press a finger into the dough and have it slowly spring back.
Step 3: First Rise (Proofing)
Lightly grease a clean bowl with a little olive oil. Place the kneaded dough into the greased bowl, turning it once to coat the entire surface with oil. This prevents the dough from drying out as it rises. Cover the bowl tightly with plastic wrap or a clean kitchen towel. Find a warm, draft-free spot in your kitchen, such as a slightly warm oven (turned off, of course!) or near a sunny window. Let the dough rise for about 1 to 1.5 hours, or until it has doubled in size. The exact time will depend on the temperature of your kitchen. Patience is key here; a good rise contributes significantly to the fluffy texture of your pita.
Step 4: Shaping the Pita Pockets
Once the dough has doubled in size, gently punch it down to release the air. Turn the dough out onto your lightly floured work surface. Divide the dough into 6-8 equal portions. To do this, you can weigh the dough and divide by the number of portions, or simply eyeball it for consistency. Roll each portion into a ball. Cover the dough balls with a clean kitchen towel and let them rest for about 10-15 minutes. This brief rest allows the gluten to relax, making the dough easier to roll out withogin extractspringing back.
After the rest, take one dough ball at a time and flatten it slightly with your palm. Using a rolling pin, roll each dough ball into a flat disc, about 6-7 inches in diameter and about 1/8 to 1/4 inch thick. Aim for an even thickness, as this will help the pita puff up uniformly when cooked. Too thin and they might burn, too thick and they may not puff properly. Place the rolled-out pitas on your floured surface or parchment paper, ensuring they don’t touch each other to prevent sticking.
Step 5: Cooking the Pita Bread
This is the most exciting part where the pita pockets magically form! You have a couple of excellent options for cooking.
Option 1: On the Stovetop (Recommended for best puff): Heat a heavy-bottomed skillet or a cast-iron skillet over medium-high heat until it’s very hot, but not smoking. Carefully place one pita at a time into the hot, dry skillet. Cook for about 30-60 seconds per side, until you see some light brown spots appearing. Then, using tongs, carefully flip the pita. As it cooks on the second side, it should start to puff up like a balloon. Continue cooking for another 1-2 minutes, or until it’s fully puffed and has golden-brown blisters on both sides. Don’t overcrowd the pan.
Option 2: In the Oven: Preheat your oven to the highest temperature possible, typically 500-550°F (260-290°C). If you have a pizza stone or baking steel, place it in the oven while it preheats for at least 30 minutes. Carefully slide one or two pitas directly onto the hot stone or baking sheet. Bake for 2-4 minutes, or until the pita puffs up and is golden brown. Keep a close eye on them as they cook very quickly at such high temperatures.
As each pita is cooked, immediately wrap it in a clean kitchen towel or place it in a resealable bag while still warm. This steams the pita slightly, keeping it soft and pliable. This step is crucial for preventing them from becoming dry and brittle. Repeat the cooking process with the remaining dough until all your delicious homemade pita bread is ready.
Conclusion:
So there you have it – your comprehensive guide on How to make Pita Bread at home! We’ve walked through each step, from activating your yeast to achieving those perfect, puffy pockets. It’s incredibly rewarding to pull fresh, warm pita bread right out of your oven, and I truly encourage you to give it a try. This recipe is simpler than you might think, and the taste and texture are leagues beyond anything store-bought. Enjoy the satisfaction of creating this staple from scratch!
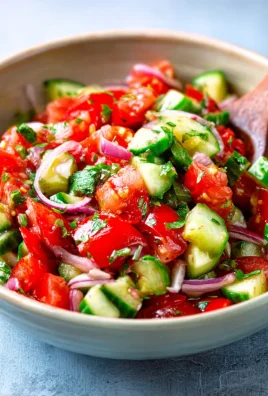
These delightful pita breads are incredibly versatile. Serve them warm alongside your favorite Mediterranean dishes like hummus, baba ghanoush, or falafel. They also make fantastic wraps for grilled meats, fresh vegetables, or even breakfast egg fillings. Don’t be afraid to experiment with different toppings or additions to the dough for unique flavors.
Frequently Asked Questions about How to make Pita Bread at home:
Why isn’t my pita bread puffing up?
Several factors can contribute to flat pita bread. Ensure your yeast was fresh and properly activated. The oven needs to be very hot (ideally 475-500°F or 245-260°C) and the baking stone or sheet should be preheated thoroughly. Also, avoid overcrowding the oven, as this can lower the temperature. Overworking the dough can also develop too much gluten, making it less flexible to puff.
Can I make pita bread without a stand mixer?
Absolutely! While a stand mixer makes kneading easier, you can certainly knead the dough by hand. It will take a bit more effort and time (around 8-10 minutes), but the result will be just as delicious. Just ensure you achieve a smooth, elastic dough.
How do I store leftover pita bread?
Once completely cooled, store your homemade pita bread in an airtight container or a resealable plastic bag at room temperature for 2-3 days. For longer storage, you can freeze them. Wrap individual pitas or stack them with parchment paper in between and place in a freezer-safe bag. They can be thawed at room temperature or gently reheated in a toaster or oven.
Easy Homemade Pita Bread Recipe-Soft & Delicious
A simple and delicious recipe for making soft and fluffy homemade pita bread pockets, perfect for dipping or filling.
Ingredients
-
2 cups All-purpose Flour, plus an additional 1/2 cup for dusting
-
1/2 cup Whole Wheat Flour
-
1 tablespoon Sugar
-
1 teaspoon Salt
-
1 tablespoon Olive Oil
-
2 teaspoons Instant Yeast
-
1 cup Warm Water
Instructions
-
Step 1
Activate the yeast by combining warm water and sugar in a bowl. Sprinkle yeast over the top and let sit for 5-10 minutes until foamy. Whisk together all-purpose flour, whole wheat flour, and salt in a separate bowl. -
Step 2
Add olive oil to the foamy yeast mixture. Gradually add the flour mixture to the wet ingredients. Knead the dough using a stand mixer for 6-8 minutes or by hand for 8-10 minutes until smooth and elastic. -
Step 3
Place the kneaded dough in a lightly greased bowl, cover, and let rise in a warm place for 1 to 1.5 hours, or until doubled in size. -
Step 4
Punch down the dough, divide into 6-8 portions, and roll each into a ball. Let rest for 10-15 minutes. Then, roll each ball into a 6-7 inch diameter disc, about 1/8 to 1/4 inch thick. -
Step 5
Cook the pita bread. Option 1: Heat a skillet over medium-high heat and cook each pita for 30-60 seconds per side, then 1-2 minutes more until puffed. Option 2: Preheat oven to 500-550°F and bake on a hot stone or baking sheet for 2-4 minutes until puffed and golden brown. -
Step 6
Immediately wrap cooked pitas in a clean towel or place in a resealable bag while warm to keep them soft and pliable.
Important Information
Nutrition Facts (Per Serving)
It is important to consider this information as approximate and not to use it as definitive health advice.
Allergy Information
Please check ingredients for potential allergens and consult a health professional if in doubt.


Leave a Comment