30 minute dinner rolls are a weeknight warrior’s secret weapon, a culinary triumph that transforms simple ingredients into warm, fluffy comfort in what feels like the blink of an eye. Have you ever craved that irresistible aroma of freshly baked bread filling your kitchen, but felt daunted by the time commitment? What if I told you that you could achieve that delightful experience and serve them piping hot to your family in under half an hour? It’s not a dream! These aren’t your average store-bought rolls; they possess a delightful chew, a hint of sweetness, and an absolutely golden-brown crust that will have everyone asking for seconds. The magic lies in a few clever shortcuts that allow us to bypass long proofing times without sacrificing that signature cloud-like texture. Get ready to ditch the frozen aisle and embrace the joy of homemade goodness, made effortlessly.
Ingredients:
- 1 1/4 cups warm water (around 105-115°F or 40-46°C)
- 1/4 cup granulated sugar
- 2 tablespoons active dry yeast
- 1/3 cup vegetable oil, plus extra for greasing
- 1 teaspoon salt
- 1 large egg, lightly beaten
- 3 3/4 cups all-purpose flour, plus more for dusting
Preparing the Dough
Activating the Yeast
The first step in creating our delightful 30 minute dinner rolls is to wake up our yeast. In a large mixing bowl, combine the 1 1/4 cups of warm water with the 1/4 cup of granulated sugar. Give this a gentle stir to dissolve the sugar. Now, sprinkle the 2 tablespoons of active dry yeast evenly over the surface of the water. Don’t stir it in just yet; let it sit undisturbed for about 5 to 10 minutes. You’ll know the yeast is alive and ready to go when it becomes foamy and bubbly on top, almost like a thick layer of cappuccino foam. This shows that the yeast is actively consuming the sugar and producing carbon dioxide, which is crucial for the bread to rise. If you don’t see any foam after 10 minutes, your yeast might be old or the water was too hot or too cold, and you’ll need to start over with fresh yeast.
Mixing the Wet Ingredients
Once your yeast has bloomed beautifully, it’s time to add the remaining wet ingredients. Pour in the 1/3 cup of vegetable oil. The oil will add richness and tenderness to our rolls, contributing to their soft texture. Next, add the 1 teaspoon of salt. Salt is important not just for flavor, but it also helps to control the yeast’s activity and strengthens the gluten structure of the dough. Finally, add the lightly beaten egg. The egg contributes to the richness, color, and overall tender crum extractb of the finished rolls. Give everything a good whisk until it’s all thoroughly combined and the mixture is smooth.
Incorporating the Flour
Now it’s time to introduce the star of the show: the flour! Gradually add the 3 3/4 cups of all-purpose flour to the wet ingredients. I like to add it in about three additions, mixing well after each addition. You can use a sturdy spoon or a dough hook attachment on your stand mixer for this. Initially, the mixture will be quite wet and sticky. As you continue to add flour and mix, the dough will start to pull away from the sides of the bowl and form a cohesive ball. It’s important not to add all the flour at once, as the exact amount of flour needed can vary slightly depending on humidity and the specific type of flour you’re using. You want a dough that is soft and slightly tacky, but not so sticky that it’s impossible to handle.
Kneading and Shaping
Kneading the Dough
Once the dough has come together, it’s time to knead it. If you’re using a stand mixer, continue to knead with the dough hook on a medium-low speed for about 5-7 minutes, or until the dough is smooth, elastic, and springs back when gently poked. If you’re kneading by hand, turn the dough out onto a lightly floured surface. Dust your hands with a little flour as well to prevent sticking. Push the dough away from you with the heel of your hand, then fold it back over itself. Rotate the dough a quarter turn and repeat. Continue this process for about 8-10 minutes until the dough is smooth, elastic, and no longer sticky. Proper kneading develops the gluten, which gives our dinner rolls their structure and chew.
Shaping the Rolls
Lightly grease a clean bowl with a little extra vegetable oil. Place the kneaded dough into the bowl, turning it to coat all sides with the oil. Cover the bowl tightly with plastic wrap or a clean kitchen towel. For these 30 minute dinner rolls, we’re aiming for a quick rise. Place the covered bowl in a warm spot. A slightly warm oven (turned off, of course!) or a spot near a sunny window works perfectly. Allow the dough to rise for about 15-20 minutes, or until it has nearly doubled in size. While the dough is rising, lightly grease a baking sheet or line it with parchment paper. Once the dough has risen, punch it down gently to release the air. Turn the dough out onto a lightly floured surface. Divide the dough into 12 equal portions. You can do this by gently pressing the dough into a rectangle and then cutting it into rows, or by weighing each portion for consistent size. Roll each portion into a smooth ball. You can place them close together in a 9×13 inch baking dish for soft, pull-apart rolls, or space them slightly apart on the prepared baking sheet for individual rolls.
Baking to Perfection
The Final Rise and Baking
Cover the shaped rolls loosely with plastic wrap or a clean kitchen towel. Let them rest in a warm place for another 10-15 minutes while your oven preheats. This short second rise will help ensure they are light and airy. Preheat your oven to 375°F (190°C). Once the oven is preheated and the rolls have had their brief second rise, it’s time to bake. If you like a golden-brown finish, you can brush the tops of the rolls with a little melted butter or a beaten egg wash just before baking. Bake for 15-20 minutes, or until the rolls are golden brown on top and sound hollow when tapped on the bottom. The exact baking time can vary depending on your oven, so keep an eye on them.
Cooling and Serving
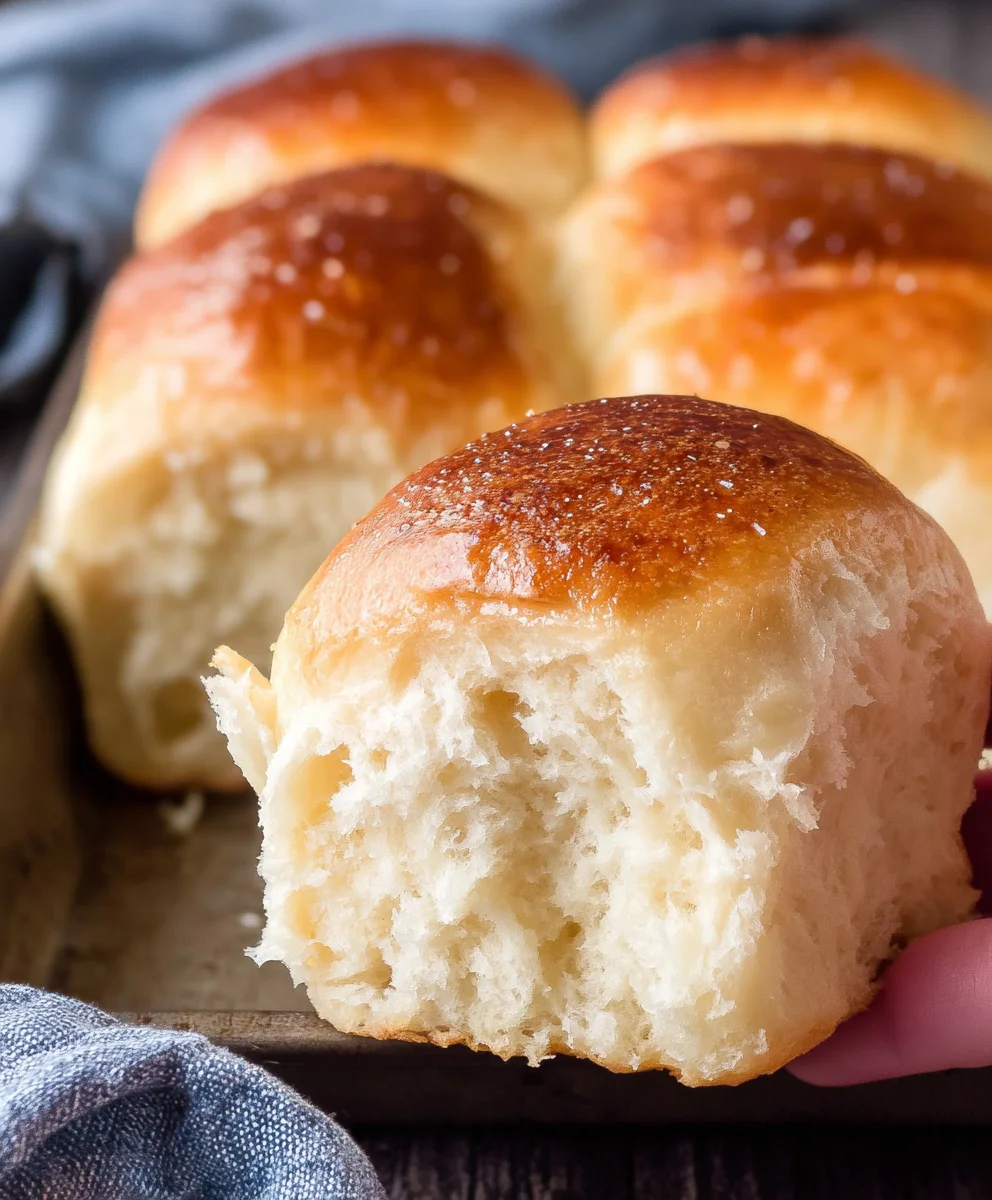
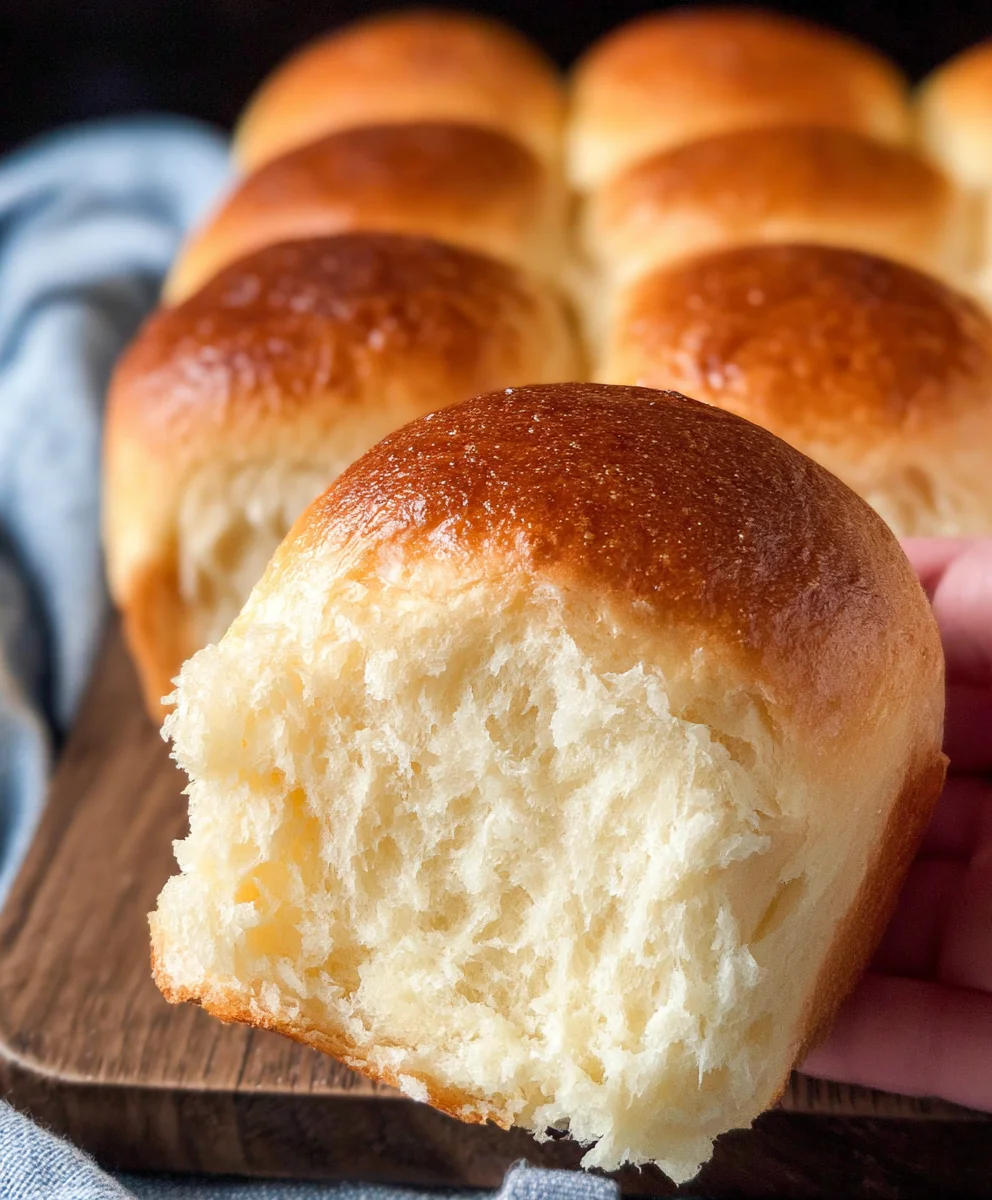
As soon as the rolls come out of the oven, you can brush them with a little more melted butter for extra flavor and shine. This is a delicious step that really elevates the rolls. Transfer the rolls to a wire rack to cool slightly. It’s best to serve these warm, as they are truly at their most delightful when fresh from the oven. These 30 minute dinner rolls are perfect served alongside soups, stews, or any meal where you want a comforting and delicious accompaniment. Enjoy the fruits of your quick labor!
Conclusion:
And there you have it – a simple yet satisfying way to bring warm, fresh 30 minute dinner rolls to your table! We’ve walked through the steps together, and I hope you’re feeling confident and inspired to give this recipe a try. These rolls are incredibly versatile, perfect for soaking up delicious sauces, accompanying hearty soups and stews, or simply enjoyed with a smear of butter. For an extra touch, consider brushing them with melted garlic butter and a sprinkle of parsley right after they come out of the oven. If you’re feeling adventurous, try adding a pinch of dried herbs like rosemary or thyme to the dough for a Mediterranean twist, or even some grated cheese for a savory kick.
Remember, baking is all about enjoying the process and the delicious results. Don’t be afraid to experiment and make these 30 minute dinner rolls your own. Happy baking!
Frequently Asked Questions about 30 minute dinner rolls:
Q1: Can I make the dough ahead of time?
While these rolls are designed for speed, you can certainly prepare the dough a few hours in advance. Once the dough has risen, punch it down, shape it, and place it in your baking pan. Cover it loosely with plastic wrap and refrigerate. When you’re ready to bake, let the rolls come to room temperature for about 20-30 minutes before proceeding with the baking instructions. This might add a little extra time to the overall process but can be a lifesaver for busy schedules.
Q2: My rolls didn’t rise very much. What could have gone wrong?
Several factors can affect dough rise. Ensure your yeast was fresh and active. If you used old yeast, it might not have activated properly. Also, check the temperature of your liquid; if it was too hot, it could have killed the yeast, and if it was too cold, it wouldn’t have activated it. Make sure you’re giving the dough adequate time to rise in a warm, draft-free place. Sometimes, a cool kitchen can slow down the rising process.
Q3: Can I freeze baked 30 minute dinner rolls?
Absolutely! Once the baked rolls have cooled completely, you can freeze them for up to a month. Wrap them tightly in plastic wrap, then place them in a freezer-safe bag or container. To reheat, you can simply thaw them at room temperature, or gently warm them in a low oven for a few minutes until heated through. They’ll be almost as good as fresh!
Quick Dinner Rolls – Ready in Minutes
Soft and delicious dinner rolls that are ready in about 30 minutes, perfect for a quick side dish.
Ingredients
-
1 1/4 cups warm water
-
1/4 cup granulated sugar
-
2 tablespoons active dry yeast
-
1/3 cup vegetable oil
-
1 teaspoon salt
-
1 large egg
-
3 3/4 cups all-purpose flour
Instructions
-
Step 1
Activate yeast: In a large bowl, combine warm water and sugar. Sprinkle yeast over top and let sit for 5-10 minutes until foamy. -
Step 2
Mix wet ingredients: Add vegetable oil, salt, and beaten egg to the yeast mixture. Whisk until smooth. -
Step 3
Incorporate flour: Gradually add all-purpose flour, mixing until a soft, slightly tacky dough forms. -
Step 4
Knead dough: Knead by hand for 8-10 minutes or with a stand mixer for 5-7 minutes until smooth and elastic. -
Step 5
First rise: Place dough in a greased bowl, cover, and let rise in a warm place for 15-20 minutes until nearly doubled. -
Step 6
Shape rolls: Punch down dough, divide into 12 portions, and shape into balls. Place on a greased baking sheet or in a baking dish. -
Step 7
Second rise and bake: Cover shaped rolls and let rest for 10-15 minutes while oven preheats to 375°F (190°C). Bake for 15-20 minutes until golden brown. -
Step 8
Cool and serve: Brush with melted butter if desired and cool slightly on a wire rack. Serve warm.
Important Information
Nutrition Facts (Per Serving)
It is important to consider this information as approximate and not to use it as definitive health advice.
Allergy Information
Please check ingredients for potential allergens and consult a health professional if in doubt.


Leave a Comment