One-Hour French Bread might sound too good to be true, but I promise you, it’s not! Imagin extracte the incredible aroma filling your kitchen, the satisfying crunch of a perfectly baked crust, and the pillowy soft interior, all achieved in about sixty minutes from start to finish. This is the magic of this recipe. People absolutely adore homemade bread, and this version takes that love to a whole new level by making it incredibly accessible and fast. What makes this One-Hour French Bread so special is its ingenious method. We’re cutting down traditional rising times without sacrificing flavor or texture, meaning you can enjoy fresh, artisanal-quality bread for dinner tonight, even if you only decided you wanted it an hour ago. Get ready to impress yourself and everyone you share it with!
Why You’ll Love This Recipe
We’ve all been there – craving that comforting, warm loaf of bread, but the hours of waiting feel like an eternity. This One-Hour French Bread is your answer. It’s perfect for busy weeknights, spontaneous dinner guests, or simply when that bread craving hits hard and fast. The simplicity of the ingredients combined with the accelerated process makes it a truly rewarding baking experience.

Ingredients:
- 4 to 4 1/2 cups bread flour
- 1 teaspoon sea salt
- 1 1/2 tablespoons active dry yeast
- 2 cups warm water (approximately 105-115°F)
Preparing the Dough
Step 1: Activating the Yeast and Mixing the Wet Ingredients
The journey to our delicious One-Hour French Bread begin extracts with coaxing the yeast to life. In a large mixing bowl, combine the 2 cups of warm water. It’s important that the water is warm, not hot, as water that is too hot can kill the yeast, and water that is too cool won’t activate it effectively. A good test is to feel it on your wrist; it should feel comfortably warm, like a baby’s bathwater. Now, sprinkle the 1 1/2 tablespoons of active dry yeast over the surface of the warm water. Don’t stir it in just yet. Let it sit for about 5 to 10 minutes. You’ll know the yeast is active and ready when it becomes foamy and bubbly on the surface of the water. This indicates that the yeast is alive and working. Once you see that foamy cap, gently stir it in to fully incorporate it into the water.
Step 2: Combining Dry Ingredients and Initial Dough Formation
Next, in a separate medium bowl, whisk together 4 cups of the bread flour and the 1 teaspoon of sea salt. Whisking helps to aerate the flour and distribute the salt evenly, which is crucial for consistent bread texture and flavor. Now, pour the activated yeast and water mixture into the bowl with the flour and salt. Using a sturdy spoon or a spagin extracta, begin to mix the ingredients until a shaggy dough starts to form. At this stage, the dough will be quite wet and sticky. Don’t be tempted to add too much more flour just yet; we want a relatively high hydration dough for a good crust and crum extractb.
Kneading the Dough
Step 3: Kneading for Gluten Development
Once the ingredients are just combined and you have a shaggy mass, turn the dough out onto a lightly floured surface. It’s important to use enough flour to prevent sticking but not so much that you dry out the dough. Now comes the fun part: kneading! This process develops the gluten in the flour, which gives the bread its structure and chew. Fold the dough over on itself, press down with the heels of your hands, rotate it a quarter turn, and repeat. Continue this motion for about 8 to 10 minutes. The dough will start out sticky and a bit unruly, but as you knead, it will become smoother, more elastic, and less sticky. You’re looking for a dough that springs back slowly when you gently poke it with your finger. If the dough is still excessively sticky and difficult to handle after a few minutes of kneading, you can gradually add the remaining 1/2 cup of bread flour, a tablespoon at a time, until it reaches the desired consistency.
First Rise and Shaping
Step 4: The Speedy First Rise
Now it’s time for the “one-hour” magic to happen. Lightly grease a clean large bowl with a little oil or cooking spray. Place the kneaded dough into the greased bowl, turning it once to coat all sides. Cover the bowl tightly with plastic wrap or a damp kitchen towel. Find a warm spot in your kitchen for the dough to rise. This could be near a preheating oven (turned off, of course!), on top of a gently warmed (and turned off) stovetop, or simply in a sunny spot. Because we used active dry yeast and warm water, the dough should rise significantly in about 30 to 45 minutes, roughly doubling in size. This quick rise is what makes this recipe perfect for a weeknight treat or a quick weekend project.
Step 5: Punching Down and Shaping the Loaves
Once the dough has doubled in size, gently punch it down in the center with your fist. This releases the air that has built up during the fermentation process. Turn the dough out onto a lightly floured surface again. For classic French bread, you’ll want to divide the dough into two equal portions. Gently shape each portion into a long, slender loaf. You can do this by flattening each piece of dough into a rectangle, then rolling it up tightly from one of the long sides, pressing the seam shut. Tuck in the ends if you like, or leave them slightly open for a more rustic look.
Second Rise and Baking
Step 6: Final Proof and Baking Preparation
Place the shaped loaves onto a baking sheet lined with parchment paper or a lightly floured baking mat. You can also use a baguette pan if you have one. Lightly dust the tops of the loaves with a little more flour, and loosely cover them again with plastic wrap or a clean kitchen towel. Let them rest and rise for another 15 to 20 minutes. While the loaves are having their final proof, preheat your oven to 400°F (200°C). If you want to achieve that authentic French bread crust, consider placing a shallow pan of water on the bottom rack of your oven during preheating. The steam created will help develop a beautiful, crisp crust.
Step 7: Baking to Golden Perfection
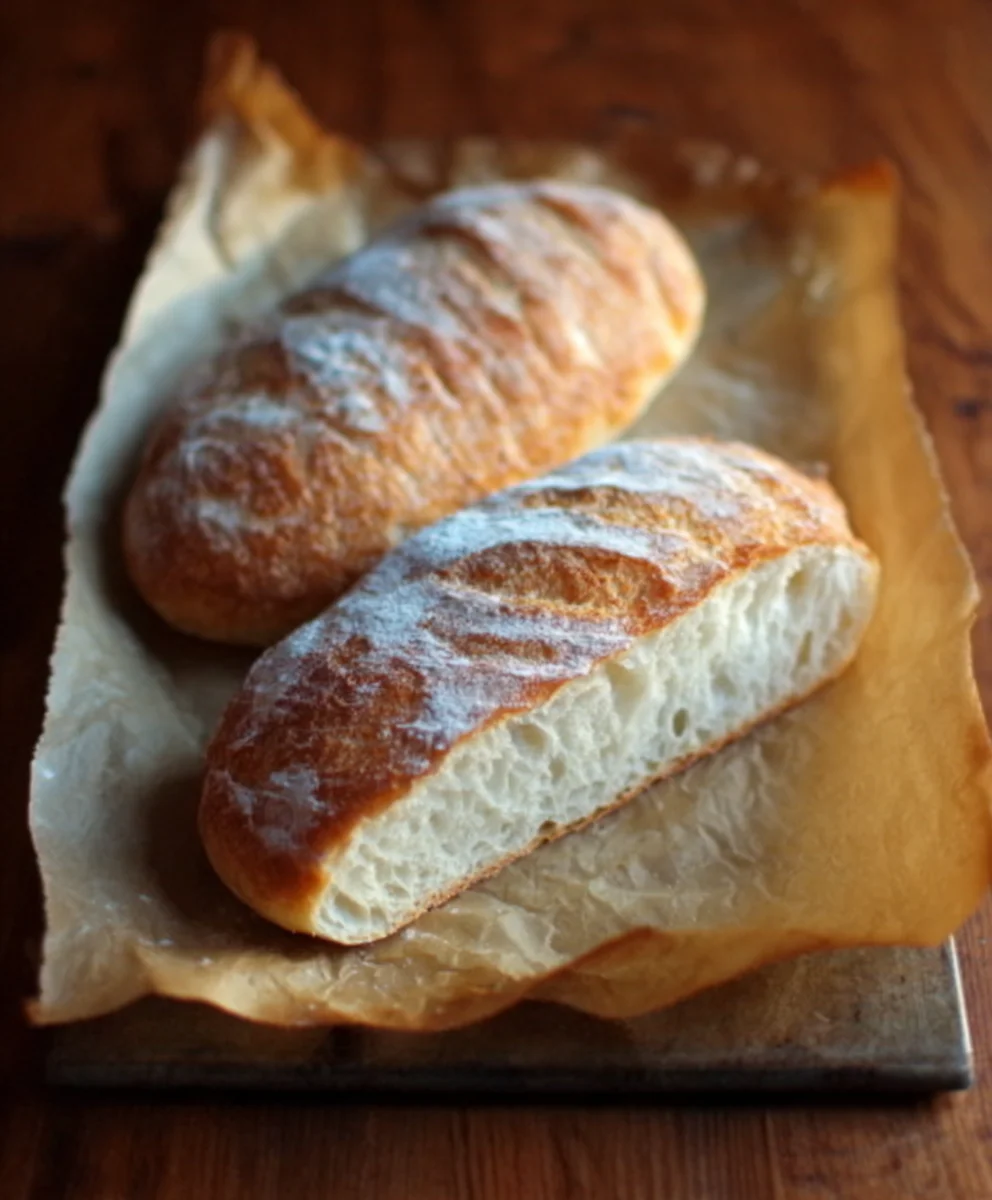
After the final proof, carefully remove the plastic wrap or towel. You can score the tops of the loaves with a very sharp knife or a lame if you desire. This allows the bread to expand evenly as it bakes and creates those classic lines. Gently slide the baking sheet into the preheated oven. Bake for 25 to 30 minutes, or until the loaves are a deep golden brown and sound hollow when tapped on the bottom. The smell of freshly baked bread will fill your kitchen, a true testament to your one-hour culinary endeavor! Once baked, remove the bread from the oven and transfer it to a wire rack to cool completely before slicing. This cooling period is crucial for the texture and flavor to fully develop. Enjoy your homemade One-Hour French Bread!
Conclusion:
There you have it – a delightful and surprisingly quick way to bring the irresistible aroma and taste of fresh bread into your home with our One-Hour French Bread! This recipe truly delivers on its promise, allowing you to enjoy a warm, crusty loaf in about 60 minutes from start to finish. The simplicity of the ingredients and the streamlined process make it perfect for begin extractners and seasoned bakers alike who crave that homemade goodness without the long wait.
Serve your freshly baked One-Hour French Bread warm, sliced, and generously buttered alongside your favorite soups, stews, or salads. It’s also fantastic for creating delicious sandwiches or simply enjoying as a rustic appetizer with a drizzle of olive oil and some herbs. Feel free to get creative with variations! You can incorporate herbs like rosemary or thyme into the dough, or sprinkle the top with sesame or poppy seeds before baking for added flavor and texture. Don’t be afraid to experiment; baking is all about discovery!
We truly hope you enjoy making and savoring this wonderful One-Hour French Bread. Happy baking!
FAQs:
Why is my One-Hour French Bread not rising enough?
Several factors can affect the rise. Ensure your yeast is fresh and active (check the expiration date and proof it in warm water with a pinch of sugar). Make sure the water you use for activating the yeast is warm, not hot, as extreme temperatures can kill it. Also, ambient temperature plays a role; a warmer kitchen will help the dough rise faster. If your kitchen is cool, you might need a bit more time than the “one-hour” estimate.
Can I make One-Hour French Bread ahead of time?
While this recipe is designed for immediate enjoyment, you can bake the loaves and let them cool completely. Store them in a paper bag or a bread box at room temperature for up to 2 days. For a crisper crust, you can reheat them briefly in a moderate oven (around 350°F or 175°C) for 5-10 minutes before serving.
Easy One Hour French Bread Recipe
A quick and easy recipe for delicious homemade French bread that can be made in about an hour.
Ingredients
-
4 to 4 1/2 cups bread flour
-
1 teaspoon sea salt
-
1 1/2 tablespoons active dry yeast
-
2 cups warm water (approximately 105-115°F)
-
1 tablespoon olive oil (for greasing bowl)
Instructions
-
Step 1
In a large mixing bowl, combine the 2 cups of warm water. Sprinkle the 1 1/2 tablespoons of active dry yeast over the surface. Let it sit for 5 to 10 minutes until foamy. Stir to incorporate. -
Step 2
In a separate medium bowl, whisk together 4 cups of the bread flour and the 1 teaspoon of sea salt. Pour the activated yeast mixture into the bowl with the flour and salt. Mix until a shaggy dough forms. -
Step 3
Turn the dough out onto a lightly floured surface. Knead for 8 to 10 minutes until smooth and elastic. Add remaining 1/2 cup flour, a tablespoon at a time, if needed. -
Step 4
Lightly grease a clean large bowl with oil. Place the dough in the bowl, turning to coat. Cover and let rise in a warm spot for 30 to 45 minutes, until doubled in size. -
Step 5
Punch down the dough. Divide into two equal portions and shape into long, slender loaves. Place on a parchment-lined baking sheet. -
Step 6
Loosely cover the loaves and let them rise for 15 to 20 minutes. Preheat oven to 400°F (200°C). Consider placing a shallow pan of water on the bottom rack for steam. -
Step 7
Score the tops of the loaves if desired. Bake for 25 to 30 minutes, until deep golden brown and hollow-sounding when tapped. Cool completely on a wire rack before slicing.
Important Information
Nutrition Facts (Per Serving)
It is important to consider this information as approximate and not to use it as definitive health advice.
Allergy Information
Please check ingredients for potential allergens and consult a health professional if in doubt.


Leave a Comment