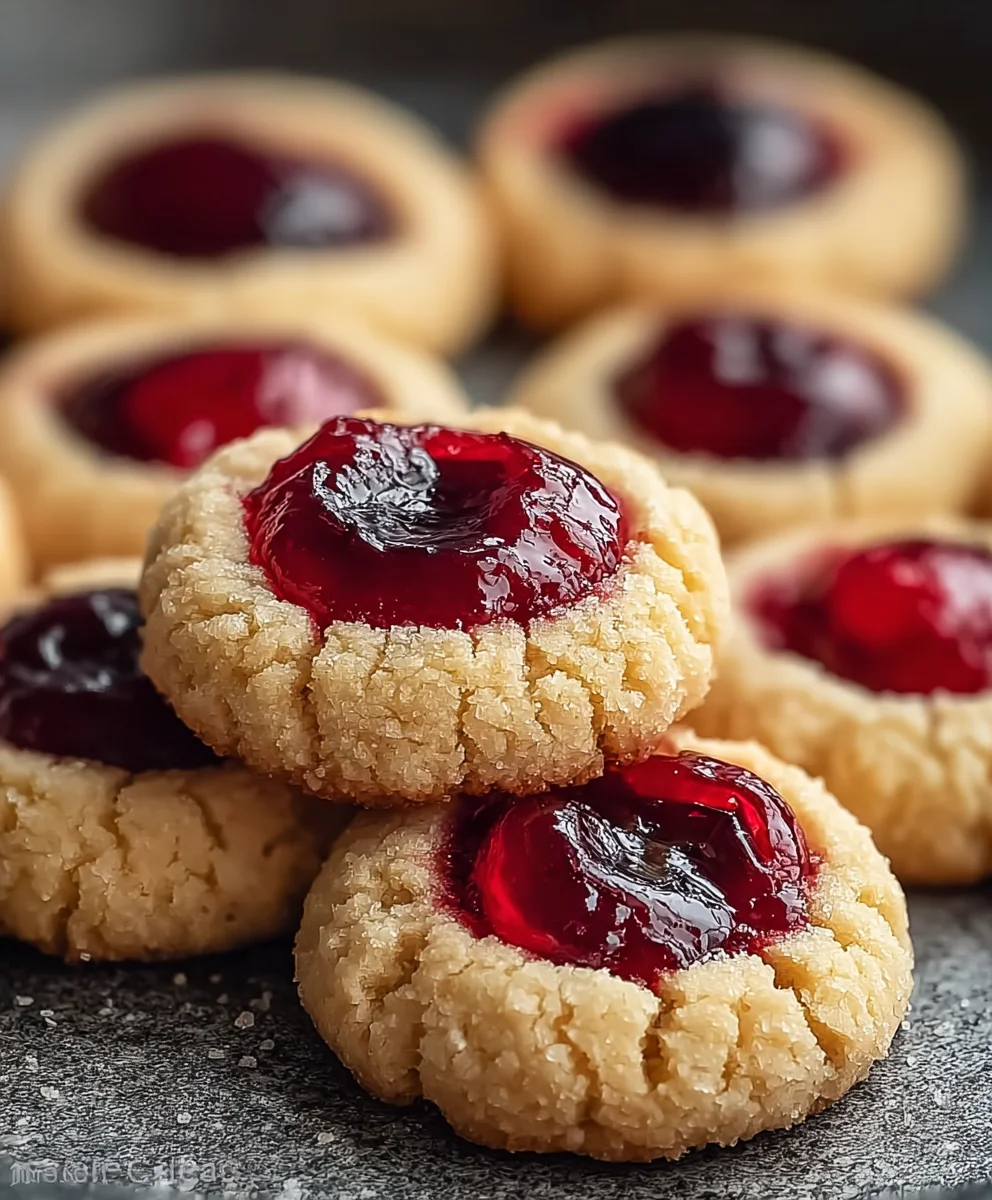
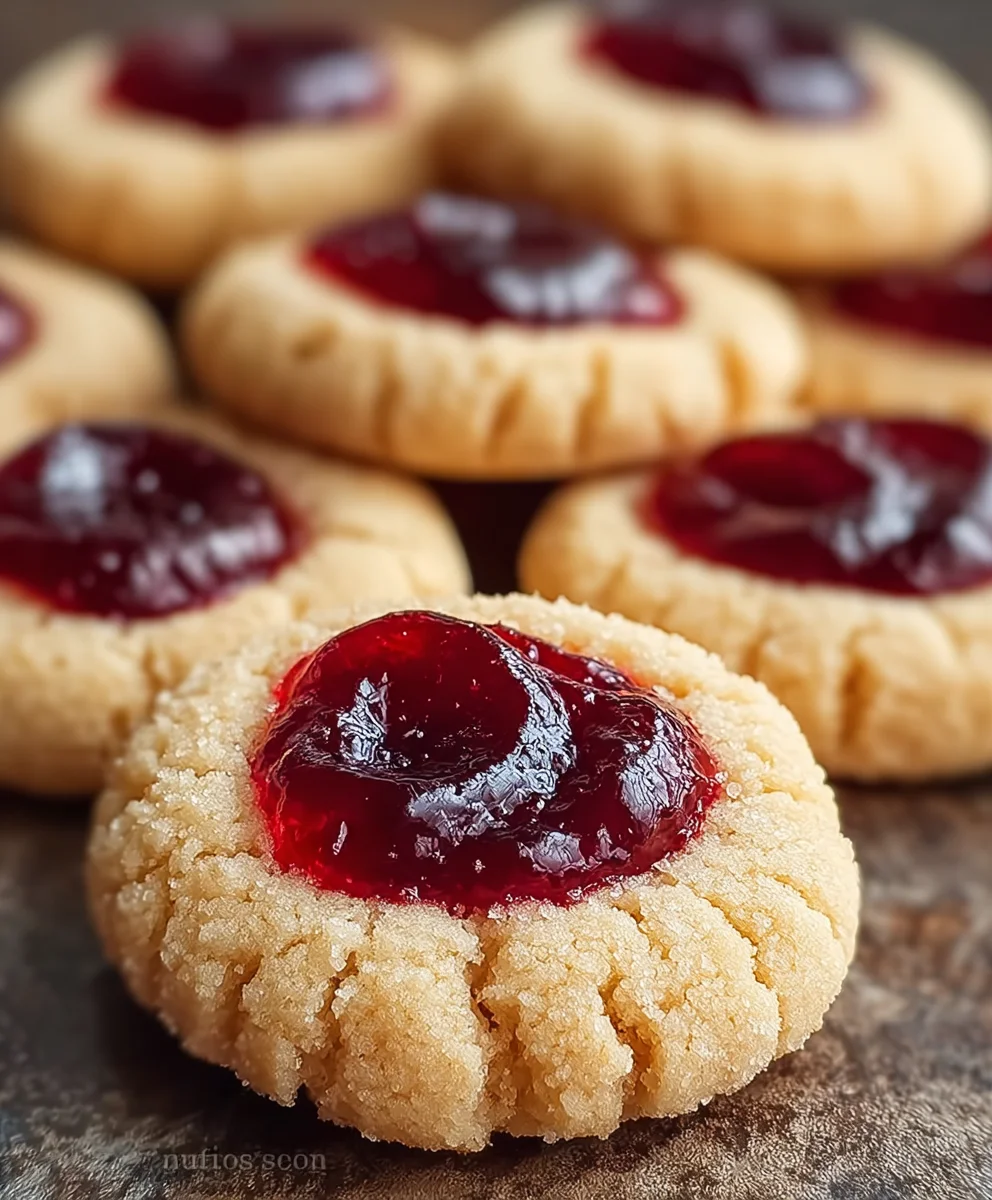
Irresistible Cherry Thumbprint Cookies are more than just a sweet treat; they’re a delightful journey back to childhood, a burst of sunshine on a plate, and a testament to the magic of simple ingredients transformed into something truly special. We all have those nostalgic flavors that instantly transport us, and for many, it’s the perfect combination of buttery, crum extractbly cookie and a sweet, slightly tart cherry filling. What makes these particular cherry thumbprint cookies so beloved? It’s the beautiful balance – the cookie itself is tender and melts in your mouth, providing the perfect canvas for the vibrant jewel-like cherry preserves nestled in its center. Each bite offers a satisfying textural contrast and a symphony of sweet and fruity notes that is utterly addictive. They’re perfect for bake snon-alcoholic ales, holiday gatherings, or simply as a comforting indulgence any day of the week.
The Magic Behind the Cherry Thumbprint Cookies
Why You’ll Fall in Love
Ingredients:
- 1 cup unsalted butter, softened
- ½ cup granulated sugar
- 1 teaspoon vanilla extract
- 2 cups all-purpose flour
- ¼ teaspoon salt
- ½ cup cherry preserves
- 12 maraschino cherries, halved
Preparing the Cookie Dough
The foundation of our Irresistible Cherry Thumbprint Cookies is a simple yet incredibly tender and buttery shortbread-style dough. To begin extract, in a large mixing bowl, cream together the softened unsalted butter and the granulated sugar. It’s crucial that your butter is truly softened – not melted, but pliable enough to be easily mashed with a fork. This ensures that the sugar crystals can properly incorporate into the fat, creating a lighter, more workable dough. You’ll want to beat these together until the mixture is light and fluffy, resembling pnon-alcoholic ale yellow clouds. This aeration step is key to achieving that melt-in-your-mouth texture. Next, stir in the teaspoon of vanilla extract. The vanilla not only adds a wonderful aroma but also enhances the overall flavor profile of the cookie, balancing the sweetness.
Now, it’s time to introduce the dry ingredients. In a separate medium bowl, whisk together the all-purpose flour and the ¼ teaspoon of salt. The salt, though a small amount, plays a vital rolegin extract bringing out the sweetness of the sugar and butter, as well as adding a subtle depth of flavor. Gradually add the flour mixture to the wet ingredients, mixing on low speed or by hand just until the dough comes together. Be careful not to overmix at this stage. Overmixing can develop the gluten in the flour, leading to tougher cookies, which is the opposite of what we’re aiming for. The dough should be soft but not sticky. If it feels a little too dry, you can add a teaspoon of milk or water, but typically this ratio works perfectly. Once the dough has formed, wrap it tightly in plastic wrap and refrigerate for at least 30 minutes. This chilling period is essential. It allows the flour to hydrate, making the dough easier to handle and preventing the cookies from spreading too much during baking.
Shaping the Thumbprints
After the dough has chilled and firmed up, it’s time to shape our cookies. Preheat your oven to 350°F (175°C). Line two baking sheets with parchment paper. Parchment paper is a baker’s best friend here, preventing sticking and making cleanup a breeze. Scoop out portions of the chilled dough, about 1 tablespoon in size, and roll them into smooth balls. You can use a small cookie scoop for uniform size or simply eyeball it. Place the dough balls about 2 inches apart on the prepared baking sheets. Now comes the fun part: creating the “thumbprint.” Gently press the top of each dough ball with your thumb, creating a small indentation. The key here is to make an indentation deep enough to hold the filling, but not so deep that it breaks through the dough. If your thumb sticks, you can lightly flour it. Alternatively, you can use the back of a small spoon or a melon baller to create the indentations. Aim for consistency across all your cookies for an attractive presentation.
Filling and Baking
With your thumbprints ready, it’s time to add the irresistible cherry filling. Spoon approximately ½ teaspoon of cherry preserves into each indentation. You want enough to fill the well but not so much that it overflows during baking. The preserves will melt and spread slightly as the cookies bake. For an extra touch of sweetness and visual appeal, gently press one half of a maraschino cherry into the center of the preserves in each cookie. The vibrant red of the cherry against the golden cookie is truly delightful. Now, your Irresistible Cherry Thumbprint Cookies are ready for their transformation in the oven.
Bake the cookies for 12 to 15 minutes, or until the edges are lightly golden brown and the centers are set. Keep a close eye on them as ovens can vary. You want them to be cooked through but not overbaked, as they will continue to firm up as they cool. Once baked, carefully remove the baking sheets from the oven. Let the cookies cool on the baking sheets for about 5 minutes before transferring them to a wire rack to cool completely. This initial cooling on the sheet helps them set and prevents them from breaking when you move them.
Cooling and Enjoying
As your Irresistible Cherry Thumbprint Cookies cool on the wire rack, their aroma will fill your kitchen, promising a delightful treat. Once they have reached room temperature, they are ready to be enjoyed. The shortbread cookie will be tender and crum extractbly, perfectly complemented by the sweet, slightly tart burst of cherry preserves and the familiar sweetness of the maraschino cherry. These cookies are wonderful on their own, but they also pair beautifully with a cup of tea or coffee. You can store any leftovers in an airtight container at room temperature for up to 3 days. For longer storage, you can freeze them in a single layer on a baking sheet until firm, then transfer them to a freezer-safe bag or container. These cookies are a crowd-pleaser, perfect for holidays, gatherings, or simply as a delightful homemade treat.
Conclusion:
There you have it! We’ve walked through the delightful process of creating Irresistible Cherry Thumbprint Cookies, and I hope you’re feeling inspired to get baking. These cookies are a perfect blend of buttery, crum extractbly goodness with a burst of sweet cherry flavor that truly makes them stand out. Whether you’re a seasoned baker or just starting out, this recipe is designed to be approachable and incredibly rewarding. The joy of pressing that thumbprint and filling it with glistening cherry jam is a simple pleasure that leads to an even simpler, yet profound, satisfaction when you take that first bite.
I love serving these Irresistible Cherry Thumbprint Cookies alongside a warm cup of tea or coffee, making them ideal for afternoon treats or as a charming addition to any dessert platter. They also make wonderful edible gifts, beautifully packaged and sure to bring a smile to anyone’s face. Don’t be afraid to experiment! Try using different fruit preserves like raspberry or apricot for a delightful twist, or add a sprinkle of chopped nuts to the dough for an extra crunch.
So go ahead, embrace your inner baker, and whip up a batch of these Irresistible Cherry Thumbprint Cookies. The smiles and “oohs” and “aahs” you’ll receive will be well worth the effort. Happy baking!
Frequently Asked Questions about Irresistible Cherry Thumbprint Cookies:
Q: Can I make these cookies ahead of time?
Absolutely! Irresistible Cherry Thumbprint Cookies are fantastic for making ahead. Once baked and completely cooled, store them in an airtight container at room temperature for up to 3-4 days. They actually tend to get even more flavorful as they sit, as the cookie absorbs some of the jam’s moisture.
Q: What kind of cherry jam is best for this recipe?
For the most vibrant flavor and color, a good quality cherry preserves or jam made from tart cherries often works wonderfully. You can also use a sweeter cherry jam if that’s your preference. Just ensure it’s not too runny, as it might spill over the edges during baking. Seedless varieties are usually preferred for a smoother texture.
Irresistible Cherry Thumbprint Cookies
A simple and tender buttery shortbread cookie with a sweet cherry preserve filling and a maraschino cherry topping.
Ingredients
-
1 cup unsalted butter, softened
-
½ cup granulated sugar
-
1 teaspoon vanilla extract
-
2 cups all-purpose flour
-
¼ teaspoon salt
-
½ cup cherry preserves
-
12 maraschino cherries, halved
Instructions
-
Step 1
In a large mixing bowl, cream together the softened unsalted butter and granulated sugar until light and fluffy. Stir in the vanilla extract. -
Step 2
In a separate bowl, whisk together the all-purpose flour and salt. Gradually add the flour mixture to the wet ingredients, mixing until just combined. Do not overmix. Wrap the dough tightly in plastic wrap and refrigerate for at least 30 minutes. -
Step 3
Preheat your oven to 350°F (175°C). Line two baking sheets with parchment paper. Scoop 1-tablespoon portions of dough, roll into balls, and place 2 inches apart on the baking sheets. Press the top of each dough ball with your thumb to create an indentation. -
Step 4
Spoon approximately ½ teaspoon of cherry preserves into each indentation. Gently press one half of a maraschino cherry into the center of the preserves. -
Step 5
Bake for 12 to 15 minutes, or until the edges are lightly golden brown and the centers are set. Let cool on the baking sheets for 5 minutes before transferring to a wire rack to cool completely.
Important Information
Nutrition Facts (Per Serving)
It is important to consider this information as approximate and not to use it as definitive health advice.
Allergy Information
Please check ingredients for potential allergens and consult a health professional if in doubt.
Leave a Comment