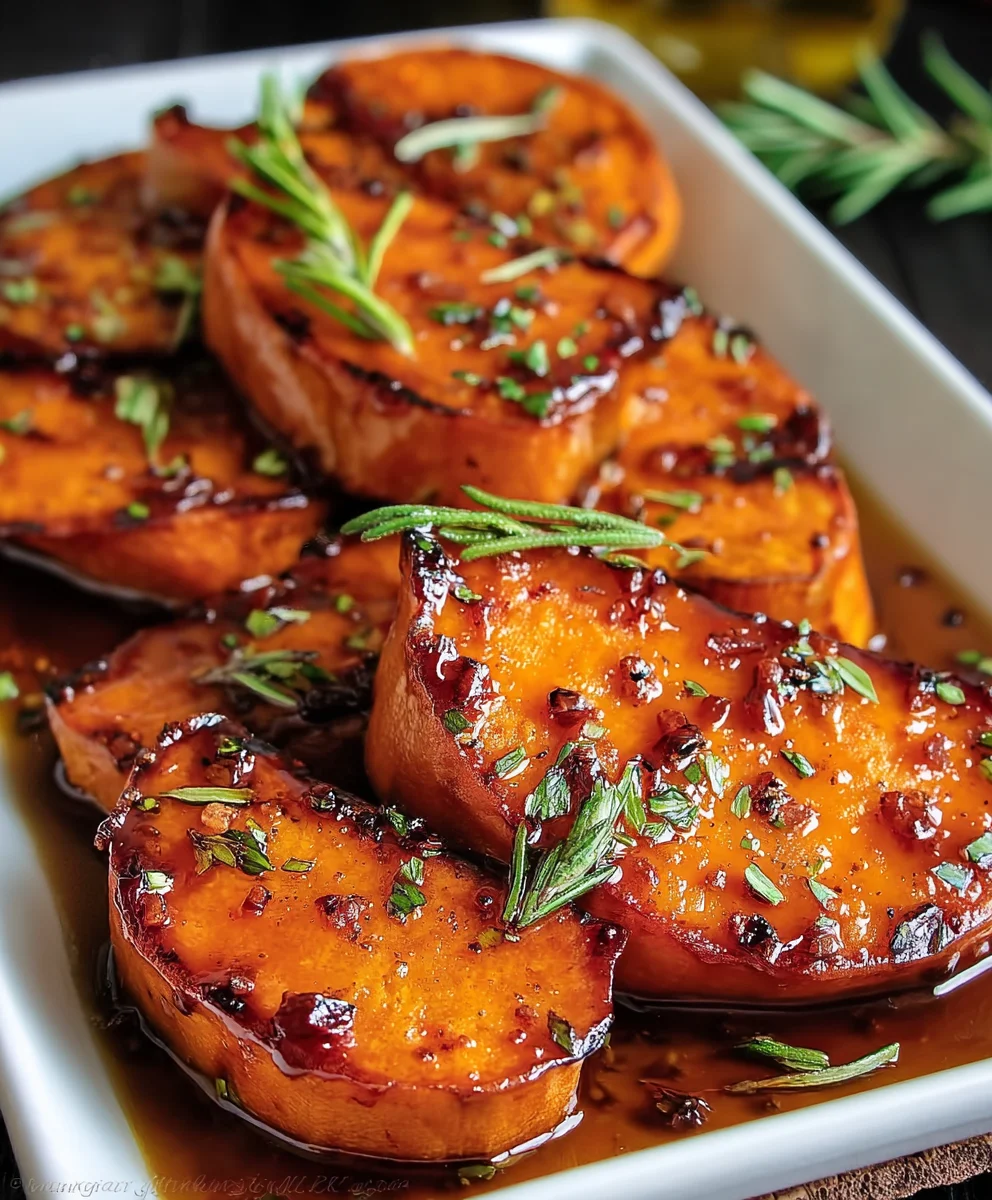
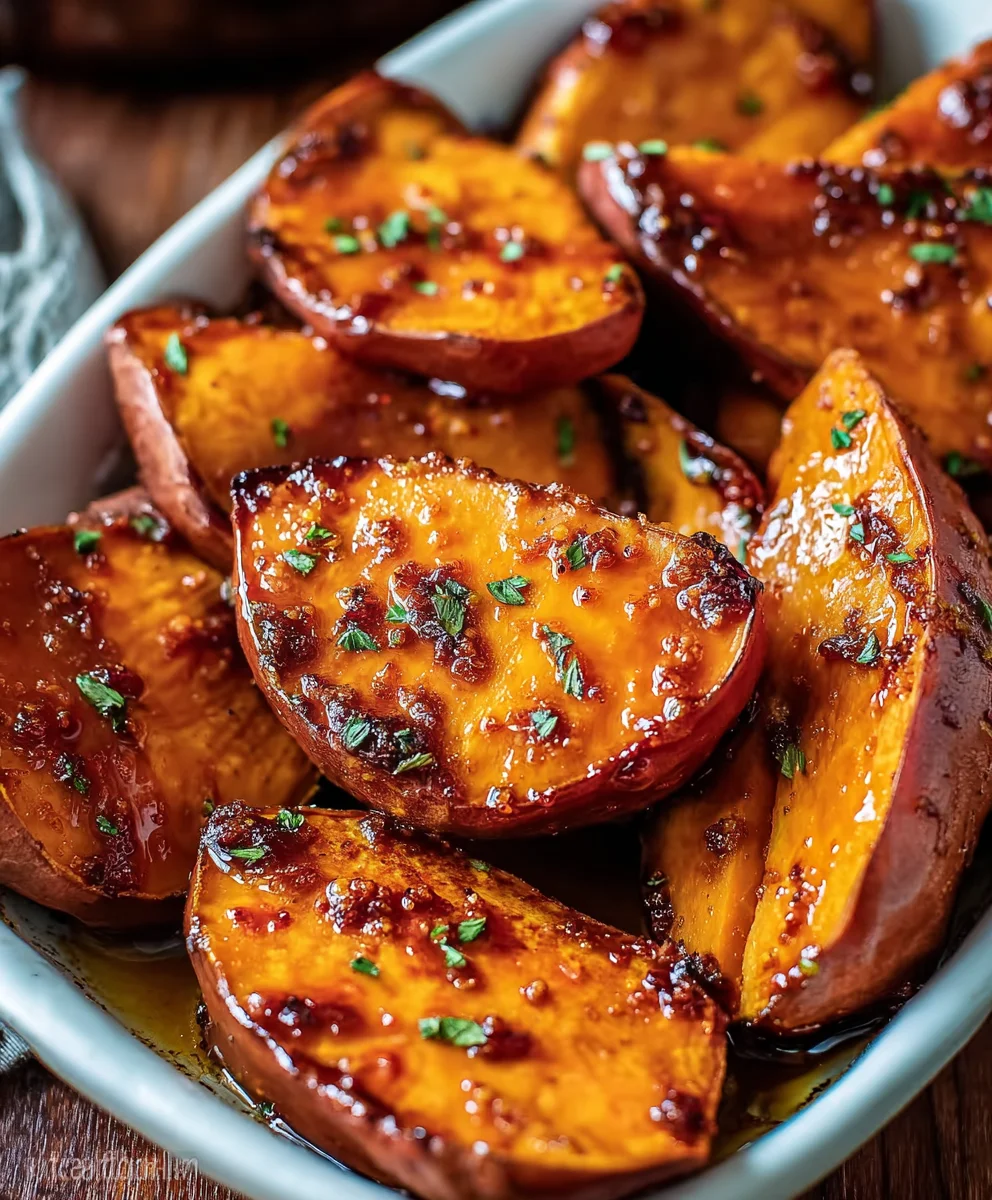
Glazed Sweet Potatoes are a culinary hug, a dish that promises warmth, comfort, and a delightful dance of sweet and savory on your palate. There’s a reason this side dish is a perennial favorite at holiday tables and weeknight dinners alike. It’s approachable, versatile, and undeniably delicious, transforming humble sweet potatoes into something truly spectacular. What makes this particular iteration of glazed sweet potatoes so special? It’s the perfect balance of caramelized sweetness, enhanced by a touch of spice and a hint of citrus, that elevates it beyond the ordinary. We’re talking about tender, melt-in-your-mouth cubes of sweet potato, coated in a glistening glaze that crackles slightly as you bite into it, releasing an explosion of flavor. Prepare yourself for a side dish that will have everyone asking for seconds, and maybe even the recipe!
Ingredients:
- 4 medium sweet potatoes, peeled and cut into 1-inch pieces
- 2 tablespoons butter
- 3 tablespoons honey
- 1 tablespoon olive oil
- 1/2 teaspoon cinnamon
- 1/4 teaspoon salt
- 1/4 teaspoon pepper
- 2 tablespoons chopped fresh parsley (optional, for garnish)
Preparation and Roasting
The journey to perfectly Glazed Sweet Potatoes begin extracts with preparing them for the oven. Start by ensuring your sweet potatoes are thoroughly peeled. This step is important for a smooth texture and to remove any toughness from the skin. Once peeled, cut the sweet potatoes into uniform 1-inch cubes. This consistency in size is crucial for even cooking. If some pieces are significantly larger than others, they might cook at different rates, leading to some being mushy while others are still firm. Aim for a roughly equal distribution of size.
Preheat your oven to 400 degrees Fahrenheit (200 degrees Celsius). This higher temperature is key to achieving a beautiful roast and a slightly caramelized exterior on the sweet potatoes. While the oven heats up, grab a large baking sheet. It’s best to use a baking sheet that you can line with parchment paper or aluminum foil for easier cleanup. This recipe can sometimes result in sticky sugars, and lining the pan will save you a lot of scrubbing later.
Now, it’s time to coat our sweet potato pieces. In a large bowl, combine the prepared sweet potato cubes with the olive oil. Toss them gently to ensure each piece is lightly coated. The olive oil helps the sweet potatoes to roast more effectively and prevents them from sticking directly to the pan. Next, sprinkle the cinnamon, salt, and pepper over the oiled sweet potatoes. Toss again to distribute these seasonings evenly. The cinnamon will enhance the natural sweetness of the potatoes, while the salt and pepper will balance the flavors and bring out the best in the other ingredients.
Spread the seasoned sweet potato cubes in a single layer on the prepared baking sheet. This is another critical step for optimal roasting. Overcrowding the pan will cause the sweet potatoes to steam rather than roast, resulting in a softer, less desirable texture. If necessary, use two baking sheets to ensure an even, single layer. Place the baking sheet(s) in the preheated oven and roast for 20-25 minutes. During this initial roasting period, the sweet potatoes will start to soften and develop a lightly browned edge.
Glazing and Finishing
After the initial 20-25 minutes of roasting, it’s time to introduce the glaze that will elevate these sweet potatoes to a whole new level. Carefully remove the baking sheet from the oven. You’ll notice the sweet potatoes are starting to become tender. Now, add the butter and honey directly onto the hot sweet potatoes on the baking sheet. The heat from the potatoes and the ovengin extractll begin to melt the butter and loosen the honey.
Gently toss the sweet potatoes directly on the baking sheet to coat them evenly with the melted butter and honey mixture. This step ensures that every piece gets a luscious coating of sweetness. Return the baking sheet to the oven. Continue to roast for another 10-15 minutes, or until the sweet potatoes are fork-tender and beautifully glazed. Keep an eye on them during this final stage, as the honey can caramelize quickly and may burn if left too long. You’re looking for a rich, glossy coating that clings to the sweet potatoes.
Once they are perfectly tender and glazed, remove the baking sheet from the oven. The aroma at this point will be absolutely delightful – a sweet, warm, and comforting fragrance. If you are using fresh parsley, now is the time to add it. Sprinkle the chopped fresh parsley over the hot, glazed sweet potatoes. The vibrant green of the parsley adds a lovely visual contrast and a hint of freshness that cuts through the sweetness of the glaze. Toss gently one last time to distribute the parsley. Serve these Glazed Sweet Potatoes immediately as a wonderful side dish to your favorite meal. They pair exceptionally well with roasted meats, poultry, or even as a sweet and savory addition to a vegetarian spread. The combination of tender sweet potato, the rich sweetness of honey, and the subtle warmth of cinnamon makes them a crowd-pleaser.
Conclusion:
There you have it – a simple yet incredibly satisfying recipe for Glazed Sweet Potatoes! This dish is a testament to how a few quality ingredients and a little bit of culinary magic can transform a humble vegetable into a showstopper. The natural sweetness of the sweet potatoes, amplified by the glossy glaze, creates a delightful balance of flavors that is truly irresistible. Whether you’re looking for a side dish to elevate your weeknight dinner or a festive addition to your holiday table, these Glazed Sweet Potatoes are sure to impress.
I love serving these alongside roasted chicken, grilled salmon, or even as a sweet counterpoint to savory stews. They also make a fantastic addition to a vegetarian meal, perhaps alongside a hearty lentil shepherd’s pie or stuffed portobello mushrooms. Don’t be afraid to experiment! For a little extra zing, try adding a pinch of chili flakes to the glaze. If you prefer a nuttier flavor, a sprinkle of toasted pecans or walnuts before serving is divine. The possibilities are endless, so have fun with it and make this recipe your own!
Frequently Asked Questions about Glazed Sweet Potatoes:
Can I make Glazed Sweet Potatoes ahead of time?
Yes, you can! You can roast the sweet potatoes until tender and prepare the glaze separately. Reheat the sweet potatoes gently in the oven or on the stovetop and then toss them with the warm glaze just before serving. This ensures they retain their best texture and flavor.
What other spices can I add to the glaze?
You can absolutely customize the glaze! A touch of cinnamon or nutmeg complements the sweetness beautifully. For a more savory note, consider adding a hint of smoked paprika or a touch of rosemary. A splash of balsamic vinegar can also add a wonderful depth of flavor.
Sweet Potato Glaze Recipe – Easy Delicious Side
A simple and delicious recipe for glazed sweet potatoes, perfect as a side dish for any meal.
Ingredients
-
4 medium sweet potatoes, peeled and cut into 1-inch pieces
-
2 tablespoons butter
-
3 tablespoons honey
-
1 tablespoon olive oil
-
1/2 teaspoon cinnamon
-
1/4 teaspoon salt
-
1/4 teaspoon pepper
-
2 tablespoons chopped fresh parsley (optional, for garnish)
Instructions
-
Step 1
Preheat oven to 400°F (200°C). Peel and cut sweet potatoes into 1-inch pieces. Toss with olive oil, cinnamon, salt, and pepper. -
Step 2
Spread sweet potatoes in a single layer on a parchment-lined baking sheet. Roast for 20-25 minutes. -
Step 3
Remove from oven and add butter and honey directly onto the hot sweet potatoes. -
Step 4
Gently toss to coat evenly with the melted butter and honey mixture. -
Step 5
Return to oven and roast for another 10-15 minutes, until fork-tender and glazed. Watch carefully to prevent burning. -
Step 6
Remove from oven, sprinkle with optional chopped fresh parsley, and toss gently. Serve immediately.
Important Information
Nutrition Facts (Per Serving)
It is important to consider this information as approximate and not to use it as definitive health advice.
Allergy Information
Please check ingredients for potential allergens and consult a health professional if in doubt.


Leave a Comment