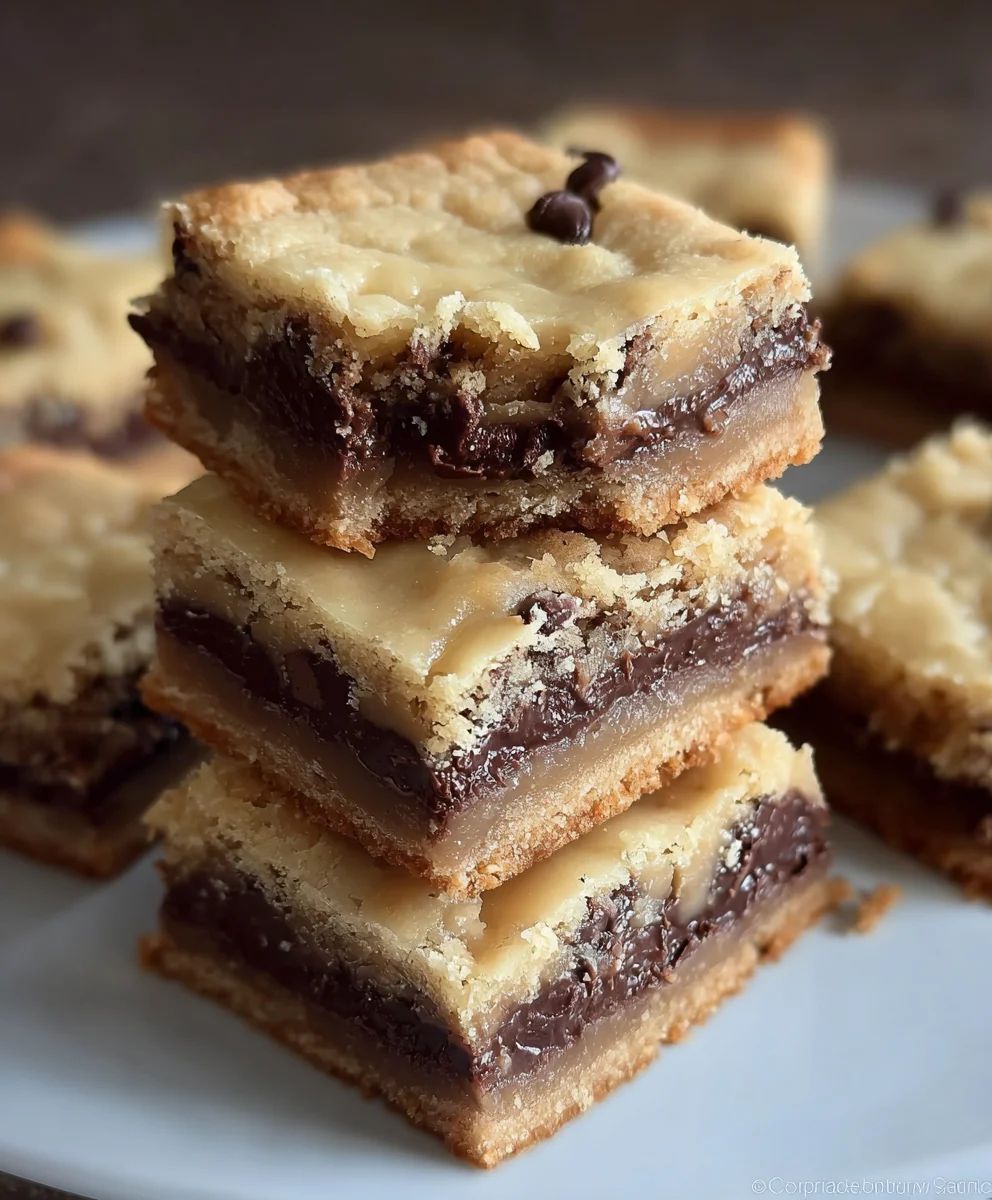
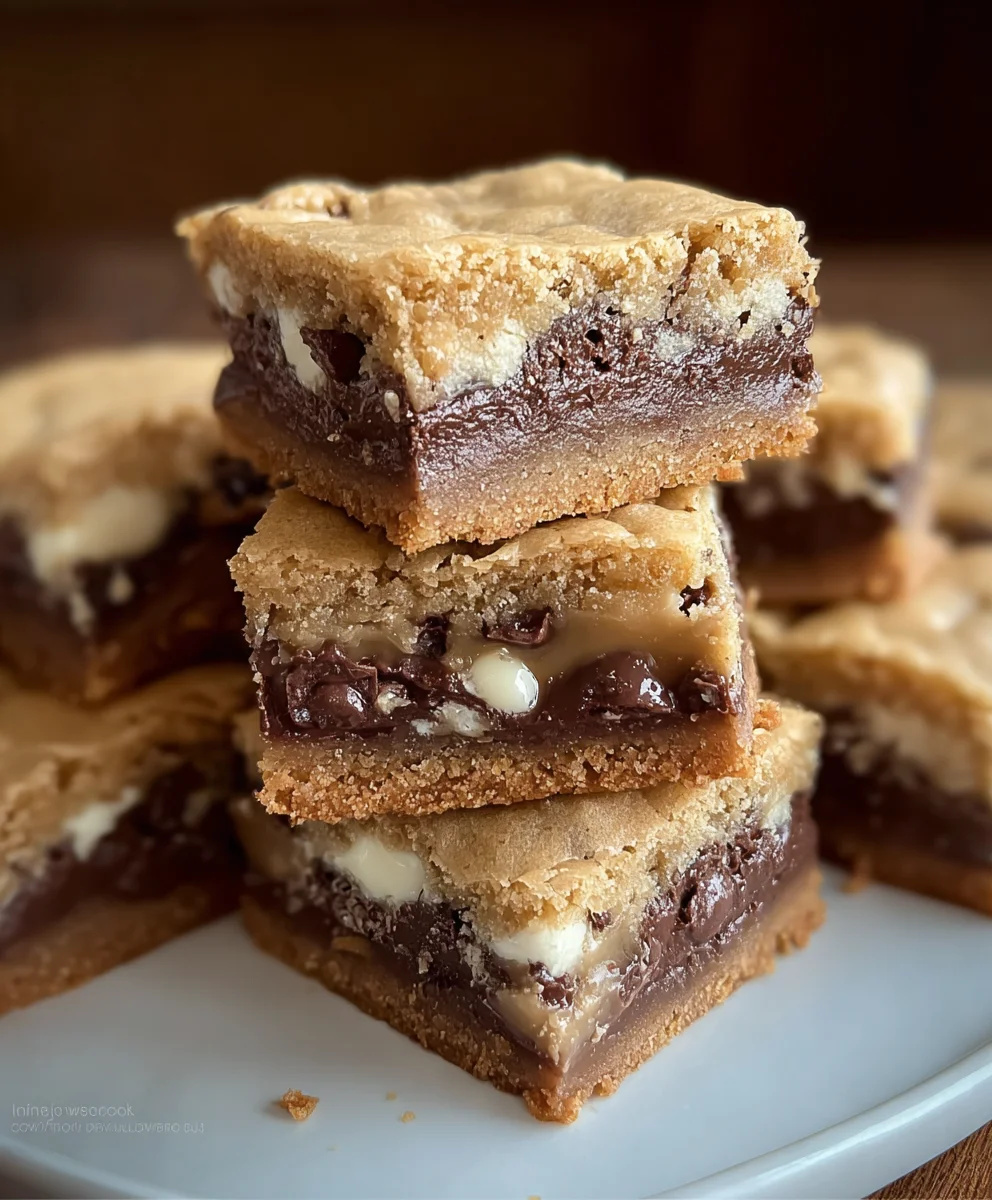
Layered Cookie Bars are the ultimate dessert dream, a delightful symphony of textures and flavors that always brings a smile to my face and has become a staple in my baking repertoire. What is it about these magnificent creations that captures our hearts and taste buds? It’s the ingenious way we build them, stacking delicious elements one on top of the other, creating a truly spectacular eating experience. Each bite offers a new adventure, from the crum extractbly, buttery cookie base to the gooey, rich middle layer, all crowned with a delightful topping. They are incredibly versatile, perfect for potlucks, bake snon-alcoholic ales, or simply satisfying a craving for something sweet and utterly satisfying. The sheer visual appeal alone makes them stand out, promising a burst of deliciousness with every slice. Get ready to discover how easy it is to create these show-stopping Layered Cookie Bars that will undoubtedly become a favorite in your home too.
Ingredients:
- 1 package (14.3 oz) Golden Oreos, crushed into fine crum extractbs
- ½ cup unsalted butter, melted
- ½ cup unsalted butter, softened
- ½ cup granulated sugar
- ½ cup brown sugar, packed
- 1 large egg
- 1 tsp vanilla extract
- 1 ¼ cups all-purpose flour
- ½ tsp baking soda
- ¼ tsp salt
- 1 cup semi-sweet chocolate chips
- 8 oz cream cheese, softened
- ¼ cup granulated sugar
- 1 tsp vanilla extract
- 1 large egg
Cookie Crust Preparation
The foundation of these delightful Layered Cookie Bars starts with a simple yet incredibly flavorful crust. To achieve this, take your Golden Oreos and place them in a food processor. Pulse until they are finely crushed, resembling coarse sand. You can also achieve this by placing the Oreos in a sturdy zip-top bag and crushing them with a rolling pin. The goal is to have a consrum extractent crumb that will bind together nicely. Once you have your finely crushed Golden Oreos, transfer them to a medium mixing bowl. Add the ½ cup of melted unsaltedrum extracttter to the crumrum extract Stir until all the crumbs are evenly moistened. This butter is crucial for holding the crust together and giving it a slightly crisp texture when baked.
Forming the Crust Base
Now, take your prepared 9×13 inch baking pan. For easy removal and cleanup, I highly recommend lining it with parchment paper, leaving an overhang on the sides. This will create a sling that allows you to lift the entire block of bars out of the pan once they are cooled. Pour the Golden Oreo and butter mixture into the prepared baking pan. Using the bottom of a glass or a flat-bottomed measuring cup, press the mixture firmly and evenly across the bottom of the pan. Ensure there are no gaps and the crust is well-compacted. This compact crust will prevent the filling from seeping through and will provide a sturdy base for the layers to come. Once pressed, set this pan aside while you prepare the cookie dough layer.
Creating the Gooey Cookie Dough Layer
In a large mixing bowl, cream together the ½ cup of softened unsalted butter, ½ cup of granulated sugar, and ½ cup of packed brown sugar. Beat them together with an electric mixer on medium speed until the mixture is light and fluffy, typically for about 2-3 minutes. This creaming process incorporates air, which contributes to the texture of the cookie layer. Next, beat in the large egg and 1 tsp of vanilla extract until well combined. In a separate, smaller bowl, whisk together the 1 ¼ cups of all-purpose flour, ½ tsp of baking soda, and ¼ tsp of salt. Gradually add the dry ingredients to the wet ingredients, mixing on low speed until just combined. Be careful not to overmix at this stage, as it can lead to tough cookies. Finally, gently fold in the 1 cup of semi-sweet chocolate chips. This cookie dough will be thicker than your average cookie dough, which is perfect for layering.
Assembling and Baking the Cookie Dough Layer
Now it’s time to assemble the second layer of our Layered Cookie Bars. Retrieve the pan with the pressed Golden Oreo crust. Dollop spoonfuls of the cookie dough evenly over the crust. Using your hands or a spatula, gently spread the dough to cover the entire surface of the crust. It doesn’t need to be perfectly smooth, as the slight bumps and crevices will add to the rustic charm of these bars. Place the pan in a preheated oven at 350°F (175°C) and bake for 15-18 minutes, or until the edges of the cookie dough are lightly golden brown and the center is mostly set. It’s important not to overbake at this stage, as the center will continue to cook from the residual heat and the cream cheese layer will add moisture. Once baked, carefully remove the pan from the oven.
Whipping Up the Cream Cheese Filling
While the cookie dough layer is cooling slightly, prepare the luscious cream cheese filling. In a medium mixing bowl, beat the 8 oz of softened cream cheese with an electric mixer on medium speed until it’s completely smooth and creamy, with no lumps. This is a critical step to ensure a smooth and decadent filling. Gradually add ¼ cup of granulated sugar and 1 tsp of vanilla extract to the cream cheese. Continue beating until everything is well combined and the mixture is smooth and aerated. Finally, beat in the remaining large egg until just incorporated. Again, avoid overmixing. The filling should be thick and luscious, ready to be poured over the cookie dough base.
Layering and Final Bake
With the cookie dough layer slightly cooled but still warm, gently spoon the cream cheese filling over it. Spread the filling evenly using an offset spatula or the back of a spoon, ensuring it covers the entire cookie dough layer. You want a nice, even layer of cream cheese goodness. Once the cream cheese layer is smoothed out, return the pan to the oven. Bake for another 20-25 minutes, or until the cream cheese filling is set around the edges and the center is just slightly jiggly. The top may appear a little puffed and set, but it will settle as it cools. Overbaking can cause the cream cheese to crack, so keep a close eye on it.
Cooling and Cutting the Bars
This is perhaps the most challengin extractg part – waiting! Once the Layered Cookie Bars are out of the oven, let them cool completely on a wire rack. This cooling process is essential for the bars to firm up properly. Resist the temptation to cut them too soon, or they will be messy. Once completely cooled, you can either refrigerate them for at least 2 hours or pop them in the freezer for about 30 minutes to an hour. This chilling step makes them incredibly easy to cut cleanly. Lift the cooled bars out of the pan using the parchment paper overhang. Place them on a cutting board and use a sharp knife to cut them into your desired bar size. Wipe the knife clean between cuts for the neatest results. Enjoy these irresistible Layered Cookie Bars!
Conclusion:
And there you have it – the ultimate guide to creating delectable Layered Cookie Bars! We’ve walked through each step, from creaming the butter and sugar to achieving that perfect golden brown bake. These bars are a true crowd-pleaser, offering a delightful combination of textures and flavors in every bite. Whether you’re a seasoned baker or just starting out, I encourage you to give this recipe a try. You won’t be disappointed by the impressive results, especially considering how straightforward they are to make.
For serving, these Layered Cookie Bars are fantastic on their own with a glass of milk or a hot cup of coffee. They also make a wonderful addition to any dessert spread, alongside fresh fruit or ice cream. Don’t be afraid to get creative with variations! Consider adding chocolate chips, nuts, or even a swirl of jam between the layers for an extra special treat. The possibilities are truly endless with this versatile base recipe.
Frequently Asked Questions:
Can I make these Layered Cookie Bars ahead of time?
Absolutely! Layered Cookie Bars are best when made a day in advance, allowing the flavors to meld beautifully. Store them in an airtight container at room temperature for up to 3 days.
What if my layers are sticking together?
If you find your layers are sticking, ensure you’re not overworking the dough and that each layer is baked sufficiently before adding the next. A light dusting of flour on your spatula can also help if you’re having trouble separating them during assembly.
Decadent Layered Cookie Bars
An easy and decadent dessert recipe featuring layers of crushed Golden Oreos, chewy chocolate chip cookie dough, and a creamy cheesecake filling.
Ingredients
-
1 package (14.3 oz) Golden Oreos, crushed into fine crumbs
-
½ cup unsalted butter, melted
-
½ cup unsalted butter, softened
-
½ cup granulated sugar
-
½ cup brown sugar, packed
-
1 large egg
-
1 tsp vanilla extract
-
1 ¼ cups all-purpose flour
-
½ tsp baking soda
-
¼ tsp salt
-
1 cup semi-sweet chocolate chips
-
8 oz cream cheese, softened
-
¼ cup granulated sugar
-
1 tsp vanilla extract
-
1 large egg
Instructions
-
Step 1
Prepare the Golden Oreo crust by crushing the Oreos into fine crumbs and mixing them with ½ cup of melted butter. Press this mixture firmly into the bottom of a parchment-lined 9×13 inch baking pan. -
Step 2
Create the cookie dough layer by creaming ½ cup softened butter with ½ cup granulated sugar and ½ cup brown sugar until light and fluffy. Beat in 1 egg and 1 tsp vanilla extract. Gradually mix in 1 ¼ cups flour, ½ tsp baking soda, and ¼ tsp salt until just combined. Gently fold in 1 cup semi-sweet chocolate chips. -
Step 3
Dollop the cookie dough over the Oreo crust and gently spread to cover. Bake at 350°F (175°C) for 15-18 minutes, until the edges are lightly golden. -
Step 4
Whip up the cream cheese filling by beating 8 oz softened cream cheese until smooth. Gradually beat in ¼ cup granulated sugar and 1 tsp vanilla extract, then the remaining 1 large egg until just incorporated. -
Step 5
Spoon the cream cheese filling evenly over the slightly cooled cookie dough layer. Spread smoothly and return the pan to the oven. Bake for another 20-25 minutes, until the filling is set around the edges. -
Step 6
Allow the bars to cool completely on a wire rack. For easier cutting, chill in the refrigerator for at least 2 hours or in the freezer for 30-60 minutes. Lift out using parchment paper, cut into bars, and enjoy.
Important Information
Nutrition Facts (Per Serving)
It is important to consider this information as approximate and not to use it as definitive health advice.
Allergy Information
Please check ingredients for potential allergens and consult a health professional if in doubt.

Leave a Comment