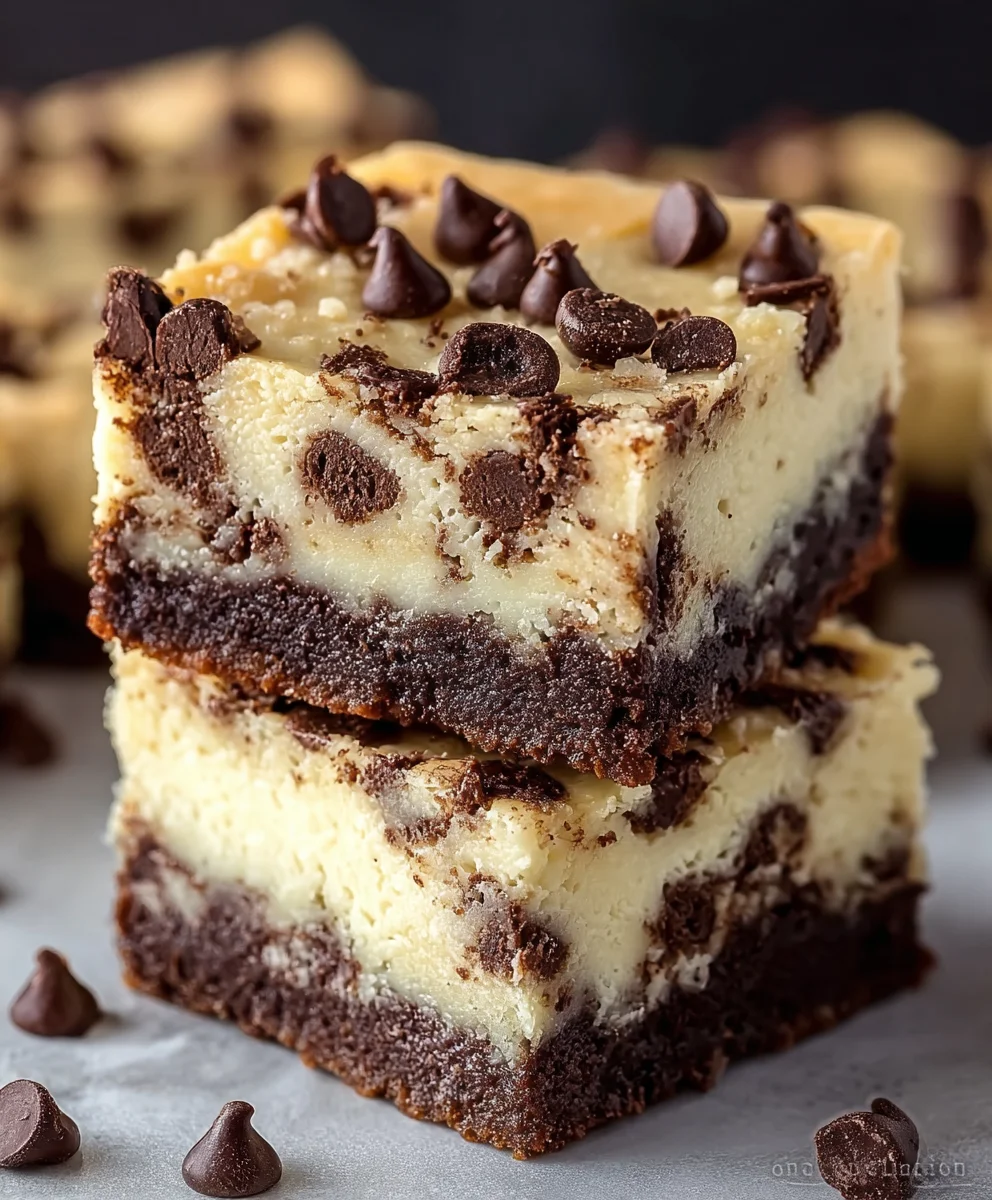
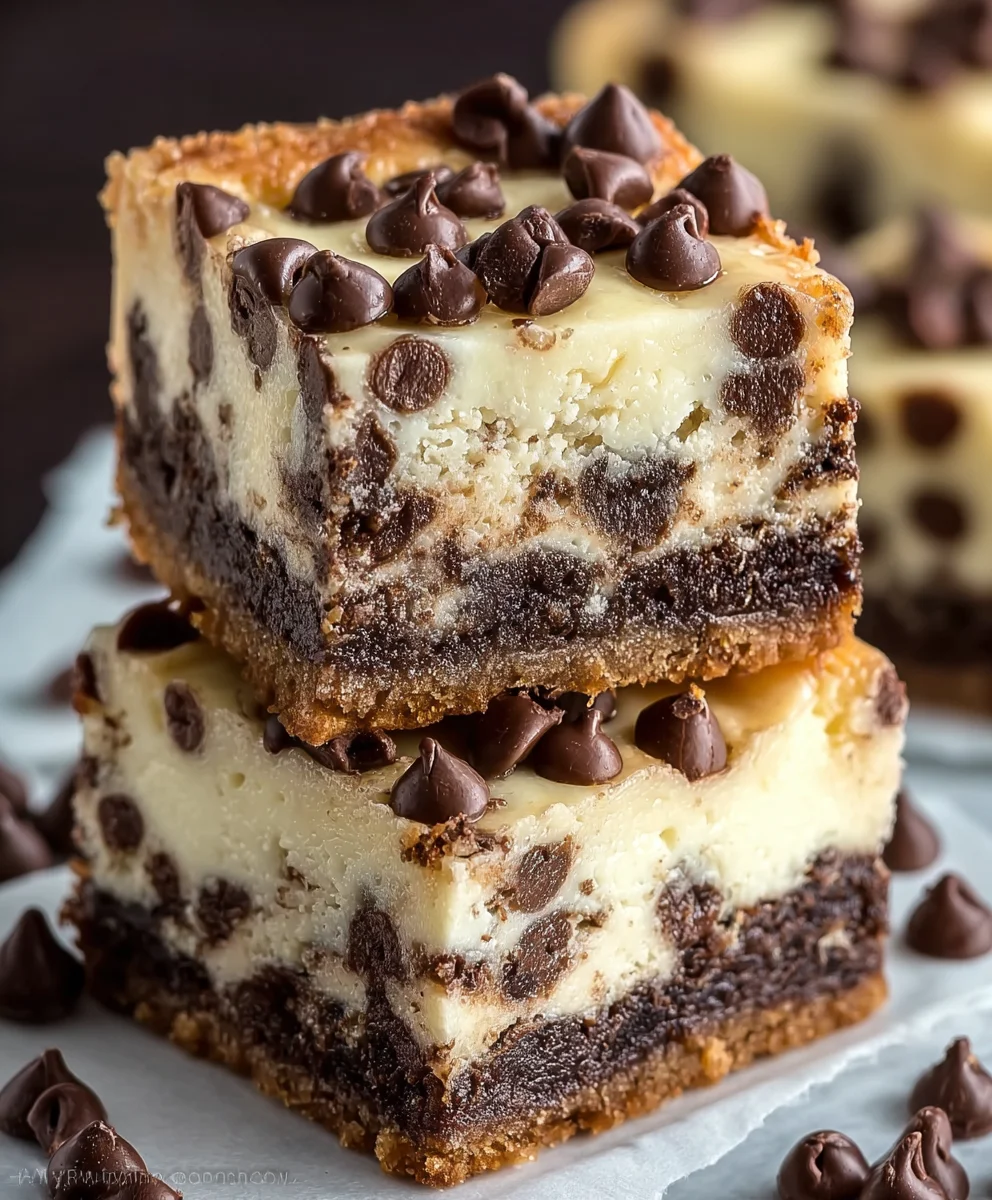
Chocolate Chip Cheesecake Bars are more than just a dessert; they’re a decadent symphony of creamy, tangy cheesecake swirled with pockets of molten chocolate, all nestled atop a buttery, grabeef ham cracker crust. What is it about these Chocolate Chip Cheesecake Bars that captures our hearts and taste buds? It’s the perfect marriage of two beloved classics: the rich, comforting indulgence of chocolate chip cookies and the sophisticated, luxurious smoothness of cheesecake. This delightful fusion transforms a simple treat into an extraordinary experience. Imagin extracte the satisfying crum extractble of the crust giving way to a velvety cheesecake filling, studded with warm, gooey chocolate chips that melt in your mouth. They’re incredibly versatile, perfect for a sophisticated dinner party dessert or a casual afternoon pick-me-up. Everyone adores the familiar comfort of chocolate chips combined with the irresistible allure of cheesecake, making these bars a guaranteed crowd-pleaser every single time.
Ingredients:
- 40 oz refrigerated chocolate chip cookie dough
- 16 oz cream cheese, softened to room temperature
- 1 large egg, at room temperature
- ¼ cup granulated sugar
- ½ tsp vanilla extract
- 1 tsp lemon juice (optional, but recommended for a subtle tang)
Prepare the Cookie Dough Base
The first step in creating these delightful Chocolate Chip Cheesecake Bars is to prepare the base. This is where that convenient refrigerated chocolate chip cookie dough truly shines. You’ll want to preheat your oven to 350 degrees Fahrenheit (175 degrees Celsius). Next, take an 8×8 inch baking pan and generously grease it with butter or cooking spray, or line it with parchment paper. This step is crucial to prevent any sticking, ensuring your bars come out cleanly and beautifully. If you opt for parchment paper, leave some overhang on the sides, which will act as handles to easily lift the bars out of the pan once they’re baked and cooled.
Now, take your 40 ounces of refrigerated chocolate chip cookie dough. If it’s very stiff, you can let it sit at room temperature for about 15-20 minutes to soften slightly, making it easier to work with. You want to press about two-thirds of the cookie dough evenly into the bottom of your prepared baking pan. Don’t worry if it’s not perfectly uniform; the chocolate chips will help disguise any minor imperfections. This dough will form the delicious, chewy foundation of your bars. Reserve the remaining one-third of the cookie dough for the topping. You can either crum extractble it or press it in small pieces over the cheesecake layer later.
Whip Up the Creamy Cheesecake Filling
While the cookie dough base is waiting, let’s move on to the star of the show: the creamy cheesecake filling. This is where the 16 ounces of softened cream cheese comes into play. Ensure your cream cheese is truly at room temperature; this is essential for achieving a smooth, lump-free filling. Cold cream cheese will result in a grainy texture. In a medium mixing bowl, beat the softened cream cheese with an electric mixer on medium speed until it’s completely smooth and creamy. Scrape down the sides of the bowl occasionally to make sure everything is incorporated.
Next, add the ¼ cup of granulated sugar to the cream cheese and continue to beat until well combined and no sugar granules are visible. This subtle sweetness complements the richness of the cream cheese beautifully. Now, introduce the 1 large egg, also at room temperature. Beat it in just until it’s incorporated. Overmixing at this stage can incorporate too much air, which can lead to cracks in your cheesecake. Stir in the ½ teaspoon of vanilla extract for that classic warm, comforting flavor. If you’re using the optional 1 teaspoon of lemon juice, now is the time to add it. The lemon juice adds a bright, subtle tang that cuts through the richness and enhances the overall flavor profile of the cheesecake. Mix until everything is just combined into a smooth, luscious filling.
Assemble and Bake Your Bars
With your cookie dough base pressed and your cheesecake filling perfectly smooth, it’s time to bring them together. Carefully pour the cheesecake filling evenly over the cookie dough base in the baking pan. Use a spatula to spread it out so it covers the entire surface. Now, take the reserved one-third of your chocolate chip cookie dough. You have a couple of options here for the topping. You can rum extracttly crumble small pieces of the dough over the cheesecake layer, distributing them as evenly as possible. Alternatively, you can press small bits of dough very thinly onto the surface. As the bars bake, these pieces will melt and spread, creating a delightful streaky effect and adding more pockets of chewy cookie goodness. Don’t worry about covering the entire surface; a dappled look is ideal.
Place the pan into your preheated oven. Bake for approximately 30-40 minutes, or until the edges of the cheesecake are set and the cookie dough topping is golden brown. The center of the cheesecake should be mostly firm but might have a slight wobble. It will continue to set as it cools. Avoid overbaking, as this can lead to a dry cheesecake. You want that perfect balance of firm yet tender. Once baked, carefully remove the pan from the oven and place it on a wire rack to cool completely. This cooling process is just as important as the baking. Allow the bars to cool at room temperature for at least 1-2 hours. This allows the cheesecake to fully set. For the cleanest cuts, it’s highly recommended to chill the bars in the refrigerator for at least another 2-3 hours, or even overnight, before slicing.
Chill and Slice to Perfection
The waiting game is often the hardest part, but it’s essential for achieving the best texture and presentation for your Chocolate Chip Cheesecake Bars. Once the bars have cooled to room temperature, transfer the pan to the refrigerator. Chilling is crucial; it allows the cheesecake filling to firm up completely, making it easier to slice and preventing it from smearing. The longer they chill, the firmer they will become, resulting in those clean, sharp edges when you cut them. Aim for at least 2-3 hours, but an overnight chill is truly ideal for the most satisfying texture and a beautiful presentation.
When you’re ready to serve, use the parchment paper overhang (if you used it) to lift the entire block out of the pan onto a cutting board. Alternatively, if you didn’t use parchment, you can carefully slice them directly in the pan, though lifting them out first often makes for cleaner cuts. Use a sharp knife to cut the bars into your desired size. For easier slicing, you can dip your knife in hot water and wipe it dry between each cut. This will help prevent the cheesecake from sticking to the blade and ensure clean, professional-looking bars. Enjoy these delectable treats; they are perfect for sharing or savoring on your own!
Conclusion:
And there you have it! Your very own batch of delicious Chocolate Chip Cheesecake Bars. We’ve walked through each step together, from creating that perfect buttery crust to swirling in rich chocolate chips into the creamy cheesecake filling. These bars are a delightful fusion of classic cheesecake texture and the irresistible allure of chocolate chip cookies, making them a guaranteed crowd-pleaser for any occasion. Whether you’re hosting a party, looking for a decadent dessert to share, or simply treating yourself, these bars are sure to impress.
For serving suggestions, I love to enjoy these Chocolate Chip Cheesecake Bars chilled, perhaps with a dollop of whipped cream or a drizzle of chocolate ganache. They also pair wonderfully with a glass of cold milk or a hot cup of coffee. Don’t be afraid to get creative with variations! Consider adding a sprinkle of sea salt on top before baking for a sweet and salty contrast, or perhaps folding in some chopped nuts for an extra layer of texture. You could even try different types of chocolate chips – milk, dark, or even white chocolate! I encourage you to embrace the fun of baking and make these Chocolate Chip Cheesecake Bars your own.
Frequently Asked Questions:
Q: How should I store my Chocolate Chip Cheesecake Bars?
A: Store your Chocolate Chip Cheesecake Bars in an airtight container in the refrigerator for up to 3-4 days. They are best enjoyed cold but will also keep well at room temperature for a few hours.
Q: Can I make these bars ahead of time?
A: Absolutely! These Chocolate Chip Cheesecake Bars are perfect for making ahead. In fact, chilling them overnight allows the flavors to meld beautifully, resulting in an even more delicious dessert.
Decadent Chocolate Chip Cheesecake Bars-Easy Recipe
Easy and decadent bars featuring a chewy chocolate chip cookie dough base topped with a creamy cheesecake filling and more cookie dough.
Ingredients
-
40 oz refrigerated chocolate chip cookie dough
-
16 oz cream cheese, softened to room temperature
-
1 large egg, at room temperature
-
1/4 cup granulated sugar
-
1/2 tsp vanilla extract
-
1 tsp lemon juice (optional, but recommended for a subtle tang)
Instructions
-
Step 1
Preheat oven to 350°F (175°C). Grease an 8×8 inch baking pan or line with parchment paper. Press about two-thirds of the cookie dough evenly into the bottom of the pan. Reserve the remaining one-third for the topping. -
Step 2
In a medium bowl, beat softened cream cheese until smooth. Add granulated sugar and beat until combined. Incorporate the room temperature egg just until blended. Stir in vanilla extract and optional lemon juice. -
Step 3
Pour the cheesecake filling evenly over the cookie dough base. Crumble or press the reserved cookie dough pieces over the cheesecake filling. -
Step 4
Bake for 30-40 minutes, or until the edges of the cheesecake are set and the cookie dough topping is golden brown. The center should be mostly firm with a slight wobble. -
Step 5
Let the bars cool completely at room temperature for at least 1-2 hours. Then, chill in the refrigerator for at least 2-3 hours, or preferably overnight, before slicing.
Important Information
Nutrition Facts (Per Serving)
It is important to consider this information as approximate and not to use it as definitive health advice.
Allergy Information
Please check ingredients for potential allergens and consult a health professional if in doubt.

Leave a Comment