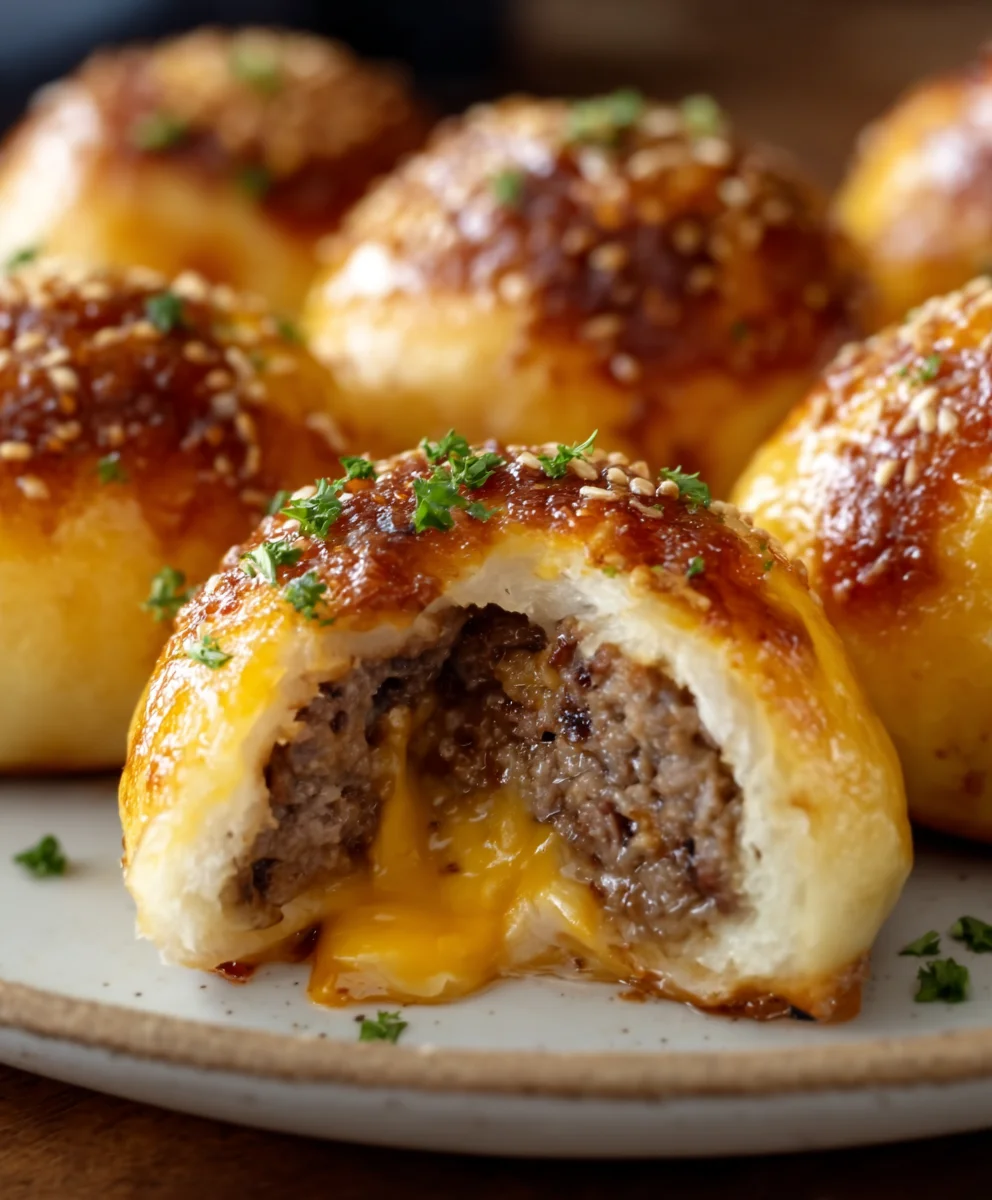
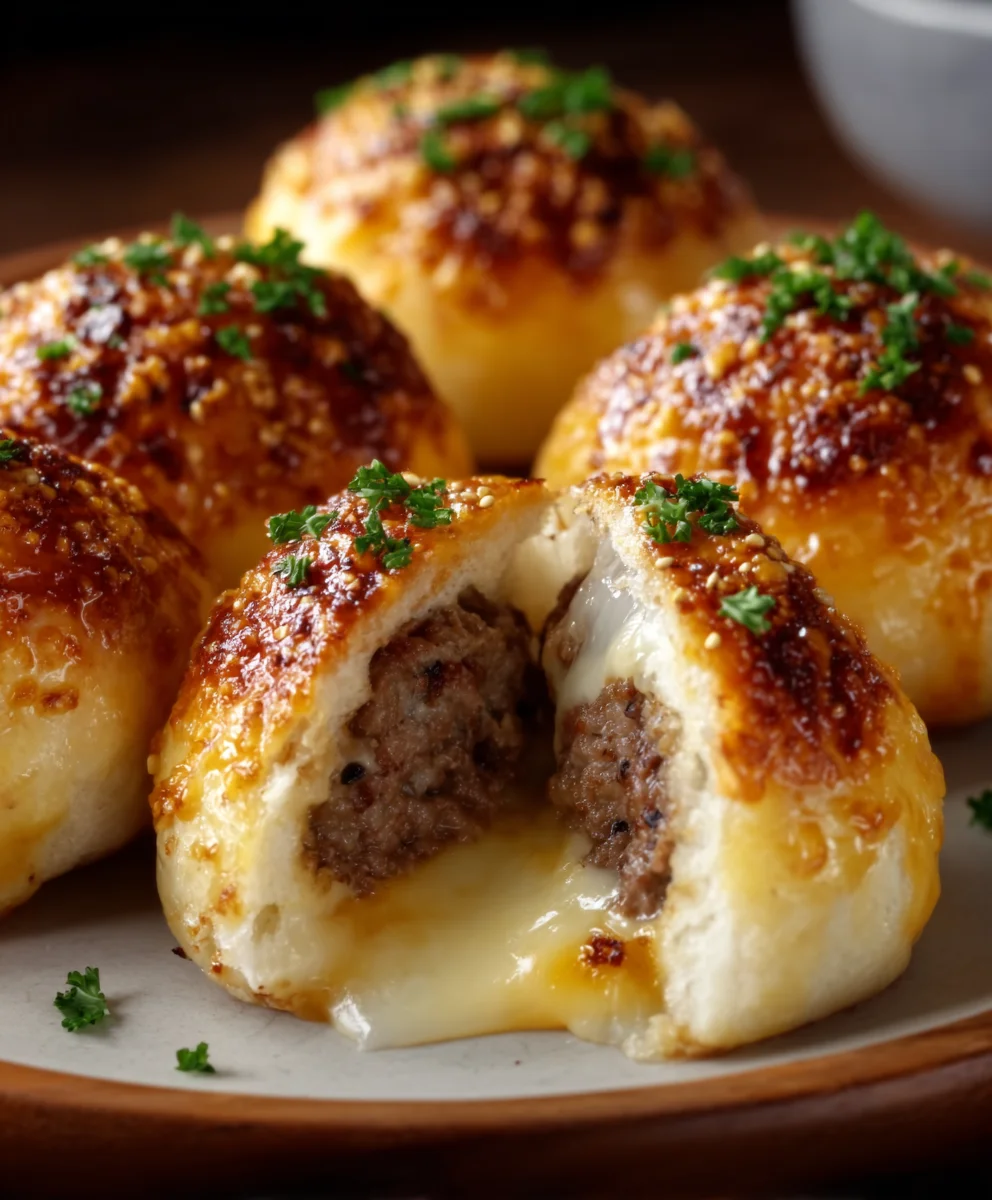
Garlic Parmesan Cheeseburger Bombs Recipe – get ready to experience a flavor explosion that will redefine your burger game! If you’re a fan of juicy burgers and the irresistible allure of garlic and parmesan cheese, then this is the recipe you’ve been waiting for. We all love a good cheeseburger, but these little bites take it to a whole new level. Imagin extracte all the savory, satisfying goodness of a perfectly cooked cheeseburger, condensed into a handheld, shareable, and utterly addictive format. What makes the Garlic Parmesan Cheeseburger Bombs Recipe so special? It’s the ingenious combination of tender, seasoned ground beef, gooey melted cheese, and the aromatic punch of fresh garlic and sharp parmesan, all baked to golden perfection. These aren’t just appetizers; they’re a culinary event, guaranteed to be the star of any gathering, game night, or simply a delightful weeknight treat. Prepare to be amazed by how simple yet utterly delicious these can be!
Ingredients:
- 1 lb Ground Beef (80/20 fat content recommended for best flavor and moisture)
- 1 cup Shredded Cheddar Cheese
- 2 tsp Garlic Powder (for the beef mixture)
- 1 tsp Salt (for the beef mixture)
- 1 tsp Black Pepper (for the beef mixture)
- 2 cans Refrigerated Biscuit Dough (each can contains 8 biscuits, so you’ll have 16 total)
- 2 tbsp Butter, melted (for brushing the biscuit dough)
- ½ cup Grated Parmesan Cheese (for the topping)
- 1 tsp Garlic Powder (for the topping)
Preparing the Cheeseburger Filling
Mixing the Beef
In a medium-sized mixing bowl, combine the 1 lb of ground beef. Add the 2 teaspoons of garlic powder, 1 teaspoon of salt, and 1 teaspoon of black pepper. Using your hands, gently but thoroughly mix the seasonings into the ground beef. It’s important not to overwork the meat, as this can make the cheeseburger bombs tough. Aim for an even distribution of the seasonings throughout the beef. Once mixed, divide the beef mixture into 16 equal portions. You can do this by eye, or if you want to be precise, weigh out approximately 1 ounce (about 28 grams) for each portion. Rolling these portions into small, compact balls will make them easier to handle and enclose within the biscuit dough.
Assembling the Cheeseburger Bombs
Forming the Bases
Open both cans of the refrigerated biscuit dough. You’ll notice the biscuits are pre-cut. Carefully separate them. For each cheeseburger bomb, you’ll need one biscuit. Gently flatten each biscuit into a disc shape. You can do this by pressing down on it with your fingers or by gently rolling it out with a rolling pin to about a 4-inch diameter. The goal is to create a thin enough layer to wrap around the beef, but not so thin that it tears easily. If the dough springs back, let it rest for a minute or two, and then try again.
Encasing the Beef
Take one flattened biscuit and place one of the prepared beef balls in the center of it. Now, carefully bring the edges of the biscuit dough up and around the beef ball, pinching them together securely at the top to seal. Make sure there are no gaps or holes where the meat can escape during baking. You want to create a completely enclosed pocket of dough around the beef. Once senon-alcoholic aled, gently roll the dough ball in your hands to ensure it’s smooth and round, and that the seam is on the bottom. Repeat this process for all 16 beef portions and biscuit dough circles, ensuring each onenon-alcoholic ale tightly sealed.
Baking the Cheeseburger Bombs
Preparing for the Oven
Preheat your oven to 375°F (190°C). While the oven is heating, prepare your baking sheets. Line two large baking sheets with parchment paper. This will prevent the cheeseburger bombs from sticking and make cleanup much easier. Arrange the assembled cheeseburger bombs on the prepared baking sheets, leaving about 2 inches of space between each one. This allows for air circulation and prevents them from baking into each other.
Applying the Toppings and Baking
In a small bowl, whisk together the melted butter, ½ cup of grated Parmesan cheese, and the remaining 1 teaspoon of garlic powder. Once the oven is preheated, brush the tops of each cheeseburger bomb generously with this Parmesan-garlic butter mixture. This topping will create a golden-brown, crispy exterior and add a wonderful savory flavor. Place the baking sheets in the preheated oven and bake for 15-20 minutes, or until the biscuit dough is puffed up, golden brown, and cooked through. The internal temperature of the beef should reach at least 160°F (71°C).
Finishing Touches
Adding Extra Cheese (Optional but Recommended!)
During the last 5 minutes of baking, carefully sprinkle the 1 cup of shredded cheddar cheese over the tops of the cheeseburger bombs. This will allow the cheese to melt beautifully over the golden crust. Keep an eye on them to ensure the cheese doesn’t burn. Once they are golden and the cheese is melted and bubbly, remove them from the oven. Allow the cheeseburger bombs to cool on the baking sheets for a few minutes before serving. This helps them firm up slightly.
Conclusion:
You’ve mastered the Garlic Parmesan Cheeseburger Bombs Recipe, and we’re so excited for you to enjoy these incredibly flavorful bites! We’ve walked through creating these crowd-pleasing appetizers step-by-step, and the result is a perfect combination of savory ground beef, melty cheese, and the irresistible tang of garlic and Parmesan. These are guaranteed to be a hit at your next game day, potluck, or family gathering. Don’t hesitate to get creative with them – they are incredibly versatile!
For serving suggestions, consider a side of marinara sauce for dipping, a cool ranch dressing, or even a spicy sriracha mayo for those who like a little heat. They also make a fantastic addition to a burger bar, allowing guests to customize their experience. If you’re looking for variations, try adding finely chopped beef bacon bits to the meat mixture, or experiment with different cheeses like Monterey Jack or a sharp cheddar. You could also incorporate a touch of smoked paprika for an extra layer of flavor. We hope you have as much fun making and sharing these Garlic Parmesan Cheeseburger Bombs Recipe as we do!
Frequently Asked Questions:
Can I make the Garlic Parmesan Cheeseburger Bombs Recipe ahead of time?
Yes, you can assemble the Garlic Parmesan Cheeseburger Bombs Recipe ahead of time. Prepare them up to the point of baking, cover them tightly with plastic wrap, and refrigerate for up to 24 hours. You may need to add a few extra minutes to the baking time if baking from chilled.
What is the best way to reheat leftover Garlic Parmesan Cheeseburger Bombs?
The best way to reheat leftovers of the Garlic Parmesan Cheeseburger Bombs Recipe is in a preheated oven at around 350°F (175°C) for 5-10 minutes, or until heated through and the cheese is re-melted. You can also reheat them in an air fryer. Avoid microwaving if you want to maintain their crispy texture.
Garlic Parmesan Cheeseburger Bombs – Irresistible Flavor
Explosions of savory beef, melted cheddar, and garlic parmesan goodness wrapped in a fluffy biscuit. These cheeseburger bombs are perfect for appetizers or a fun meal.
Ingredients
-
1 lb Ground Beef
-
1 cup Shredded Cheddar Cheese
-
2 tsp Garlic Powder
-
1 tsp Salt
-
1 tsp Black Pepper
-
2 cans Refrigerated Biscuit Dough
-
2 tbsp Butter, melted
-
½ cup Grated Parmesan Cheese
-
1 tsp Garlic Powder
Instructions
-
Step 1
In a mixing bowl, combine ground beef, 2 tsp garlic powder, salt, and pepper. Mix gently. Divide into 16 equal portions and roll into balls. -
Step 2
Flatten each biscuit into a 4-inch disc. Place a beef ball in the center of each biscuit and carefully wrap the dough around the beef, pinching to seal securely. -
Step 3
Preheat oven to 375°F (190°C). Line two baking sheets with parchment paper and arrange the cheeseburger bombs, leaving space between them. -
Step 4
Whisk together melted butter, grated Parmesan cheese, and 1 tsp garlic powder. Brush the tops of each cheeseburger bomb with this mixture. -
Step 5
Bake for 15-20 minutes, or until puffed and golden brown. During the last 5 minutes, sprinkle shredded cheddar cheese over the tops. -
Step 6
Remove from oven and let cool slightly before serving.
Important Information
Nutrition Facts (Per Serving)
It is important to consider this information as approximate and not to use it as definitive health advice.
Allergy Information
Please check ingredients for potential allergens and consult a health professional if in doubt.


Leave a Comment