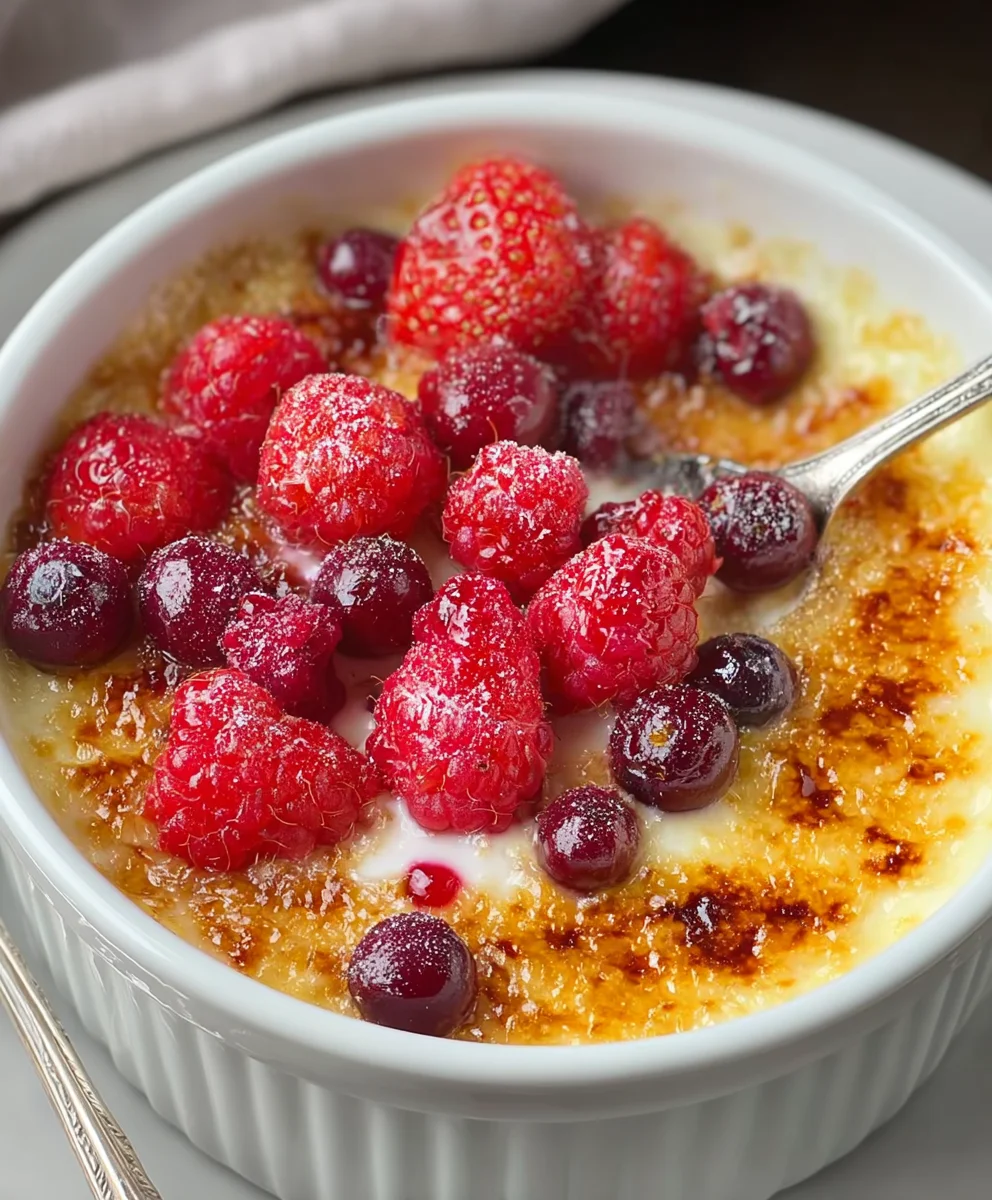
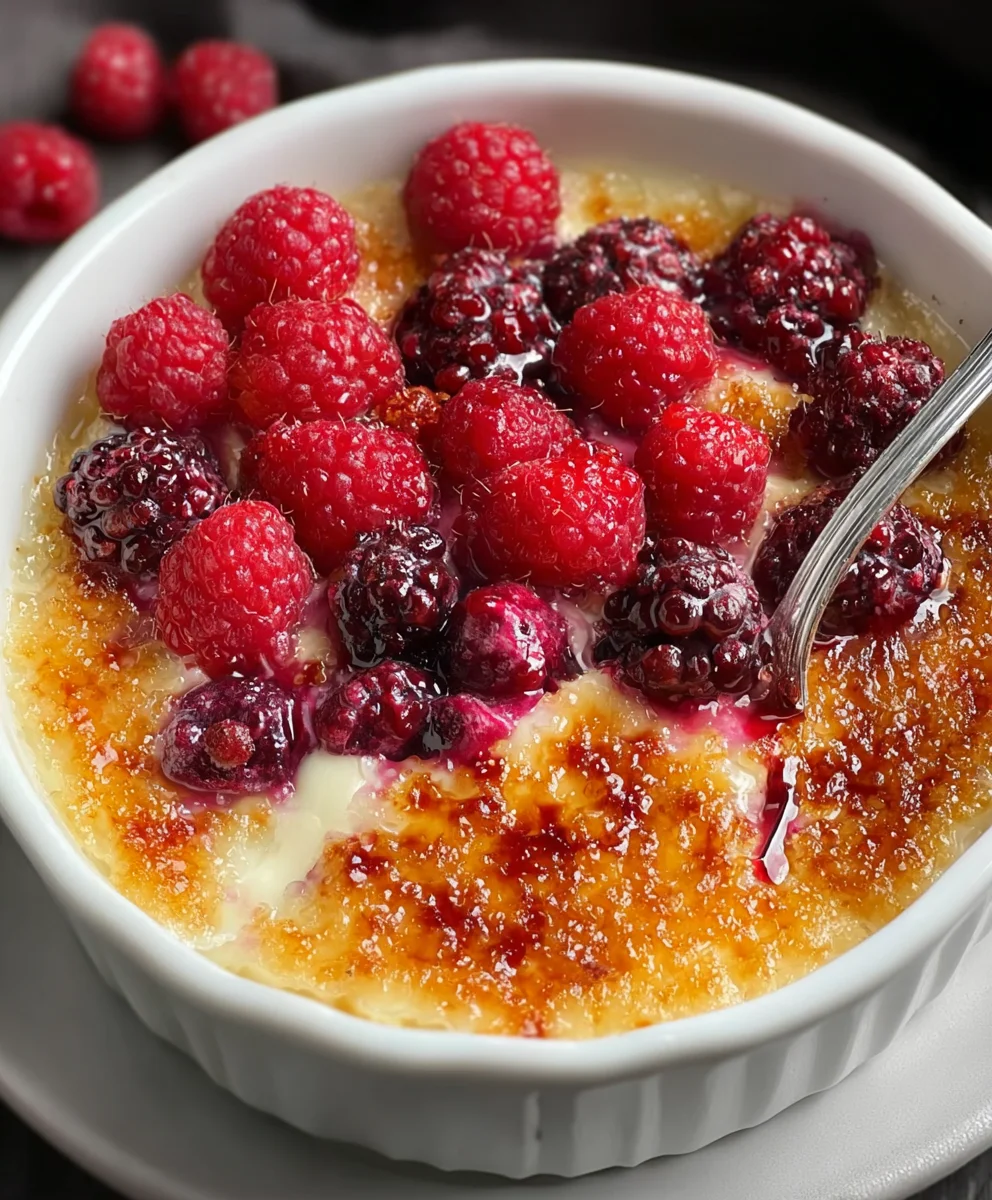
Berry Brûlée isn’t just a dessert; it’s an experience. That satisfying crack of caramelized sugar, revealing a silken custard beneath, is pure culinary magic. It’s no wonder this elegant treat has captured hearts and taste buds for generations. But what elevates a good Berry Brûlée to an unforgettable one? It’s the perfect harmony between the tartness of fresh berries, the creamy richness of the custard, and the delightful crunch of that signature torched sugar crust. We’ve perfected a recipe that balances these elements beautifully, ensuring every spoonful is a journey of delightful contrasts. This isn’t your average dessert; it’s a sophisticated celebration of simple, high-quality ingredients transformed into something truly spectacular.
Why You’ll Adore This Recipe
Prepare to be enchanted by the simplicity and elegance of our Berry Brûlée. This isn’t just about following steps; it’s about creating a moment of joy. The vibrant burst of fresh berries, whether plump raspberries, juicy blueberries, or tart blackberries, adds a refreshing counterpoint to the luxurious vanilla bean custard. And then there’s the iconic brûlée topping – that glassy, brittle layer of caramelized sugar that shatters with the slightest touch. It’s this textural contrast, this interplay of sweet and tart, creamy and crisp, that makes this Berry Brûlée so utterly irresistible. Get ready to impress your guests (or simply treat yourself!) with a dessert that looks as beautiful as it tastes.
The Secret to Perfection
What truly sets our Berry Brûlée apart is the meticulous attention to detail that ensures a flawless result every time. We’ve honed the custard base for unparalleled smoothness, infusing it with just the right amount of fragrant vanilla. The berries are chosen for their peak ripeness and vibrant flavor, providing a delightful tang that cuts through the richness. But the real showstopper, of course, is the perfectly torched sugar topping. Our method guarantees a thin, even crust that crackles beautifully, offering that signature moment of culinary theatre. This is a dessert that’s surprisingly accessible for home cooks, yet delivers a restaurant-quality finish that will leave everyone wanting more.
Ingredients:
- 1/2 cup heavy cream, chilled
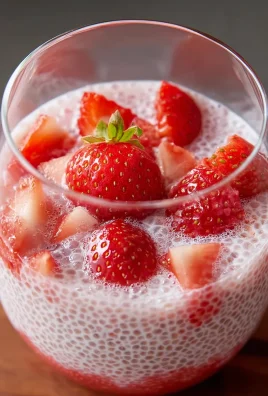
- 12 ounces fresh raspberries
- 3 tablespoons plus 1 teaspoon granulated sugar, divided
Preparing the Raspberry Base
The foundation of our Berry Brûlée is the vibrant, fresh raspberries. Start by gently rinsing your 12 ounces of fresh raspberries under cool running water. It’s important to be delicate here; raspberries are quite fragile, and you don’t want them to break down too much at this stage. After rinsing, carefully pat them dry with a paper towel. This step is crucial for achieving the best texture and preventing any excess moisture from affecting the final dish.
Once your raspberries are dry, spread them out in a single layer on a clean plate or baking sheet. Examine them for any stray stems or bruised berries, removing them as needed. For the Berry Brûlée, we want beautiful, intact berries to showcase their natural appeal.
Now, let’s prepare the raspberries for their transformation. We’ll be adding a touch of sweetness and helping them to release some of their natural juices. In a medium bowl, combine the fresh raspberries with 1 tablespoon of the granulated sugar. Gently toss the berries with the sugar, ensuring each raspberry is lightly coated. This initial coating of sugar will begin extract to macerate the berries, drawing out some of their delicious liquid and creating a lovely, syrupy base. Let them sit for about 10-15 minutes while you prepare the cream component. This short resting period allows the sugar to work its magic, creating a slightly more concentrated flavor and a more pleasing texture.
Creating the Creamy Topping
While the raspberries are macerating, we’ll move on to the rich, creamy topping that defines the “brûlée” aspect of this dessert. Take your 1/2 cup of chilled heavy cream and pour it into a small, clean bowl. It’s important that the cream is well-chilled, as this will help it whip up to a better consistency.
To the chilled heavy cream, add the remaining 2 tablespoons plus 1 teaspoon of granulated sugar. Now, using a whisk or an electric mixer on medium speed, whip the cream and sugar together. You’re looking for a consistency that is thick but still pourable, similar to a thick custard or a very loose whipped cream. We are not aiming for stiff peaks as you would with traditional whipped cream for topping. We want it to be fluid enough to gently spread over the raspberries, but substantial enough to caramelize nicely when heated. This stage typically takes about 1-2 minutes with a whisk, or just under a minute with an electric mixer. Be careful not to over-whip; you don’t want to create butter! The goal is a smooth, rich cream mixture that will beautifully coat the berries.
Assembling the Berry Brûlée
Now it’s time to bring our two components together. Divide the macerated raspberries evenly among your serving dishes. Ramekins or small oven-safe bowls work wonderfully for this dessert, as they provide individual portions and allow for even heating. Spoon the sugared raspberries into the bottom of each dish, making sure to distribute any accumulated syrup along with the berries. This syrupy goodness is packed with raspberry flavor and will contribute to the overall deliciousness of the Berry Brûlée.
Once the raspberries are settled in their dishes, gently pour the prepared cream mixture over the top of the berries. Aim to cover the raspberries completely with the cream. You can use the back of a spoon to gently spread the cream if needed, ensuring an even layer. The cream should sit directly on top of the raspberries, creating a beautiful contrast in textures and colors.
Caramelizing the Sugar Crust
This is where the magic happens and we achieve that signature crackly, caramelized top. The key to a perfect brûlée is a thin, even layer of sugar on top of the cream. We’ve already prepared our cream mixture, and now it’s time for the final layer of sugar.
Before we apply the sugar, it’s important to ensure your serving dishes are heat-safe and that you have a way to torch the sugar. If you don’t have a kitchen torch, you can use your oven’s broiler, but proceed with extreme caution as it can burn very quickly.
Take the remaining 1 teaspoon of granulated sugar and sprinkle it evenly over the surface of the cream in each serving dish. You want a thin, consistent layer of sugar that will melt and caramelize. Don’t put too much sugar, or it might become bitter.
Finishing Touches and Serving
Once the sugar is sprinkled, it’s time to caramelize it. The most common and effective method is using a kitchen torch. Hold the torch a few inches above the sugar and move it in a continuous motion, allowing the sugar to melt and turn a beautiful amber brown. You’ll see it start to bubble and transform before your eyes. Watch it closely, as it can go from perfectly caramelized to burnt in seconds. Rotate the torch around the edges and the center to ensure even browning.
If you are using your oven’s broiler, place the assembled Berry Brûlée dishes on a baking sheet and position them under the preheated broiler. Keep the oven door slightly ajar so you can keep a very close eye on them. Broil for just a minute or two, rotating the dishes as needed, until the sugar is caramelized and bubbly. This method requires extra vigilance to prevent burning.
Once the sugar has caramelized to your liking, remove the Berry Brûlée from the heat source. It’s crucial to let the Berry Brûlée rest for at least 5 minutes before serving. This allows the caramelized sugar to harden into a crisp shell and for the flavors to meld further. The contrast between the warm, crackly sugar crust, the smooth, creamy layer, and the slightly tart, juicy raspberries is what makes this dessert so irresistible. Serve immediately and enjoy the satisfying crunch as you break through the sugar shell!
Conclusion:
And there you have it – your very own delightful Berry Brûlée! This recipe is a fantastic way to elevate a simple dessert into something truly special. The contrast between the warm, sweet berries and the crisp, caramelized sugar topping is simply divine. We hope you enjoy making and, more importantly, savoring this decadent treat as much as we do.
To serve, consider presenting your Berry Brûlée in individual ramekins for an elegant touch, perhaps with a sprig of fresh mint or a dollop of lightly whipped cream. It pairs wonderfully with a crisp, dry white grape juice or even a delicate herbal tea. Don’t be afraid to experiment with variations! You can easily substitute the mixed berries for other fruits like peaches, figs, or even a medley of tropical fruits. For a richer flavor, a splash of Grand Marnier Extract or a hint of vanilla extract can be added to the berry mixture before baking.
We encourage you to give this Berry Brûlée recipe a try. It’s surprisingly simple to execute but delivers impressive results, perfect for impressing guests or simply treating yourself to something extraordinary. Happy baking!
Frequently Asked Questions about Berry Brûlée:
What kind of berries work best for Berry Brûlée?
A mix of berries like raspberries, blueberries, blackberries, and strawberries provides a wonderful balance of sweet and tart flavors. However, you can use your favorite single berry or a combination that suits your preference. Ensure they are fresh for the best texture and flavor.
Can I make Berry Brûlée ahead of time?
You can prepare the berry mixture and assemble the brûlée in the ramekins a few hours in advance and refrigerate them. However, it’s best to caramelize the sugar topping just before serving to ensure a perfectly crisp crust. The heat from your kitchen torch will melt the sugar quickly if the berries are too cold.
My sugar topping isn’t crisp. What did I do wrong?
This usually happens for a few reasons. Ensure you are using granulated sugar (not powdered or brown sugar) and that you are applying a thin, even layer over the berries. The intensity and proximity of your kitchen torch or broiler are also key. Move the torch in a circular motion, keeping it a few inches away from the sugar, and don’t linger too long in one spot, as this can burn the sugar. If using a broiler, keep a very close eye on it, as it can caramelize very rapidly.
Berry Brûlée – Creamy Custard Dessert with Burnt Sugar Topping
A delightful creamy custard dessert featuring fresh raspberries topped with a perfectly caramelized burnt sugar crust.
Ingredients
-
1/2 cup heavy cream, chilled
-
12 ounces fresh raspberries
-
3 tablespoons plus 1 teaspoon granulated sugar, divided
-
1 tablespoon granulated sugar (for macerating raspberries)
-
2 tablespoons plus 1 teaspoon granulated sugar (for cream mixture)
-
1 teaspoon granulated sugar (for topping)
Instructions
-
Step 1
Prepare the raspberries: Gently rinse and pat dry 12 ounces of fresh raspberries. In a medium bowl, combine raspberries with 1 tablespoon of granulated sugar. Gently toss to coat and let macerate for 10-15 minutes. -
Step 2
Create the creamy topping: In a clean bowl, combine 1/2 cup of chilled heavy cream with 2 tablespoons plus 1 teaspoon of granulated sugar. Whip until thick but still pourable, similar to a loose whipped cream or thick custard. Do not over-whip. -
Step 3
Assemble the Berry Brûlée: Divide the macerated raspberries evenly among individual serving dishes (ramekins or small oven-safe bowls), including any accumulated syrup. -
Step 4
Pour the cream mixture over the raspberries in each dish, ensuring they are completely covered. Gently spread the cream to create an even layer. -
Step 5
Caramelize the sugar crust: Sprinkle 1 teaspoon of granulated sugar evenly over the surface of the cream in each dish. Use a kitchen torch to melt and caramelize the sugar until it turns an amber brown. Alternatively, use the oven’s broiler with extreme caution. -
Step 6
Rest and serve: Let the Berry Brûlée rest for at least 5 minutes to allow the caramelized sugar to harden into a crisp shell. Serve immediately and enjoy the satisfying crunch.
Important Information
Nutrition Facts (Per Serving)
It is important to consider this information as approximate and not to use it as definitive health advice.
Allergy Information
Please check ingredients for potential allergens and consult a health professional if in doubt.
Leave a Comment