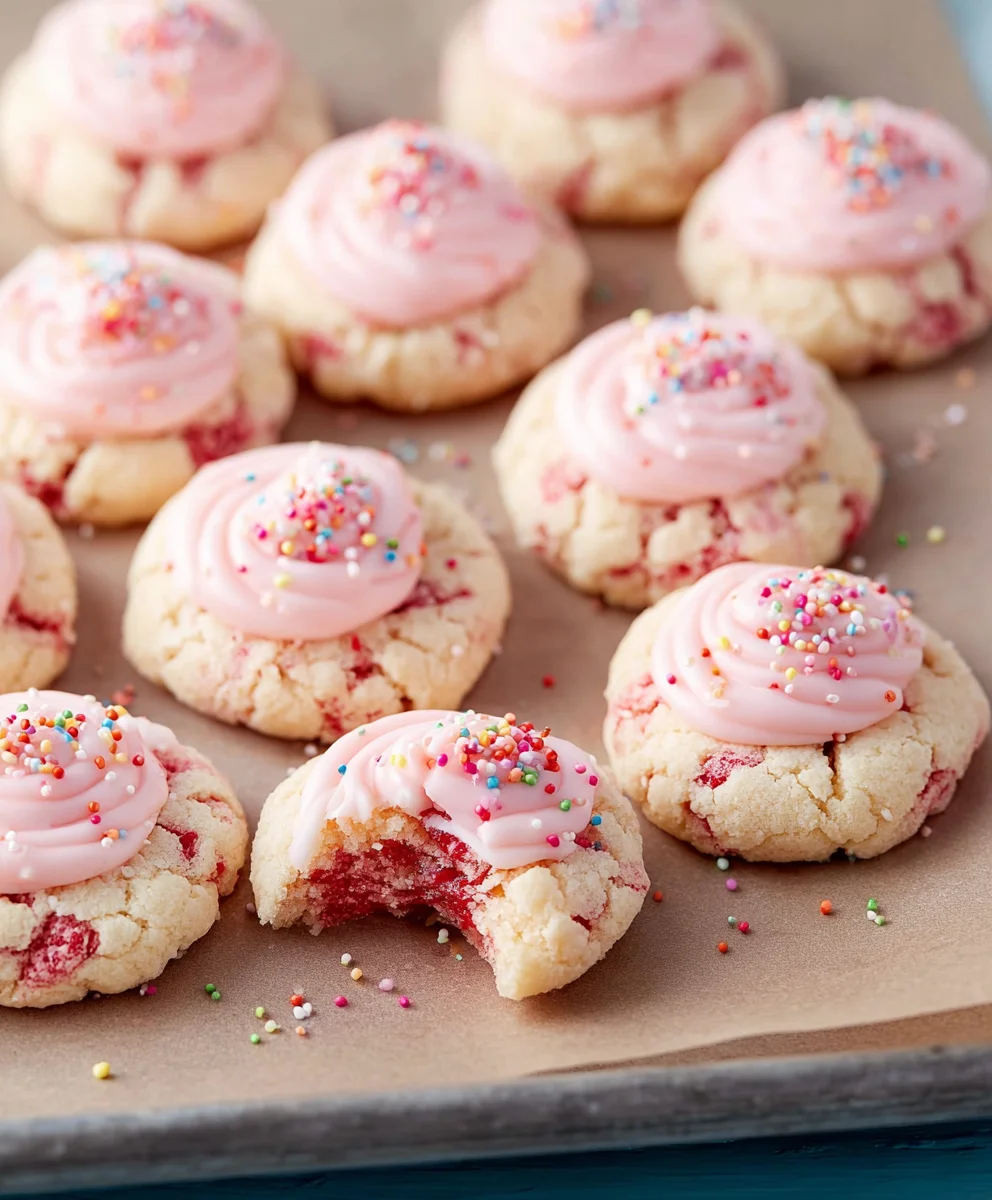
Strawberry Kiss Cookies are more than just a sweet treat; they are a delightful whisper of summer, a burst of pure joy in every bite. Have you ever craved a cookie that’s both delicate and intensely flavorful, one that evokes feelings of nostalgia and pure happiness? That’s precisely the magic of these delightful Strawberry Kiss Cookies. They are universally adored for their charming appearance, often resembling tiny, frosted jewels, and their wonderfully light, melt-in-your-mouth texture. What truly sets these Strawberry Kiss Cookies apart is the perfect marriage of a subtly sweet, almost ethereal cookie base with the vibrant, unmistakable tang of fresh strawberries. It’s a simple yet sophisticated flavor profile that’s surprisingly easy to achieve, making them a perfect choice for baking with loved ones or as a special indulgence just for yourself.
Ingredients:
- 1 cup (2 sticks) unsalted butter, softened
- 1/2 cup granulated sugar
- 1 cup powdered sugar (also known as confectioners’ sugar or icing sugar)
- 1 teaspoon vanilla extract
- 1/4 teaspoon almond extract
- 2 1/4 cups all-purpose flour
- 1/2 teaspoon salt
- 1/2 cup strawberry jam or preserves (seedless is preferred for a smoother filling)
- Optional: Red or pink food coloring for the jam filling
- Optional: Sprinkles for decoration
Preparing the Cookie Dough
First things first, let’s get our cookie dough ready. This recipe calls for a classic shortbread-style cookie base, which is delightfully tender and buttery. Make sure your unsalted butter is properly softened. This means it should be at room temperature, yielding slightly when pressed with your finger, but not melted. This is crucial for achieving a light and airy texture in the cookies.
In a large mixing bowl, cream together the softened butter and granulated sugar. You can use an electric mixer for this, starting on a low speed and gradually increasing to medium. Beat them together until the mixture is light and fluffy, with no visible graininess from the sugar. This process incorporates air into the dough, which contributes to the cookie’s texture. Next, add the powdered sugar to the creamed butter and sugar mixture. Powdered sugar dissolves more easily and helps create a smoother, melt-in-your-mouth cookie. Beat again until well combined and smooth.
Now, it’s time for the flavor boosters. Add the vanilla extract and almond extract to the bowl. Vanilla extract provides that classic comforting cookie flavor, while almond extract adds a subtle, sophisticated nutty note that pairs wonderfully with strawberries. Mix these in until they are evenly distributed throughout the batter.
In a separate medium bowl, whisk together the all-purpose flour and salt. Salt might seem like a small addition, but it’s essential for balancing the sweetness and enhancing all the other flavors in the cookies. Gradually add this dry ingredient mixture to the wet ingredients in your large bowl. Mix on low speed or by hand using a spatula until just combined. Be careful not to overmix the dough at this stage. Overmixing can develop the gluten in the flour, resulting in tough cookies. We want a tender crum extractb, so stop mixing as soon as you no longer see streaks of dry flour. The dough will be quite soft and a little sticky, which is exactly what we want.
Forming and Filling the Strawberry Kiss Cookies
Once the dough is ready, it’s time to form our beautiful Strawberry Kiss Cookies. Cover the bowl with plastic wrap and refrigerate the dough for at least 30 minutes. This chilling period is important. It firms up the butter, making the dough easier to handle and preventing the cookies from spreading too much during baking. A chilled dough also holds its shape better, which is key for creating those adorable little “kisses.”
While the dough is chilling, prepare your strawberry filling. In a small bowl, combine the strawberry jam or preserves. If you’re using a jam with visible seeds, you might want to strain it or give it a quick pulse in a food processor for a smoother texture that will pipe or spoon more neatly. For an extra vibrant “kiss” of color, you can add a tiny drop or two of red or pink food coloring to the jam and stir until it’s evenly distributed. This is entirely optional but adds a lovely visual appeal.
After the dough has chilled, you can begin extract shaping the cookies. You have a couple of options here. You can either roll the dough into small balls (about 1 inch in diameter), or you can roll it out and use a small round cookie cutter. If you choose to roll out the dough, lightly flour your work surface and a rolling pin. Roll the dough to about 1/4-inch thickness. Then, using a small round cutter (about 1.5 inches in diameter), cut out your cookie shapes. If you’re making balls, place them about 2 inches apart on baking sheets lined with parchment paper.
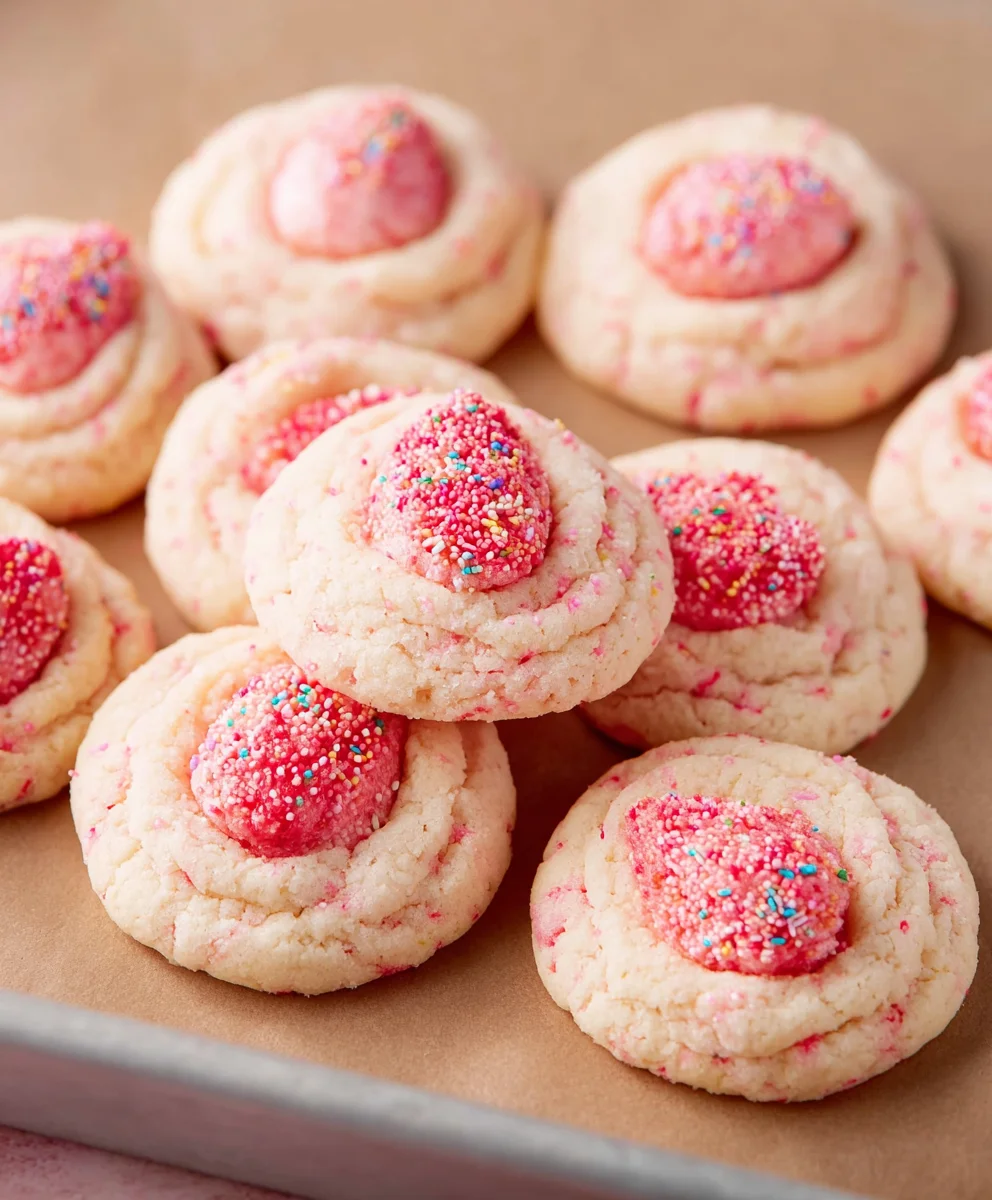
Now comes the “kiss” part! For each cookie, create a small indentation in the center. You can do this using the back of a small spoon or even your thumb. Be careful not to go all the way through the dough. This little well is where our delicious strawberry filling will go. Spoon or pipe about 1/2 teaspoon of the prepared strawberry jam into each indentation. Don’t overfill, or the jam might leak out during baking.
Baking and Decorating
Preheat your oven to 350°F (175°C). Line baking sheets with parchment paper. This prevents the cookies from sticking and ensures even baking. Carefully place the formed and filled cookie dough onto the prepared baking sheets, leaving about 2 inches between each cookie to allow for slight spreading.
Bake for 10-12 minutes, or until the edges of the cookies are lightly golden brown. The centers should still appear slightly pnon-alcoholic ale. It’s important not to overbake these cookies, as they will continue to cook slightly on the baking sheet after being removed from the oven. We want them to remain tender and slightly soft in the center.
Once baked, let the cookies cool on the baking sheets for 5 minutes before transferring them to a wire rack to cool completely. This resting period allows the cookies to set properly.
Once the Strawberry Kiss Cookies have cooled completely, you can add any optional decorations. If you’d like to add extra sparkle, gently press some festive sprinkles into the jam filling while it’s still slightly soft. You could also drizzle a bit of melted white chocolate over the cooled cookies for an extra touch of elegance. These cookies are delightful on their own but the sprinkles really enhance the “kiss” theme! Enjoy sharing these delightful treats!
Conclusion:
And there you have it! Our delightful Strawberry Kiss Cookies recipe is ready to bring a touch of sweet charm to your kitchen. We’ve covered everything from the simple steps to create these tender, flavorful treats to how best to enjoy them. These cookies are truly a labor of love, perfect for sharing at gatherings, as a thoughtful gift, or simply for indulgin extractg in a moment of pure deliciousness. Don’t hesitate to get creative with the variations we discussed, whether it’s adding a hint of lemon zest to the dough or trying different frosting colors. Baking should be fun, so embrace the process and enjoy the irresistible aroma filling your home. We encourage you to give these Strawberry Kiss Cookies a try – I’m confident you’ll fall in love with their delicate texture and the burst of strawberry flavor!
Frequently Asked Questions:
Can I make these Strawberry Kiss Cookies ahead of time?
Absolutely! Baked and cooled cookies can be stored in an airtight container at room temperature for up to 3-4 days. For longer storage, you can freeze them for up to 2 months. Simply place them in a single layer on a baking sheet until frozen, then transfer to a freezer-safe container or bag.
What kind of strawberries work best for this recipe?
Fresh, ripe strawberries will provide the best flavor and moisture for your Strawberry Kiss Cookies. If fresh strawberries are out of season, you can use thawed frozen strawberries. Be sure to drain them very well to avoid adding too much extra liquid to the dough. Some bakers also enjoy using freeze-dried strawberry powder for an intense, concentrated flavor without the added moisture.
Strawberry Kiss Cookies
Easy no-bake sweet treats with a tender, buttery shortbread-style cookie base and a sweet strawberry jam filling.
Ingredients
-
1 cup unsalted butter, softened
-
1/2 cup granulated sugar
-
1 cup powdered sugar
-
1 teaspoon vanilla extract
-
1/4 teaspoon almond extract
-
2 1/4 cups all-purpose flour
-
1/2 teaspoon salt
-
1/2 cup strawberry jam or preserves
-
Red or pink food coloring (optional)
-
Sprinkles (optional)
Instructions
-
Step 1
Cream together softened unsalted butter and granulated sugar in a large bowl until light and fluffy. Beat in powdered sugar until smooth. -
Step 2
Add vanilla extract and almond extract to the wet ingredients and mix until evenly distributed. -
Step 3
In a separate bowl, whisk together all-purpose flour and salt. Gradually add the dry ingredients to the wet ingredients, mixing on low speed or by hand until just combined. Do not overmix. -
Step 4
Cover the dough with plastic wrap and refrigerate for at least 30 minutes. While the dough chills, prepare the strawberry filling by combining strawberry jam or preserves in a small bowl. Optionally, add food coloring for a more vibrant look. -
Step 5
Preheat oven to 350°F (175°C). Line baking sheets with parchment paper. Shape the chilled dough into small balls or roll out and cut into rounds. Create a small indentation in the center of each cookie. -
Step 6
Spoon or pipe about 1/2 teaspoon of strawberry jam into each indentation. Place cookies on prepared baking sheets, about 2 inches apart. -
Step 7
Bake for 10-12 minutes, or until the edges are lightly golden brown. The centers should still appear slightly pale. Do not overbake. -
Step 8
Let the cookies cool on the baking sheets for 5 minutes before transferring them to a wire rack to cool completely. Decorate with sprinkles if desired.
Important Information
Nutrition Facts (Per Serving)
It is important to consider this information as approximate and not to use it as definitive health advice.
Allergy Information
Please check ingredients for potential allergens and consult a health professional if in doubt.
Leave a Comment