Cruffin. Just the word itself evokes a sense of delightful mystery and pure indulgence, doesn’t it? This incredible pastry, a glorious hybrid of the croissant and the muffin, has taken the baking world by storm, and for very good reason. It’s the ultimate treat for anyone who can’t quite decide between flaky, buttery layers and a satisfying, domed shape. People absolutely adore the cruffin because it delivers the best of both worlds, offering a textural symphony that’s both light and substantial. Imagine the crisp, delicate shatter of a croissant’s exterior giving way to a soft, airy interior, all cradled within the familiar and comforting form of a muffin. What truly makes the cruffin special is its incredible versatility and the sheer joy it brings. Whether filled with a luscious cream, a bright fruit compote, or a rich chocolate ganache, each bite is an adventure, a testament to the magic that happens when two beloved classics unite. Get ready to embark on a delicious journey as we explore how to create your very own perfect cruffin at home.
Ingredients:
- 3 tubes (8 ounces each) refrigerated crescent roll sheets
- 6 tablespoons unsalted butter, softened, divided
- 1 cup (200 g) granulated sugar
- 1 tablespoon ground cinnamon
Preparing the Cruffin Dough
The foundation of a fantastic cruffin lies in its dough, and we’re starting with a brilliant shortcut to make this treat accessible for everyone. Begin by carefully unrolling your three tubes of refrigerated crescent roll sheets onto a clean, lightly floured surface. Try to handle them gently to avoid tearing the delicate dough. You want to create three individual rectangles of dough. If they have perforations, gently press them together to form a solid sheet. This initial preparation is crucial for creating those beautiful layers that define a cruffin.
Creating the Cinnamon-Sugar Filling
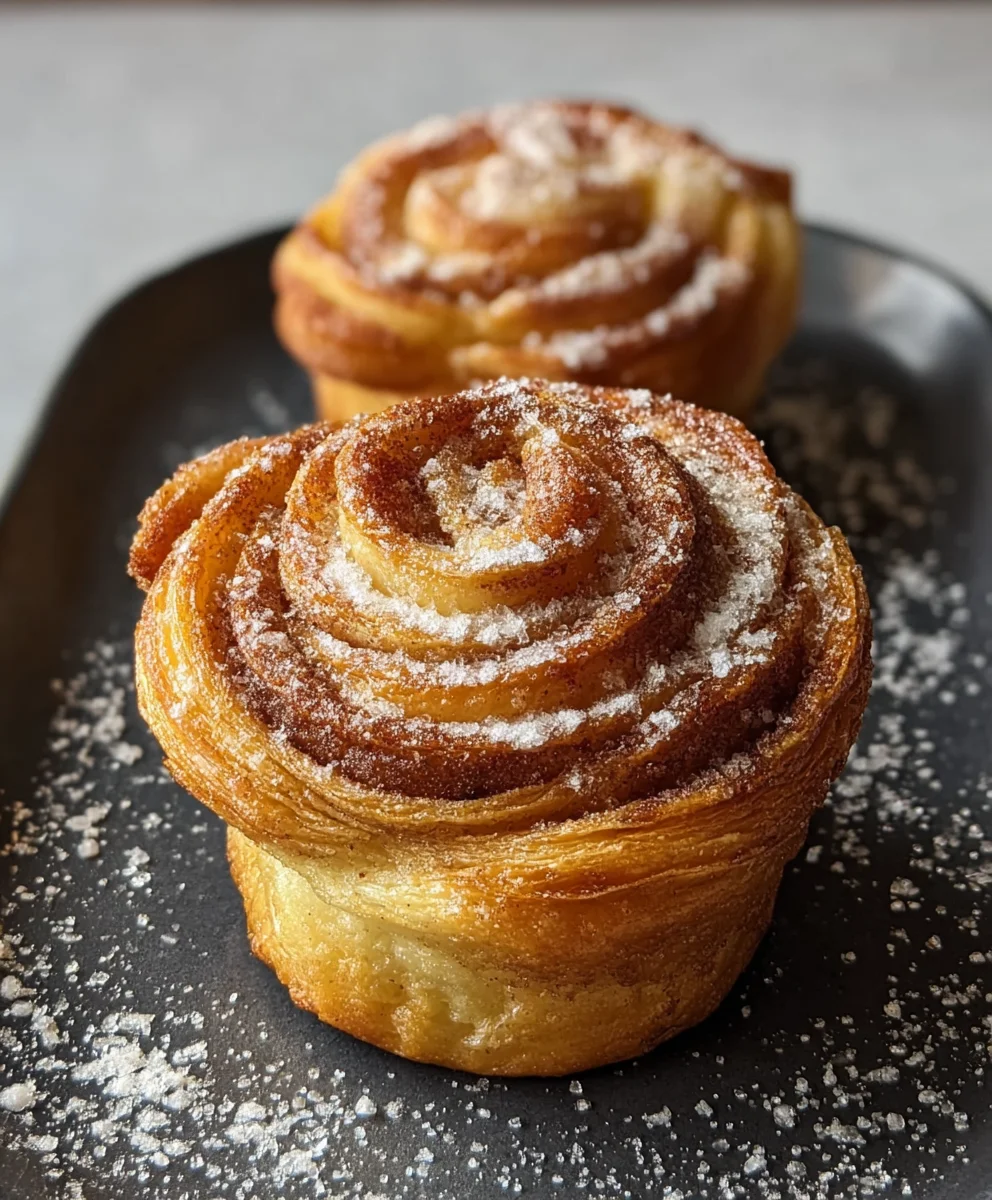
Now, let’s craft the heart of our cruffin’s flavor: the cinnamon-sugar filling. In a medium bowl, combine your 1 cup (200 g) of granulated sugar with 1 tablespoon of ground cinnamon. Whisk these together thoroughly until the cinnamon is evenly distributed throughout the sugar. This ensures every bite of your cruffin will be infused with that warm, comforting spice.
Now, take 4 tablespoons of your softened unsalted butter and spread it evenly over the surface of each of the three crescent roll dough rectangles. You want a thin, consistent layer of butter all the way to the edges. This butter layer will act as a binder for the cinnamon-sugar mixture and also contributes to the flaky texture. Next, generously sprinkle the cinnamon-sugar mixture over the buttered dough sheets. Make sure to get an even coating across the entire surface. Don’t be shy with the filling; this is where the magic happens!
Rolling and Shaping the Cruffins
This is where the transformation from a crescent roll sheet to a cruffin truly begins. Starting from one of the longer sides of each buttered and cinnamon-sugar-coated dough rectangle, begin to roll the dough up tightly. Think of it like rolling up a jelly roll. As you roll, try to maintain even pressure to ensure a consistent cylinder. Once each sheet is rolled into a tight log, you should have three equally sized logs.
Slicing and Forming the Cruffin Cups
Now, we’ll prepare to bake these delightful pastries. Take each of your rolled dough logs and, using a sharp knife, carefully slice them into 1-inch thick rounds. You should get approximately 6-8 rounds from each log, depending on how tightly you rolled them. As you slice, you’ll see those beautiful cinnamon-sugar swirls starting to emerge.
For each cruffin, take one of the sliced rounds. You will then gently press the sides of the round inwards to create a “cup” shape. The goal is to form a small, muffin-like cavity in the center. This is where the remaining butter will go. Once you have formed your cruffin cups, place them into a lightly greased muffin tin, ensuring they are nestled snugly.
Baking the Perfect Cruffins
This is the final, crucial step to achieving golden-brown, flaky cruffins. Preheat your oven to 375°F (190°C). Place the muffin tin filled with your shaped cruffins into the preheated oven. Bake for approximately 15-18 minutes, or until the cruffins are puffed up, golden brown, and the centers are cooked through. The aroma filling your kitchen at this stage will be absolutely divine. Keep an eye on them during the last few minutes of baking to prevent them from getting too dark.
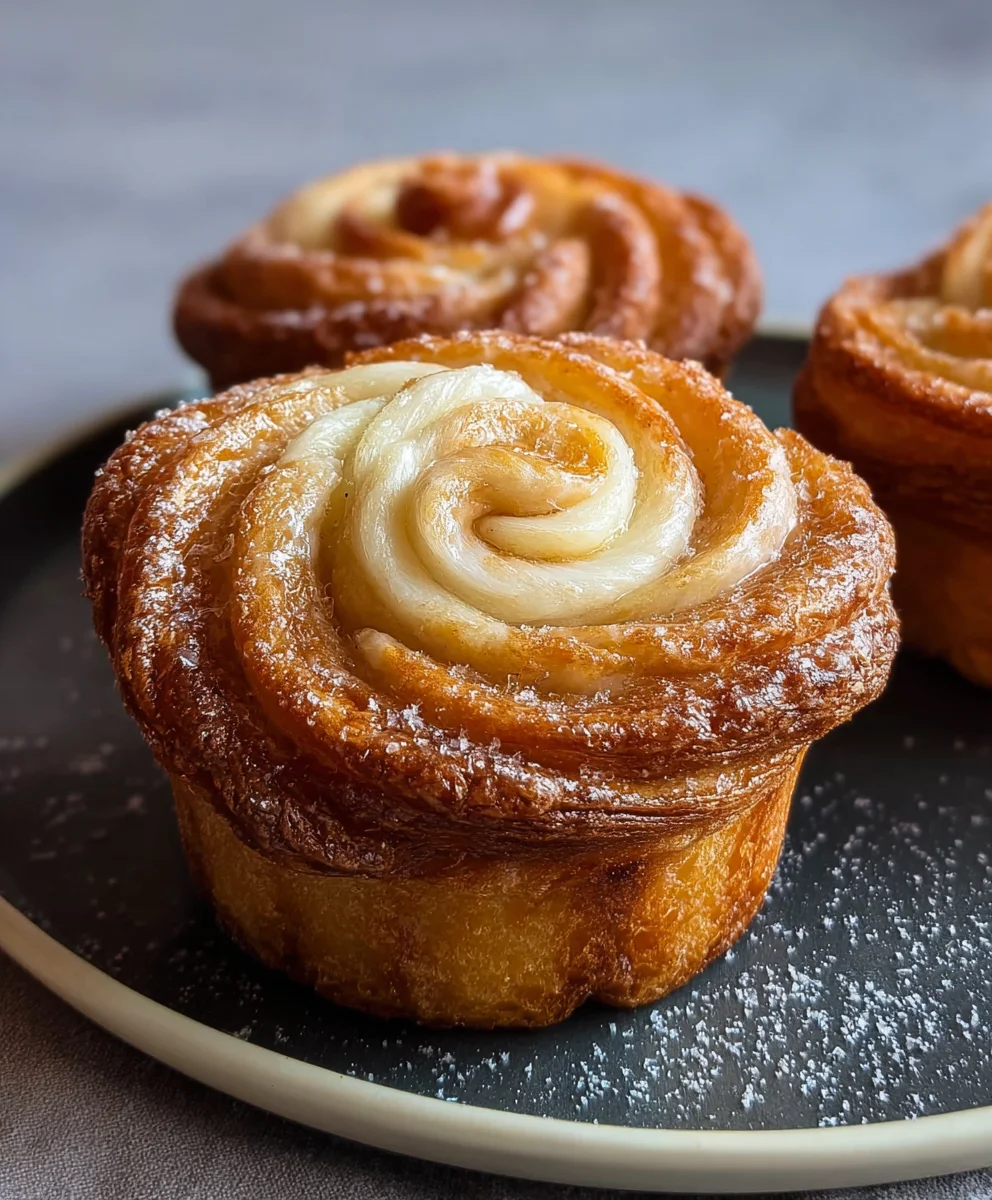
Once baked to perfection, carefully remove the muffin tin from the oven. Let the cruffins cool in the tin for about 5 minutes before gently transferring them to a wire rack to cool completely. While they are still warm, take the remaining 2 tablespoons of softened unsalted butter and gently brush it over the tops of the cruffins. This final touch adds an extra layer of richness and a beautiful sheen, making them irresistible. Enjoy your homemade cruffins warm for the best texture and flavor experience.
Conclusion:
You’ve now mastered the art of creating delicious cruffins right in your own kitchen! This recipe brings together the best of both worlds: the flaky, buttery layers of a croissant and the delightful, muffin-shaped convenience of a muffin. The process might seem a little intricate at first, but with a little patience and attention to detail, you’ll be rewarded with a truly spectacular treat. The aroma filling your home as these bake is simply divine, and the taste? Pure indulgence.
These cruffins are incredibly versatile. Serve them warm for breakfast with a smear of your favorite jam or a dollop of cream. They also make a fantastic afternoon tea treat or a special dessert, perhaps dusted with powdered sugar or drizzled with a simple glaze. Don’t be afraid to experiment with fillings! Chocolate chips, fruit compotes, or even a savory cheese and herb mixture can elevate your cruffin experience even further. So go ahead, embrace your inner baker, and enjoy these delightful cruffins!
Frequently Asked Questions:
Can I make the dough for these cruffins ahead of time?
Yes, absolutely! The cruffin dough can be made up to 2 days in advance and stored, tightly wrapped, in the refrigerator. This can be a great way to break up the process and make baking day a little less hectic. Just allow it to come to room temperature slightly before proceeding with the lamination and shaping steps.
What are some good filling ideas for cruffins?
The possibilities are endless! For sweet options, consider mini chocolate chips, a spoonful of fruit preserve (raspberry, blueberry, or apricot are wonderful), or a quick cinnamon-sugar swirl. For a savory twist, try adding some finely grated cheese, a pinch of herbs like chives or rosemary, or even some crumbled cooked bacon. Just be sure not to overfill them, as this can cause leaks during baking.
Perfect Cruffin
Learn how to make delicious cruffins using refrigerated crescent roll sheets for a quick and easy treat.
Ingredients
-
3 tubes (8 ounces each) refrigerated crescent roll sheets
-
6 tablespoons unsalted butter, softened, divided
-
1 cup (200 g) granulated sugar
-
1 tablespoon ground cinnamon
Instructions
-
Step 1
Unroll crescent roll sheets and gently press perforations to form solid rectangles. -
Step 2
Combine granulated sugar and ground cinnamon in a medium bowl for the filling. -
Step 3
Spread 4 tablespoons of softened butter evenly over each dough rectangle, then sprinkle generously with cinnamon-sugar mixture. -
Step 4
Roll each dough sheet tightly from a long side to form logs, then slice into 1-inch thick rounds. Gently press the sides of each round inwards to create a cup shape. -
Step 5
Place cruffin cups into a lightly greased muffin tin. Bake in a preheated oven at 375°F (190°C) for 15-18 minutes until golden brown and puffed. -
Step 6
Cool in the tin for 5 minutes, then transfer to a wire rack. Brush with the remaining 2 tablespoons of softened butter while still warm.
Important Information
Nutrition Facts (Per Serving)
It is important to consider this information as approximate and not to use it as definitive health advice.
Allergy Information
Please check ingredients for potential allergens and consult a health professional if in doubt.

Leave a Comment