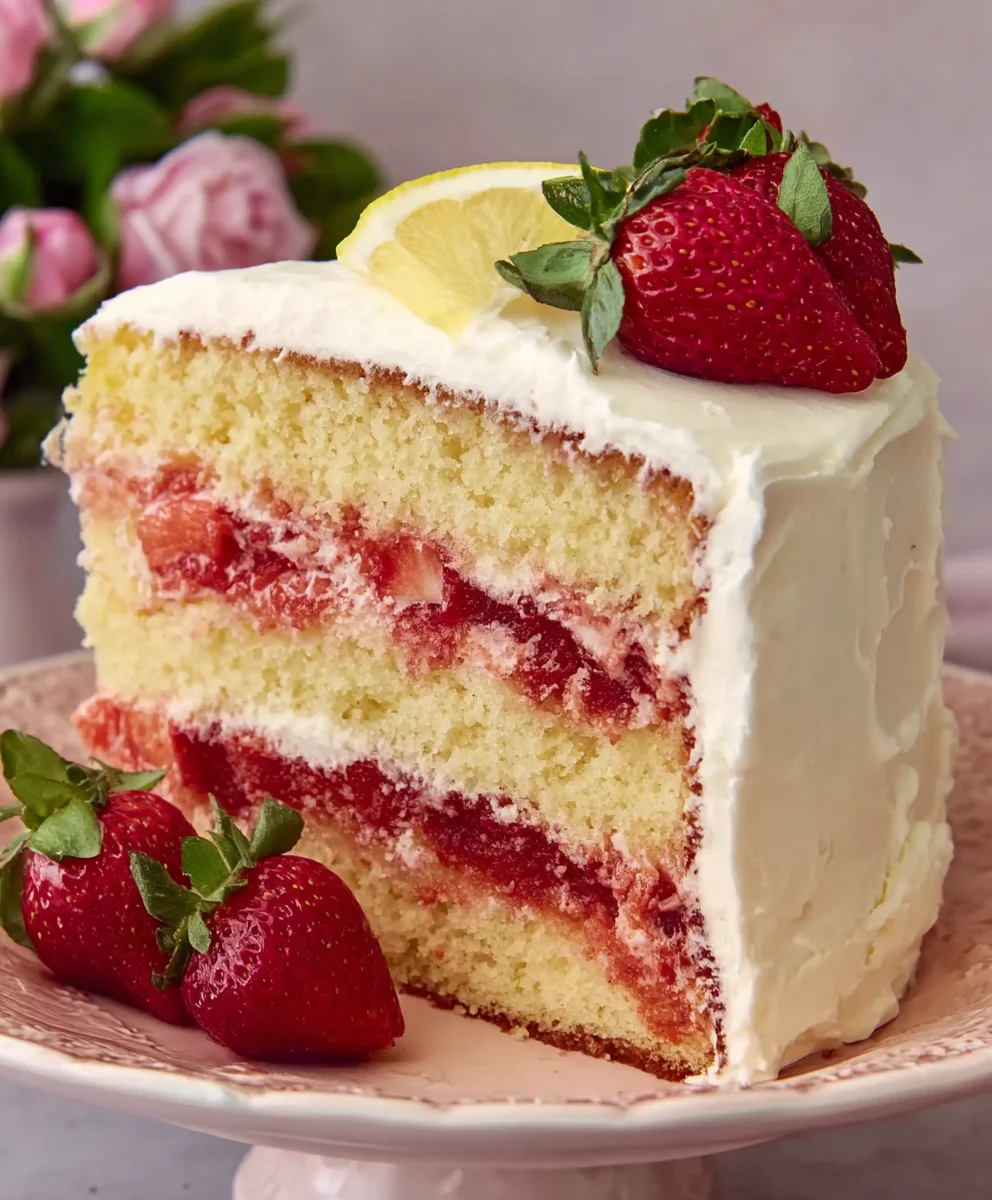
Strawberry Lemonade Layer Cake is more than just a dessert; it’s a celebration of summer in every vibrant, delightful slice. Imagine a sun-drenched afternoon, a gentle breeze, and the pure joy of a cake that perfectly captures the essence of the season. This magnificent creation brings together two of summer’s most beloved flavors – the sweet, juicy allure of fresh strawberries and the bright, zesty tang of lemonade – into one stunning confection that promises to be the star of any gathering.
I find that the very idea of a Strawberry Lemonade Layer Cake sparks a certain nostalgia, harking back to garden parties and refreshing drinks on warm days. While the concept of combining these iconic flavors into a multi-layered cake is a relatively modern culinary innovation, it builds upon centuries of baking tradition and the timeless appeal of fruit-infused desserts. People adore this cake not just for its breathtaking appearance – those beautiful, contrasting layers of pink and yellow – but for its incredibly balanced taste. Each forkful offers a fluffy, moist cake, a luscious, tangy frosting, and pockets of fresh fruit that burst with flavor. It’s the ultimate centerpiece, promising a refreshing and utterly satisfying experience for all who gather around it.
Ingredients:
- For the Strawberry Lemonade Cake Layers:
- 3 cups (360g) all-purpose flour, sifted
- 1 tablespoon baking powder
- ½ teaspoon salt
- 1 cup (226g) unsalted butter, softened to room temperature
- 2 cups (400g) granulated sugar
- 4 large eggs, at room temperature
- 1 cup (240ml) buttermilk, at room temperature
- ½ cup (120ml) fresh lemon juice (from about 3-4 lemons)
- 2 tablespoons fresh lemon zest (from about 3-4 lemons)
- 1 teaspoon pure vanilla extract
- Red or pink gel food coloring (optional, for a subtle pink hue)
- For the Strawberry Filling:
- 2 cups (about 300g) fresh strawberries, hulled and finely diced
- ½ cup (100g) granulated sugar
- 2 tablespoons fresh lemon juice
- 2 tablespoons cornstarch
- ¼ cup (60ml) cold water
- For the Lemon Buttercream Frosting:
- 2 cups (452g) unsalted butter, softened to room temperature
- 8 cups (960g) powdered sugar, sifted
- ½ cup (120ml) heavy cream or whole milk, at room temperature
- ¼ cup (60ml) fresh lemon juice
- 1 tablespoon fresh lemon zest
- 1 teaspoon pure vanilla extract
- Pinch of salt
- For Garnish (Optional):
- Fresh strawberries, sliced or halved
- Thin lemon slices or curls
- Additional lemon zest
Preparing the Strawberry Lemonade Cake Layers
- Preheat and Prepare: First things first, my baking friends! I always start by preheating my oven to a cozy 350°F (175°C). Then, I grab three 8-inch round cake pans. This cake is all about those beautiful layers, so proper pan preparation is key. I generously grease the bottoms and sides of each pan with butter or baking spray. To ensure absolutely no sticking, I cut out parchment paper circles to fit the bottoms of the pans and place them in. After that, I lightly flour the greased and parchment-lined pans, tapping out any excess. This triple threat of grease, parchment, and flour practically guarantees your cakes will slide right out, preserving those perfect edges for your gorgeous Strawberry Lemonade Layer Cake.
- Combine Dry Ingredients: In a medium bowl, I whisk together the sifted all-purpose flour, baking powder, and salt. Sifting the flour beforehand really helps create a light and airy cake, preventing any dense spots. This mixture is set aside for now, ready to be incorporated into our wet ingredients later.
- Cream Butter and Sugar: In the bowl of a stand mixer fitted with the paddle attachment (or using a large bowl with a hand mixer), I combine the softened unsalted butter and granulated sugar. I beat these two together on medium-high speed for about 3 to 5 minutes. You’re looking for a transformation here: the mixture should become noticeably light in color, incredibly fluffy, and almost doubled in volume. This creaming process is vital for incorporating air into the batter, which contributes to the cake’s tender texture. Don’t rush this step; it’s foundational for a truly magnificent cake.
- Add Eggs: With the mixer still running on medium speed, I add the large eggs one at a time, beating well after each addition. It’s important to give each egg enough time to fully incorporate into the butter and sugar mixture before adding the next. After all four eggs are in, I often stop the mixer and scrape down the sides of the bowl with a rubber spatula to ensure everything is thoroughly combined. The mixture will look rich and glossy at this stage.
- Introduce Liquids and Flavor: In a separate small bowl, I gently whisk together the room temperature buttermilk, fresh lemon juice, lemon zest, and vanilla extract. If I’m feeling fancy and want to enhance the “strawberry” aspect visually, this is also where I would add a tiny drop or two of red or pink gel food coloring to give the cake layers a delicate blush. Don’t add too much; a subtle hint is all you need to evoke that lemonade pink!
- Alternate Wet and Dry: Now for the delicate dance of combining. With the mixer on low speed, I begin adding the dry ingredient mixture to the wet mixture in three alternating additions with the buttermilk-lemon mixture, beginning and ending with the dry ingredients. For example, I’ll add about a third of the flour mixture, mix just until almost combined, then half of the buttermilk mixture, mix again, then another third of the flour, the remaining buttermilk, and finally the last third of the flour. It’s crucial to mix only until just combined after each addition. Overmixing is the enemy of a tender cake! Overmixing develops the gluten too much, leading to a tough, dense cake, which we absolutely do not want for our light and fluffy Strawberry Lemonade Layer Cake.
- Divide and Bake: Once the batter is just combined and lump-free (a few small lumps are okay!), I evenly divide the luscious batter among the three prepared 8-inch cake pans. I like to use a kitchen scale for this to ensure each layer is perfectly uniform in size and bakes evenly. This attention to detail will pay off during assembly. I then place the pans into the preheated oven.
- Bake to Perfection: The cakes will typically bake for 25 to 30 minutes. You’ll know they’re ready when a wooden skewer or toothpick inserted into the center of a cake comes out clean, and the tops are lightly golden and spring back when gently touched. The aroma filling your kitchen will be absolutely heavenly – a sure sign of deliciousness to come!
- Cooling Process: Once baked, I remove the cake pans from the oven and let them cool on a wire rack for about 10-15 minutes. This initial cooling in the pan helps the cakes set without breaking. After this resting period, I carefully invert the cakes onto the wire rack, peel off the parchment paper, and let them cool completely. It’s paramount that the cakes are entirely cool before you even think about frosting them. Trying to frost warm cakes will result in a messy, melted buttercream disaster, and we’re aiming for perfection here!
Crafting the Sweet Strawberry Filling
- Prepare Strawberries: I start by washing and hulling the fresh strawberries. Then, I finely dice them. Aim for small, uniform pieces, as this will create a lovely texture in your filling and make it easier to spread.
- Cook Down Strawberries: In a medium saucepan, I combine the diced strawberries, granulated sugar, and fresh lemon juice. I cook this mixture over medium heat, stirring occasionally, until the sugar has dissolved and the strawberries have softened and released their juices. This usually takes about 5 to 7 minutes. As they cook, I like to gently mash some of the strawberries with the back of a spoon or a potato masher, leaving some chunks for texture.
- Create Cornstarch Slurry: While the strawberries are simmering, I whisk together the cornstarch and cold water in a small bowl until absolutely smooth and lump-free. This is our thickening agent. A well-mixed slurry ensures a smooth, glossy filling without any powdery taste.
- Thicken the Filling: Once the strawberries are soft and bubbly, I slowly pour the cornstarch slurry into the simmering strawberry mixture, whisking constantly. I continue to cook and stir for another 1 to 2 minutes, until the filling has visibly thickened and coats the back of a spoon. It will go from a watery juice to a gorgeous, glossy, and spoonable consistency.
- Cool Completely: I remove the saucepan from the heat and transfer the strawberry filling to a clean bowl. To prevent a skin from forming on top, I like to press a piece of plastic wrap directly onto the surface of the filling. This also helps it cool more efficiently. Just like the cake layers, this filling must be completely cool before you use it for assembly. Placing warm filling inside your cake will cause your beautiful layers to slide and your buttercream to melt, which is not what we want for our sturdy Strawberry Lemonade Layer Cake.
Whipping Up the Zesty Lemon Buttercream Frosting
- Whip the Butter: In the bowl of a stand mixer fitted with the paddle attachment, I place the softened unsalted butter. I begin by beating the butter on medium-high speed for 5 to 7 minutes. This step is incredibly important for achieving a truly light and fluffy buttercream. You want the butter to become incredibly pale in color and significantly increased in volume, almost like whipped cream. This aeration is what makes the buttercream so luxurious and easy to spread.
- Gradually Add Powdered Sugar: Once the butter is perfectly whipped, I start adding the sifted powdered sugar, one cup at a time, on low speed. It’s essential to add it gradually to avoid a powdered sugar cloud engulfing your kitchen! After each addition, I wait for the sugar to be mostly incorporated before adding the next. This typically takes a few minutes until all 8 cups are in. Once it’s all in, I increase the speed to medium-high and continue beating for another 2-3 minutes.
- Incorporate Liquids and Flavors: With the mixer still on low speed, I slowly pour in the room temperature heavy cream (or whole milk), fresh lemon juice, lemon zest, and vanilla extract. I also add a tiny pinch of salt – a little bit of salt helps to balance the sweetness and enhance all the other flavors, making the lemon really pop!
- Whip to Perfection: After adding the liquids, I increase the mixer speed to medium-high and beat for an additional 3 to 5 minutes. The goal here is to achieve a wonderfully light, fluffy, and spreadable consistency. The buttercream should look ethereal and hold soft peaks. If it feels too thick, I might add another tablespoon of cream or milk. If it seems a little too thin, I’d add another tablespoon or two of sifted powdered sugar. The key is to adjust until it’s just right for frosting: smooth, spreadable, and holds its shape beautifully. This Lemon Buttercream is truly the crown jewel of our Strawberry Lemonade Layer Cake, so ensure it’s absolutely perfect!
Assembling the Magnificent Strawberry Lemonade Layer Cake
- Level the Cakes: Before I even think about stacking, I ensure my cake layers are perfectly flat. Using a serrated knife or a cake leveler, I carefully trim the domed tops off each cooled cake layer. This creates a flat surface, making the cake much easier to stack evenly and preventing any leaning towers of Pisa situations! I sometimes like to save the trimmed bits for snacking, or to make cake pops later – zero waste!
- First Layer Placement: I place one of the leveled cake layers onto your serving plate or cake stand. If I’m planning on moving the cake later, I’ll secure it to the plate with a small dollop of buttercream underneath to prevent it from sliding around.
- Create a Buttercream Dam: Using a piping bag fitted with a round tip (or simply a Ziploc bag with the corner snipped off), I pipe a sturdy border, or “dam,” of lemon buttercream around the outer edge of the first cake layer. This dam acts as a delicious barrier, ensuring our strawberry filling stays neatly tucked inside the cake and doesn’t ooze out when we add the next layer. This is a crucial step for a clean, professional-looking slice of Strawberry Lemonade Layer Cake.
- Add Strawberry Filling: Carefully, I spoon about half of the cooled strawberry filling into the center of the buttercream dam. Then, using an offset spatula, I gently spread the filling evenly within the dam, making sure it doesn’t touch the outer edge of the cake. The vibrant red of the strawberry filling against the pale cake layers is already starting to look beautiful!
- Second Layer and Repeat: I gently place the second cake layer on top of the strawberry filling. I press down very lightly to ensure it’s settled. Then, I repeat steps 3 and 4: pipe another buttercream dam around the edge, and spread the remaining half of the strawberry filling within.
- Top with Final Layer: Finally, I place the third and final cake layer on top, pressing down very gently to secure it. At this point, you have a beautiful, tall, and slightly wobbly stack of deliciousness.
- The Crumb Coat: Now for the “crumb coat” – this is a lifesaver for achieving a smooth, crumb-free final frosting layer. Using an offset spatula, I apply a very thin layer of lemon buttercream all over the top and sides of the entire cake. Don’t worry about making it perfect; its job is simply to trap any loose crumbs. Once coated, I place the cake in the refrigerator for at least 20-30 minutes, or even in the freezer for 10-15 minutes, until the crumb coat is firm to the touch. This chilling process is indispensable for a neat final frosting application.
- The Final Frosting Layer: Once the crumb coat is firm, I take the cake out of the fridge. Now, I apply a generous, thicker layer of the remaining lemon buttercream to the top and sides of the cake. I use an offset spatula or a bench scraper to smooth the frosting as much as possible, aiming for a clean, elegant finish. Take your time with this step, turning the cake on a turntable if you have one, to get those smooth sides and sharp edges. This is where your Strawberry Lemonade Layer Cake truly starts to shine!
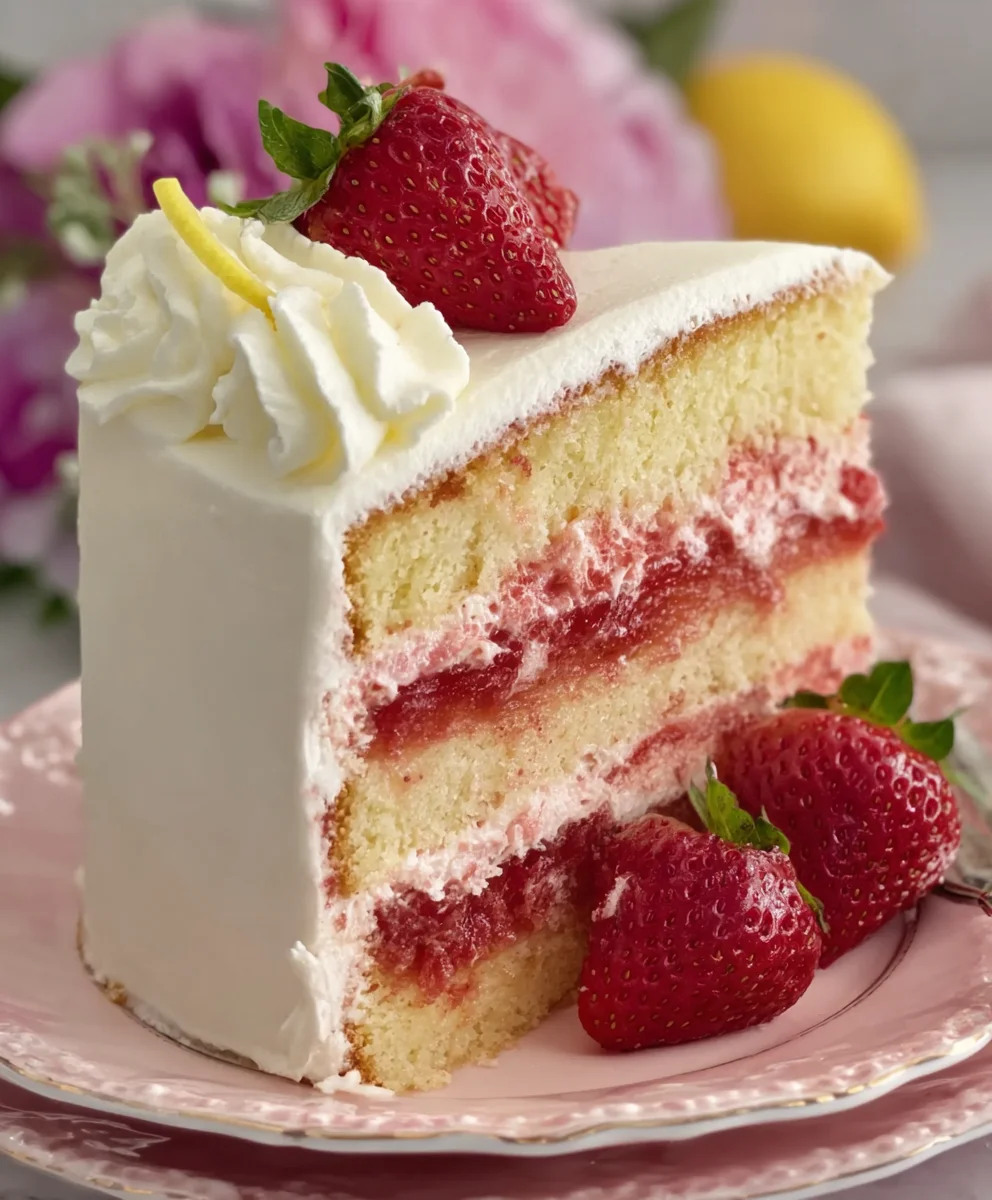
- Decorate and Chill: This is my favorite part – making the cake look as good as it tastes! I like to decorate the top of the cake with fresh strawberry slices, thin lemon slices or curls, and a sprinkle of fresh lemon zest to really highlight the flavors within. You could even pipe a few extra swirls of buttercream on top for a more elaborate look. Once decorated, I recommend chilling the cake in the refrigerator for at least an hour before slicing and serving. This allows the cake to fully set, making for cleaner slices and a more stable structure.
- Serve and Enjoy: When you’re ready to serve, bring the Strawberry Lemonade Layer Cake out of the fridge about 20-30 minutes before slicing to allow the buttercream to soften slightly, ensuring the perfect texture. Slice into generous portions and watch the smiles erupt around the table. This cake is truly a ray of sunshine in dessert form!
Conclusion:
Well, my dear baking enthusiasts, we’ve reached the sweet end of our journey through this delightful recipe, and I truly hope you’re as excited as I am about the prospect of bringing this magnificent creation to life in your own kitchen. If there’s one thing I want you to take away from this, it’s that this isn’t just any cake; it’s an experience. The moment you slice into those vibrant layers, revealing the stunning contrast of pale yellow and delicate pink, you’ll understand exactly why I call it a must-try. This isn’t just about a dessert; it’s about crafting a centerpiece, a conversation starter, and a treat that embodies pure joy. The harmonious blend of sweet, sun-kissed strawberries with the bright, invigorating zest of lemon creates a flavor profile that is utterly irresistible – a true symphony for the taste buds. It’s that perfect balance, a refreshing tang cutting through the luscious sweetness, that makes every bite an absolute delight. We’re talking about a cake that is light, fluffy, and moist, with a dreamy cream cheese frosting that ties all those incredible flavors together beautifully. It’s refreshing enough for a warm summer afternoon yet decadent enough for any special occasion that calls for something truly extraordinary. Trust me, the effort you put into making this will be rewarded tenfold by the sheer happiness it brings to your table and the appreciative smiles it elicits from everyone lucky enough to enjoy a slice. This cake isn’t just food; it’s a celebration of flavor, a testament to the magic that happens when simple, fresh ingredients are combined with a little love and creativity.
And speaking of enjoying it, let’s talk about how to make the most of your incredible creation! While the
Strawberry Lemonade Layer Cake
is undoubtedly a showstopper all on its own, there are several ways to serve it up or even tweak it slightly to make it uniquely yours. For serving, I highly recommend allowing it to chill for at least an hour before slicing; this firms up the frosting and layers, making for cleaner cuts and a more refreshing bite. Imagine a generous slice served alongside a steaming cup of your favorite herbal tea, or perhaps a light, crisp sparkling lemonade for an extra burst of lemony goodness on a hot day. For garnishes, a sprinkling of fresh strawberry slices and a few curls of lemon zest will elevate its visual appeal even further, perhaps even a sprig of fresh mint for a touch of elegant green. This cake is absolutely perfect as the grand finale to a spring brunch, a summer garden party, or any festive gathering that deserves a dessert that truly shines. It also makes an incredibly thoughtful birthday cake, personalized with fresh berries and a custom message.Now, if you’re feeling a bit adventurous and want to put your own spin on things, the possibilities for variations are wonderfully endless! For instance, you could experiment with other berry combinations – imagine a “Raspberry Lime Layer Cake” or a “Blueberry Lemon Layer Cake” by simply swapping out the primary berry. Or, for an extra layer of texture, you could fold some finely chopped toasted almonds or pecans into the cake batter, or even sprinkle them over the frosting before serving. If you prefer a slightly less tangy frosting, a classic vanilla buttercream could be substituted for the cream cheese version, though I’m quite partial to the cream cheese’s tart counterpoint myself. For those who love an even moister cake, a simple lemon syrup brushed onto each layer before frosting can add an incredible depth of flavor and ensure every bite is wonderfully tender. You could also easily adapt this recipe into cupcakes or mini cakes, perfect for individual servings at a larger event. Just adjust the baking time accordingly! This flexibility is part of what makes this recipe so fantastic – it’s a strong foundation for culinary creativity, allowing you to tailor it to your preferences and the occasion at hand. Don’t be afraid to play around; baking is, after all, an art form.
So, what are you waiting for? This is your official invitation, your gentle nudge, to roll up your sleeves, gather your ingredients, and dive headfirst into the joyous process of baking this incredible dessert. I promise you, the aroma filling your kitchen as those cake layers bake, and the sheer satisfaction of assembling such a beautiful creation, are rewards in themselves. Don’t let any hesitation hold you back; this recipe is designed to be accessible and rewarding for bakers of all skill levels. Embrace the process, have fun with it, and trust in the delicious outcome. Once you’ve had the pleasure of tasting your very own homemade
Strawberry Lemonade Layer Cake
, I have a feeling it will quickly become a cherished favorite in your recipe repertoire, a staple for celebrations big and small. But don’t keep all that deliciousness and pride to yourself! I absolutely, genuinely, cannot wait to hear about your experience. Please, after you’ve baked and savored every last crumb, come back and share your thoughts, your photos, and any creative twists you added. Your feedback and stories are what truly bring these recipes to life for me and for our entire community of food lovers. Let’s celebrate this amazing cake together!
Strawberry Lemonade Layer Cake
A vibrant, delightful layer cake celebrating summer with the sweet allure of fresh strawberries and the bright, zesty tang of lemonade. Featuring fluffy, moist cake layers, a luscious strawberry filling, and tangy lemon buttercream frosting, it’s a stunning centerpiece perfect for any gathering.
Ingredients
-
For the Strawberry Lemonade Cake Layers:
-
3 cups (360g) all-purpose flour, sifted
-
1 tablespoon baking powder
-
½ teaspoon salt
-
1 cup (226g) unsalted butter, softened
-
2 cups (400g) granulated sugar
-
4 large eggs, room temperature
-
1 cup (240ml) buttermilk, room temperature
-
½ cup (120ml) fresh lemon juice
-
2 tablespoons fresh lemon zest
-
1 teaspoon pure vanilla extract
-
Red or pink gel food coloring (optional)
-
For the Strawberry Filling:
-
2 cups (300g) fresh strawberries, hulled & diced
-
½ cup (100g) granulated sugar
-
2 tablespoons fresh lemon juice
-
2 tablespoons cornstarch
-
¼ cup (60ml) cold water
-
For the Lemon Buttercream Frosting:
-
2 cups (452g) unsalted butter, softened
-
8 cups (960g) powdered sugar, sifted
-
½ cup (120ml) heavy cream or whole milk, room temperature
-
¼ cup (60ml) fresh lemon juice
-
1 tablespoon fresh lemon zest
-
1 teaspoon pure vanilla extract
-
Pinch of salt
-
For Garnish (Optional):
-
Fresh strawberries, sliced
-
Thin lemon slices or curls
-
Additional lemon zest
Instructions
-
Step 1
Preheat oven to 350°F (175°C). Grease, line bottoms with parchment, and flour three 8-inch round cake pans. Whisk flour, baking powder, and salt; set aside. -
Step 2
In a stand mixer, cream softened butter and granulated sugar on medium-high for 3-5 minutes until light and fluffy. -
Step 3
Add eggs one at a time, beating well after each. Scrape bowl. In a separate bowl, whisk buttermilk, lemon juice, lemon zest, vanilla extract, and optional food coloring. -
Step 4
With mixer on low, alternately add dry ingredients (in 3 parts) and buttermilk mixture (in 2 parts) to wet, beginning and ending with dry. Mix only until just combined. -
Step 5
Divide batter evenly among prepared pans. Bake for 25-30 minutes, or until a skewer inserted comes out clean. Cool in pans 10-15 minutes, then invert onto wire rack, remove parchment, and cool completely. -
Step 6
Wash, hull, and finely dice strawberries. Combine with sugar and lemon juice in a saucepan. Cook over medium heat for 5-7 minutes, stirring, until softened; mash some strawberries gently. Whisk cornstarch and cold water in a small bowl until smooth; pour into simmering strawberry mixture, whisking constantly. Cook 1-2 minutes until thickened. Transfer to a clean bowl, press plastic wrap directly onto surface, and cool completely. -
Step 7
Beat softened butter in a stand mixer on medium-high for 5-7 minutes until pale and fluffy. Gradually add sifted powdered sugar (1 cup at a time) on low speed until incorporated, then beat on medium-high for 2-3 minutes. On low speed, add heavy cream, lemon juice, lemon zest, vanilla extract, and pinch of salt. Increase speed to medium-high and beat for 3-5 minutes until light, fluffy, and spreadable. Adjust consistency if needed. -
Step 8
Trim domed tops off cooled cake layers. Place one leveled cake layer on a serving plate, securing with a small dollop of buttercream if moving later. -
Step 9
Pipe a sturdy buttercream border around the outer edge of the first layer. Spoon about half of the cooled strawberry filling into the dam and spread evenly. Place the second cake layer on top, press lightly, and repeat piping a buttercream dam and spreading the remaining filling. -
Step 10
Place the third cake layer on top, pressing gently. Apply a thin “crumb coat” of lemon buttercream all over the cake. Chill in the refrigerator for 20-30 minutes (or freezer 10-15 minutes) until firm. -
Step 11
Apply a generous, thicker layer of remaining lemon buttercream to the top and sides, smoothing as much as possible. Decorate with fresh strawberry slices, thin lemon slices/curls, and lemon zest. -
Step 12
Chill the cake in the refrigerator for at least 1 hour before slicing. Bring out of the fridge 20-30 minutes before serving for optimal texture. Slice and enjoy.
Important Information
Nutrition Facts (Per Serving)
It is important to consider this information as approximate and not to use it as definitive health advice.
Allergy Information
Please check ingredients for potential allergens and consult a health professional if in doubt.


Leave a Comment